How to Change to Landscape in Adobe InDesign
Landscape orientation is used for wider horizontal designs or subjects. It is commonly applied to a page that contains a…
Apr 13, 2023
Landscape orientation is used for wider horizontal designs or subjects. It is commonly applied to a page that contains a big table or wide presentation. In this article, learn how to change to landscape in Adobe InDesign.
Use the Page Layout tab to modify the orientation layout of your page. Below are some steps that you need to follow when you change your document or publication page layout to landscape using Adobe InDesign.
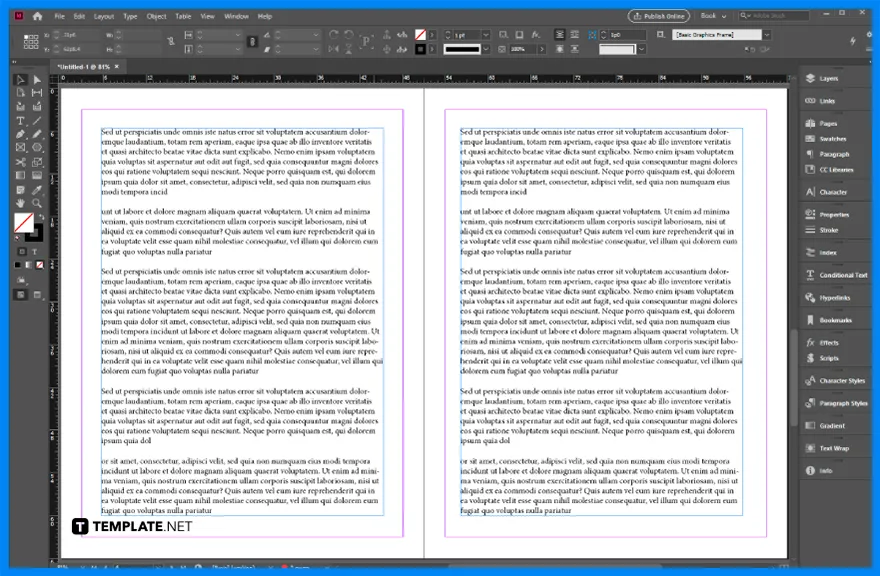
Go to Adobe InDesign. Then, open the document you want to change the page orientation to landscape.
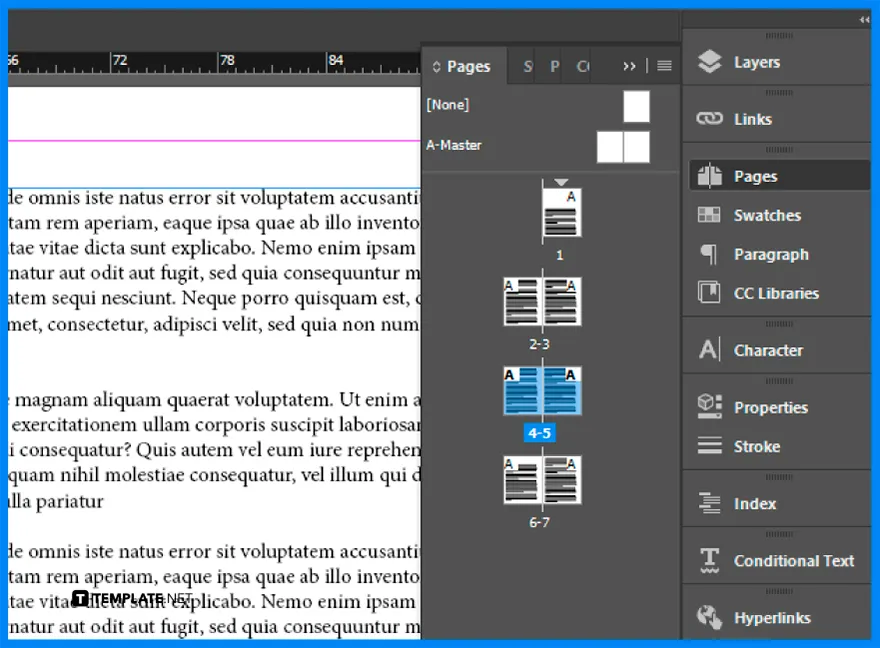
Go to the right side of your screen and find the Pages panel. If you can’t find the Pages panel, go to Window > Pages.
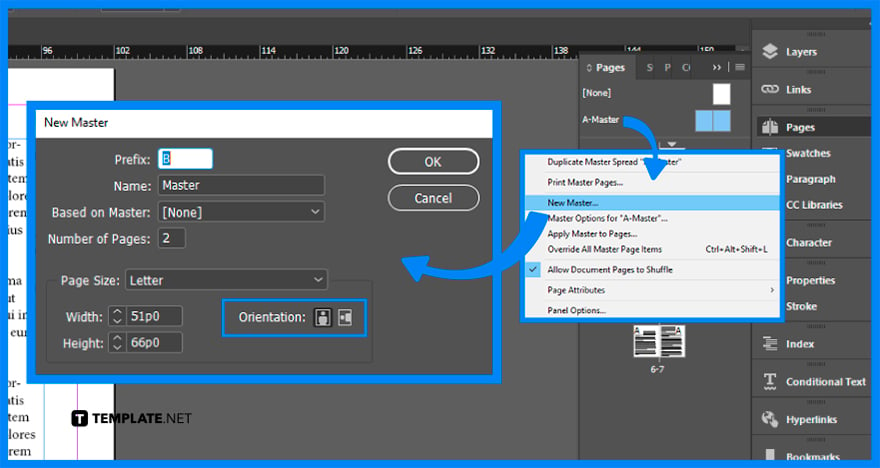
In the Pages panel, click anywhere you want, click the page, select New Master in the options at the right top part of the panel, and a new window will appear on your screen. There are different options that you can modify such as the prefix, name, based on Master, number of pages, width, height, and orientation, so change the orientation of the page to landscape and click OK.
Landscape layout is a horizontal orientation of a document or image which is usually used for charts, wider images, and text.
Go to the File menu, select Document Setup, and change the page orientation to landscape.
The dual layout function lets you have separate portrait and landscape layouts.
Double-click the page numbers of the page spread you want to rotate, click the Options button on the panel, point to Page Attributes, point to Rotate Spread View, and click 90° CW, 90° CCW, or 180°.

Landscape orientation is used for wider horizontal designs or subjects. It is commonly applied to a page that contains a…
![How to Adjust Line Spacing in Adobe InDesign [Templates + Examples] 2023](https://images.template.net/wp-content/uploads/2022/08/How-to-Adjust-Line-Spacing-in-Adobe-InDesign-788x444.png)
Adjust line spacing in Adobe InDesign so you won’t have to stick to the default letter spacing, character spacing, word…
![How to Add a Watermark in Adobe InDesign [Templates + Examples] 2023](https://images.template.net/wp-content/uploads/2022/08/How-to-Add-a-Watermark-in-Adobe-InDesign-788x444.png)
Add a watermark to any document or image designed in Adobe InDesign as a way to explicitly send a message…

A header is a top margin on each page of your document or publication. Headers are useful for adding material…

Circular pictures and designs work best for website avatars or profile pictures, site favicons, and other integral design elements that…

Calendars help individuals to stay organized and manage their time wisely for their personal life and professional life. It is…

Picas is the default unit of measurement in Adobe InDesign, however, there are also different units of measurement available in…

Adobe Photoshop helps users creatively execute their ideas into actual images. An EPS file can be read and edited in…

Unless you’re working with Adobe SVG graphics, creating an impressive website requires a lot of time and patience. However, if…