Get Access to World’s largest Template Library & Tools

How to Create a Time-Lapse in Apple Motion

Apple Motion is a motion graphics application that lets you create animated images in real time. You can maximize Motion’s creating and editing tools for film productions, broadcasts, and other creative projects.

How to Create a Time-Lapse in Apple Motion

With Motion, you can create animations, video productions, and film projects. One kind of animation is a time-lapse which will be discussed in this article step by step.

  • Step 1: Resize Images

    The first step in creating a time-lapse in Motion is resizing your images. For this step, you can use photo editing and resizing apps like Apple Preview, Aperture, or Photoshop. A size example you can set your images to is 1920 × 1280 pixels.

  • Step 2: Open Resized Images in MotionHow to Create a Time Lapse in Apple Motion - Step 2

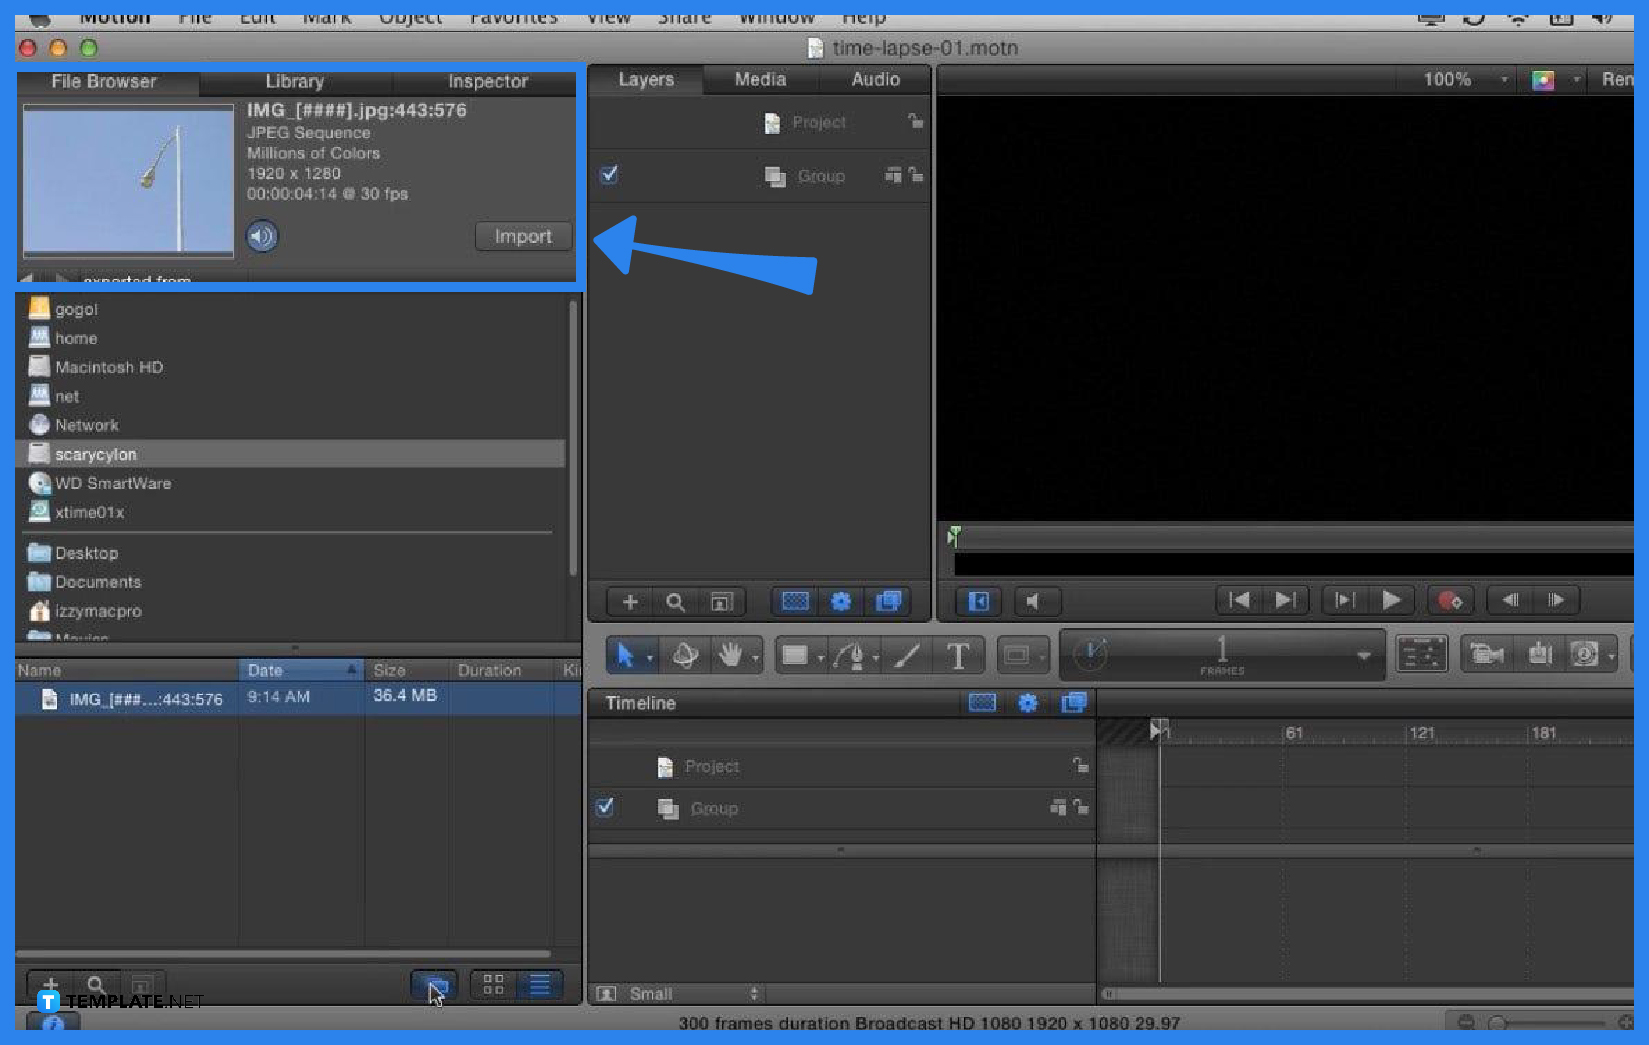
    First, you need to open Motion then click File Browser, look for the file location of the images on your device, and select the folder of the resized images. Once you select the folder, you may see one image file inside because Motion automatically creates a sequence file of all your images but if you want to check and see all the images in the folder, unselect the sequence button below the file area. However, the sequence button must be selected to be able to import the JPEG sequence to Motion.

  • Step 3: Match Video Clip Length and Project Duration

    Sometimes, the length of the JPEG sequence doesn’t match the project duration because the latter is shorter, to start the process of matching the two, click the video clip in the work area then press SHIFT+O. Above the work area is the tab showing the frame size where you will see how many frames there are in the clip (which should be the duration of the video, too). Beside it is the timecode indicator that, if you click once, will show how long the project file is; to match the duration of the video clip and the project, double-click the number of the project duration and change to the number of your frame size.

  • Step 4: Export File

    For the last step, click Share in the topmost ribbon and select Export Movie. If you click Options, you can choose where you’ll export the file and what it will include (Video Only or Video and Audio); then, if you click Render, you can set the color, render quality, and motion blur among others. After, click Next, choose the folder you’ll save the exported file will be located in your device, and once you click Save, the time-lapse will be exported which can take long depending on the size of the file.

FAQs

What is the best app for resizing images?

If you want to resize images for Motion and want to stick to Apple products, you can use Preview though Aperture works better with a larger number of images; however, Photoshop works great, too, with photo editing or resizing.

How do you find your resized images exported from another app?

You have to make sure that you clicked File Browser to see all the folders on your device and that you organized all your images in one folder under your Motion projects to locate it more easily.

How do I know when the length of the imported video clip and the project doesn’t match?

You’ll know the length of the clip and the project doesn’t match when the video plays a black screen after the last image of the imported JPEG sequence.

Why do you have to resize the images to use in the time-lapse?

Resizing the images determines the size of the frame after the time-lapse is rendered or created; if you want to maintain the size of the raw images, that would be fine, too, but the file size would be bigger and exporting will take longer.

What happens when you choose Video Only in the export options?

Selecting Video Only in the time-lapse export process would remove the audio from your video in the final product.

More in Apple

How to Create Camera Archives in Apple Final Cut ProHow to Change Settings in Apple Final Cut Pro
How to Create Square or Vertical Versions of a Project in Apple Final Cut ProHow to Change the Workspace Layout in Apple Final Cut Pro
How to Configure Audio in Apple Final Cut ProHow to Change Aspect Ratio in Apple Final Cut Pro
How to Make Neon Light Flicker in Apple Slow MotionHow to Use Compressor Apple Final Cut Pro
How to Cut Clips in Apple Final Cut ProHow to Export Still Images with Apple Final Cut Pro
How to Publish Controls to Apple Final Cut ProHow to Add Shape Mask in Apple Final Cut Pro
How to Add Presets in Apple Final Cut ProHow to Export a High-Resolution Movie Out of Final Cut Pro
How to Create a Flowchart in Apple Final Cut ProHow to Create a Time-Lapse in Apple Motion
How to Add Clip and Project in Apple Final Cut ProHow To Make/Create a Drop Down List in Apple Numbers [Templates + Examples] 2023
How to Round Up Numbers in Apple NumbersHow to Split Text in Apple Numbers
How to Do Text Tracking in Apple Final Cut ProHow to Recover Deleted/Unsaved Files in Apple Numbers
How to Get Apple Final Cut Pro for FreeHow to Replace Object on Apple Motion
How to Add a Border in Apple Final Cut ProHow to Export Video in Apple Final Cut Pro
How to Automatically Play, Loop, or Restart a Slideshow in Apple KeynoteHow to Do Object Tracking in Apple Final Cut Pro
How to Crop Clips in Apple Final Cut ProHow to Add a Footnote on Apple Final Cut Pro
How to Export Apple Final Cut Pro to MP4How to Convert CSV File in Apple Numbers
How to Merge Clips in Apple Final Cut ProHow to Use Color Board in Apple Final Cut Pro
How to Add Apple Music to Final Cut ProHow to Sort In / Sort Out in Apple Numbers
How to Import Audio Files/Clips into Apple Final Cut ProHow to Create Animated Instagram Stories with Apple Keynote
How to Reveal Text in Apple MotionHow to Add Text and Titles in Apple Final Cut Pro
How to Create a PDF Handout or Outline of Your Apple Keynote SlideshowHow to Print Apple Keynote Slides / Notes
How to Match Move in Apple MotionHow to Make a Slideshow in Apple Motion
How to Use Emitters in Apple MotionHow to Track an Object in Apple Motion
How to Make Effects in Apple MotionHow to Reverse Keyframes in Apple Motion
How to Do a Handwriting Effect on Apple MotionHow to Remove or Turn Off Effect in Apple Final Cut Pro
How to Make Product Animation in Apple MotionHow to Make a Budget with Apple Numbers
How to Make a Logo Intro on Apple MotionHow Do I Edit Audio in Apple Motion?
How to Use Filters in Apple MotionHow to Create a Scrolling Text Effect in Apple Keynote
How to Upscale Video in Apple MotionHow to Open Apple Motion Video in After Effects
How to Change Speed in Apple MotionHow to Convert Apple Motion to Final Cut Pro
How to Fix Apple Numbers Not OpeningHow to Convert Apple Numbers to Google Sheets
How to Autofill Numbers in Apple NumbersHow to Add Sound in Apple Motion
How Do You Set Tab Stops in Apple PagesHow to Enter Check Mark in Apple Pages
How to Freeze Rows and Columns in Apple NumbersHow to Open Apple Keynote Files on Windows
How to Open and Convert PDF in Apple KeynoteHow to Undo Changes in Apple Keynote
How to Delete Audio in Apple MotionHow to Create a Transition in Apple Motion
How to Create Digital Menu Boards with Apple KeynoteHow to Convert PowerPoint to Apple Keynote
How to Change Colors in Apple MotionHow Do You Make Longer Timeline in Apple Motion
How Do I Add Line Numbers in Apple PagesHow to Create Your First Apple Keynote
How to Restore Previous Version of Docs for Keynote AppleHow to Use Apple Keynote Live Video to Stream
How To Transpose in Apple Numbers [Templates + Examples] 2023How to Change Default Font in Apple Keynote
How to Recover Delete/Unsaved Apple Keynote FileHow to Make Hyperlinks in Apple Keynote
How to Insert a Video in Apple KeynoteHow to Change the Order and Timings of Builds in Apple Keynote
How to Add or Remove Rows and Columns in Apple KeynoteHow to Get Apple Keynote on Windows
How to Delete a Table in Apple KeynoteHow to Completely Remove Apple Keynote on Mac
How to Add a Highlight Effect to Text in Apple KeynoteHow to Undo/Redo in Apple Numbers
How to Make Timeline in Apple KeynoteHow to Put Page Numbers in Apple Numbers
How to Calculate the Percentage Using Apple NumbersHow to Use Sum Function in Apple Numbers
How to Link Cells in Apple NumbersHow to Create a Pivot Table in Apple Numbers
How to Add Decorative Brackets to Apple PagesHow to Add Animations in Apple Keynote
bottom banner