
How to Make a Flyer in Google Docs
In need of a simple, easy, and effective way to communicate with your customers? If so, then a flyer made…
Jan 09, 2023
Most people would list family as one of their top priorities in life. Some take their heritage or genealogy seriously enough to map out an entire family tree. Most family tree diagrams stop at the third generation; but some can go as far down as the fourth or fifth generations. If mapping out your family history is one of your goals, you can create one that’s both simple and quick with the use of pre designed Excel templates. This tutorial guide will walk you through the basics of creating and customizing your own family tree!

SUMMARY:
To customize your own family tree for posterity, it would definitely be more convenient to use an existing template. Microsoft Excel offers ready-made templates for you to use. Follow the steps below to get started.
1. Open Microsoft Excel, and click New on the menu bar on the left. Type in ‘family tree’.
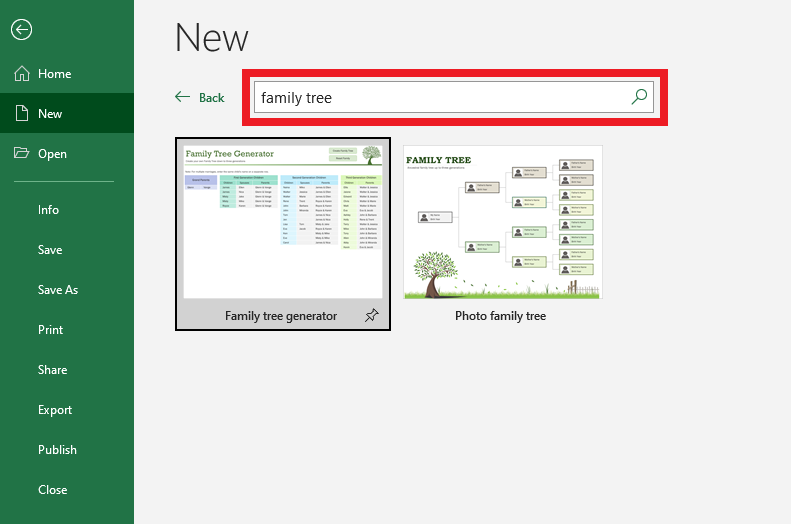
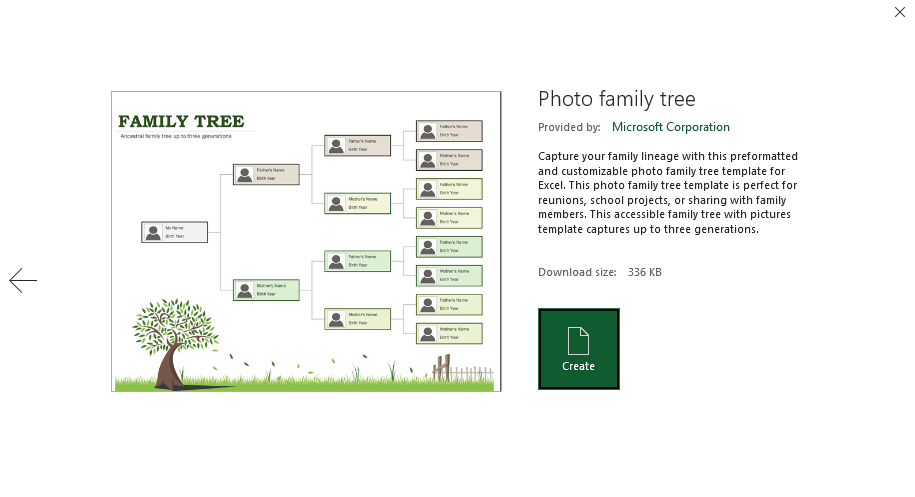
2. Pick a template and click Create.
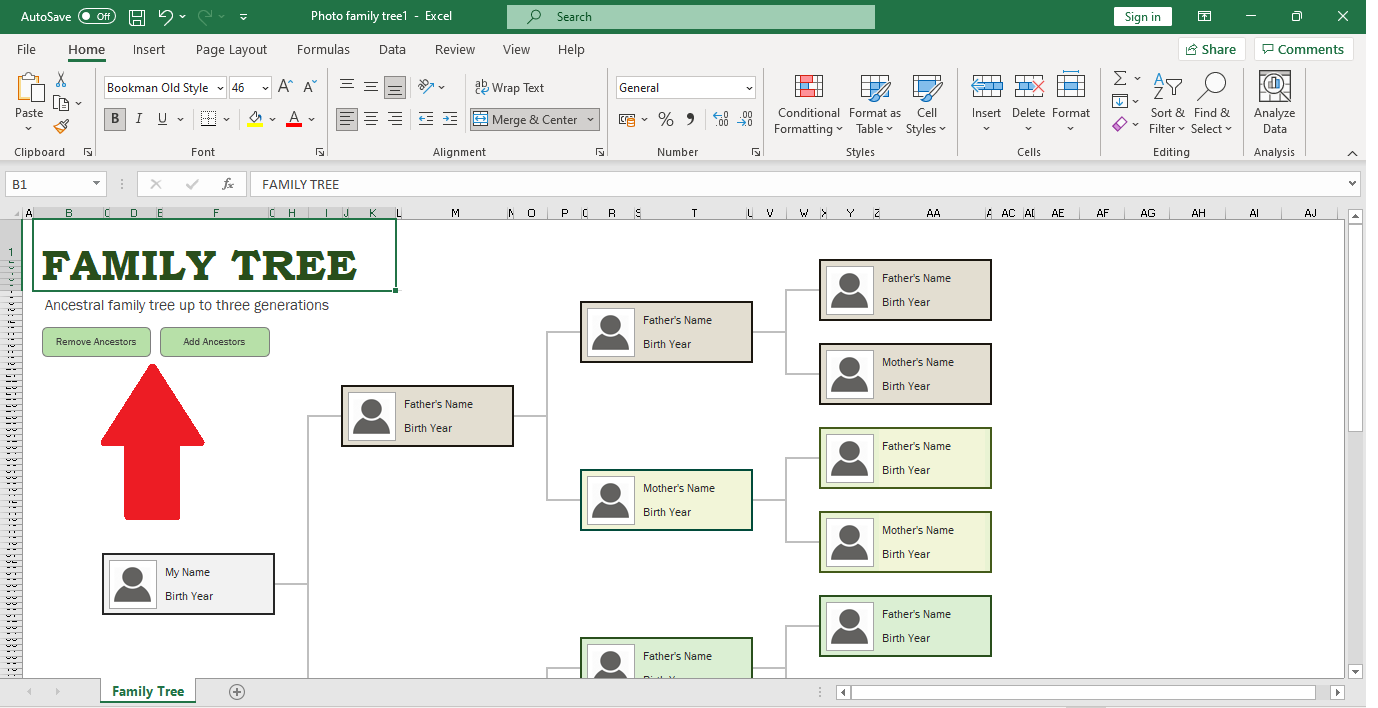
3. You can keep the title or change it by clicking the cell then editing the text inside. Feel free to remove or add persons in your family tree. Click on the box to add or remove ancestors, as seen in the sample template below. In every box, input each family members’ names and birth year.
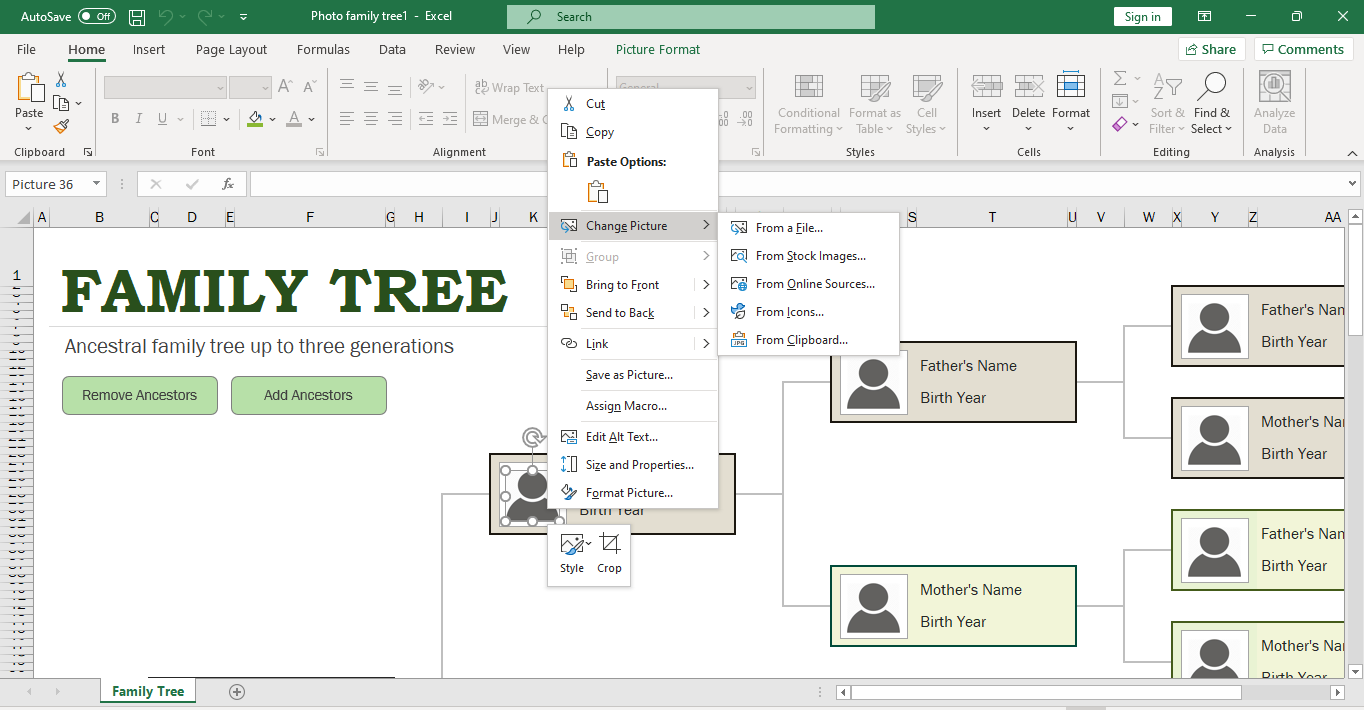
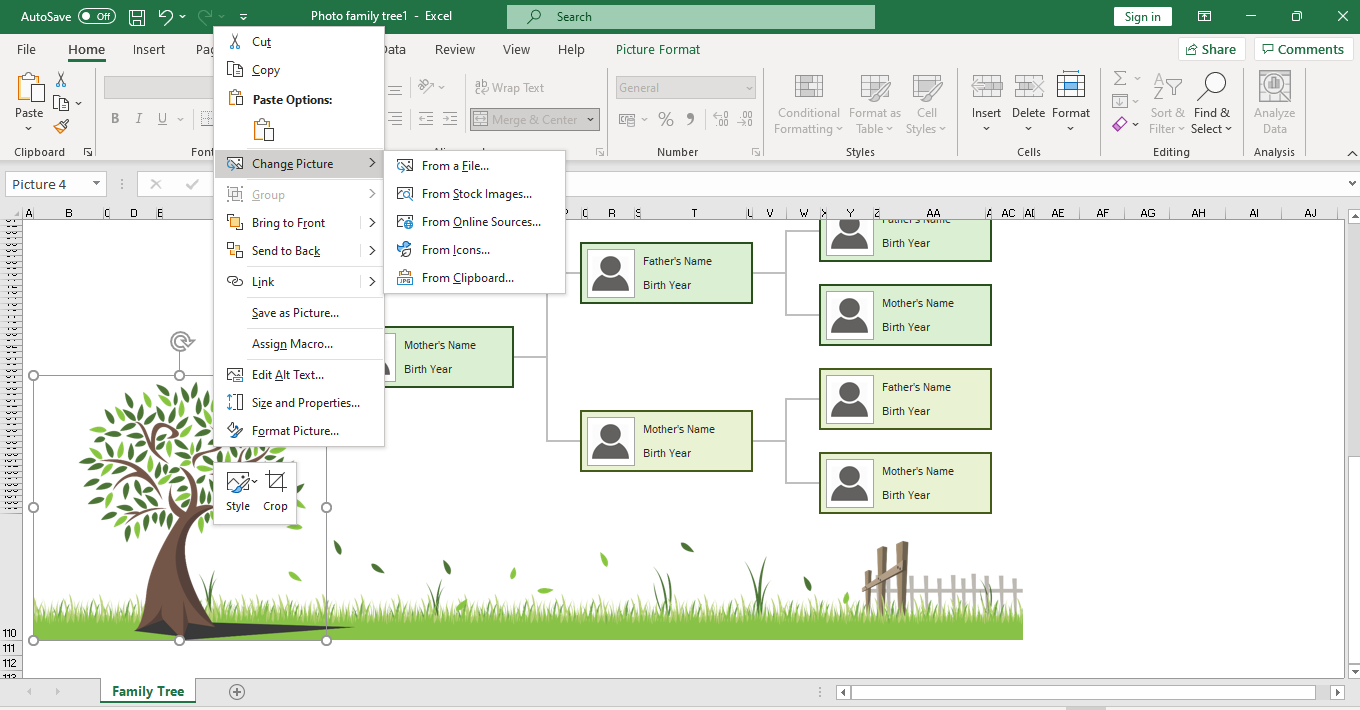
4. To add images for each family member, simply select and right click the headshot. Click Change Picture to upload a photo from your computer or an online source.
5. The sample template below features artwork of a tree. You can replace the photo by right clicking it and selecting Change Picture from the menu.
6. After editing, save your Excel file. You may choose to share and print it to other members of your family.
Note: Microsoft Office only has limited family tree templates in Excel, be sure to check out Template.net for more designs.
Learn how to create a basic family tree with this quick tutorial for Mac users. By using a predesigned template, you’ll be able to come up with a family tree more quickly and efficiently.
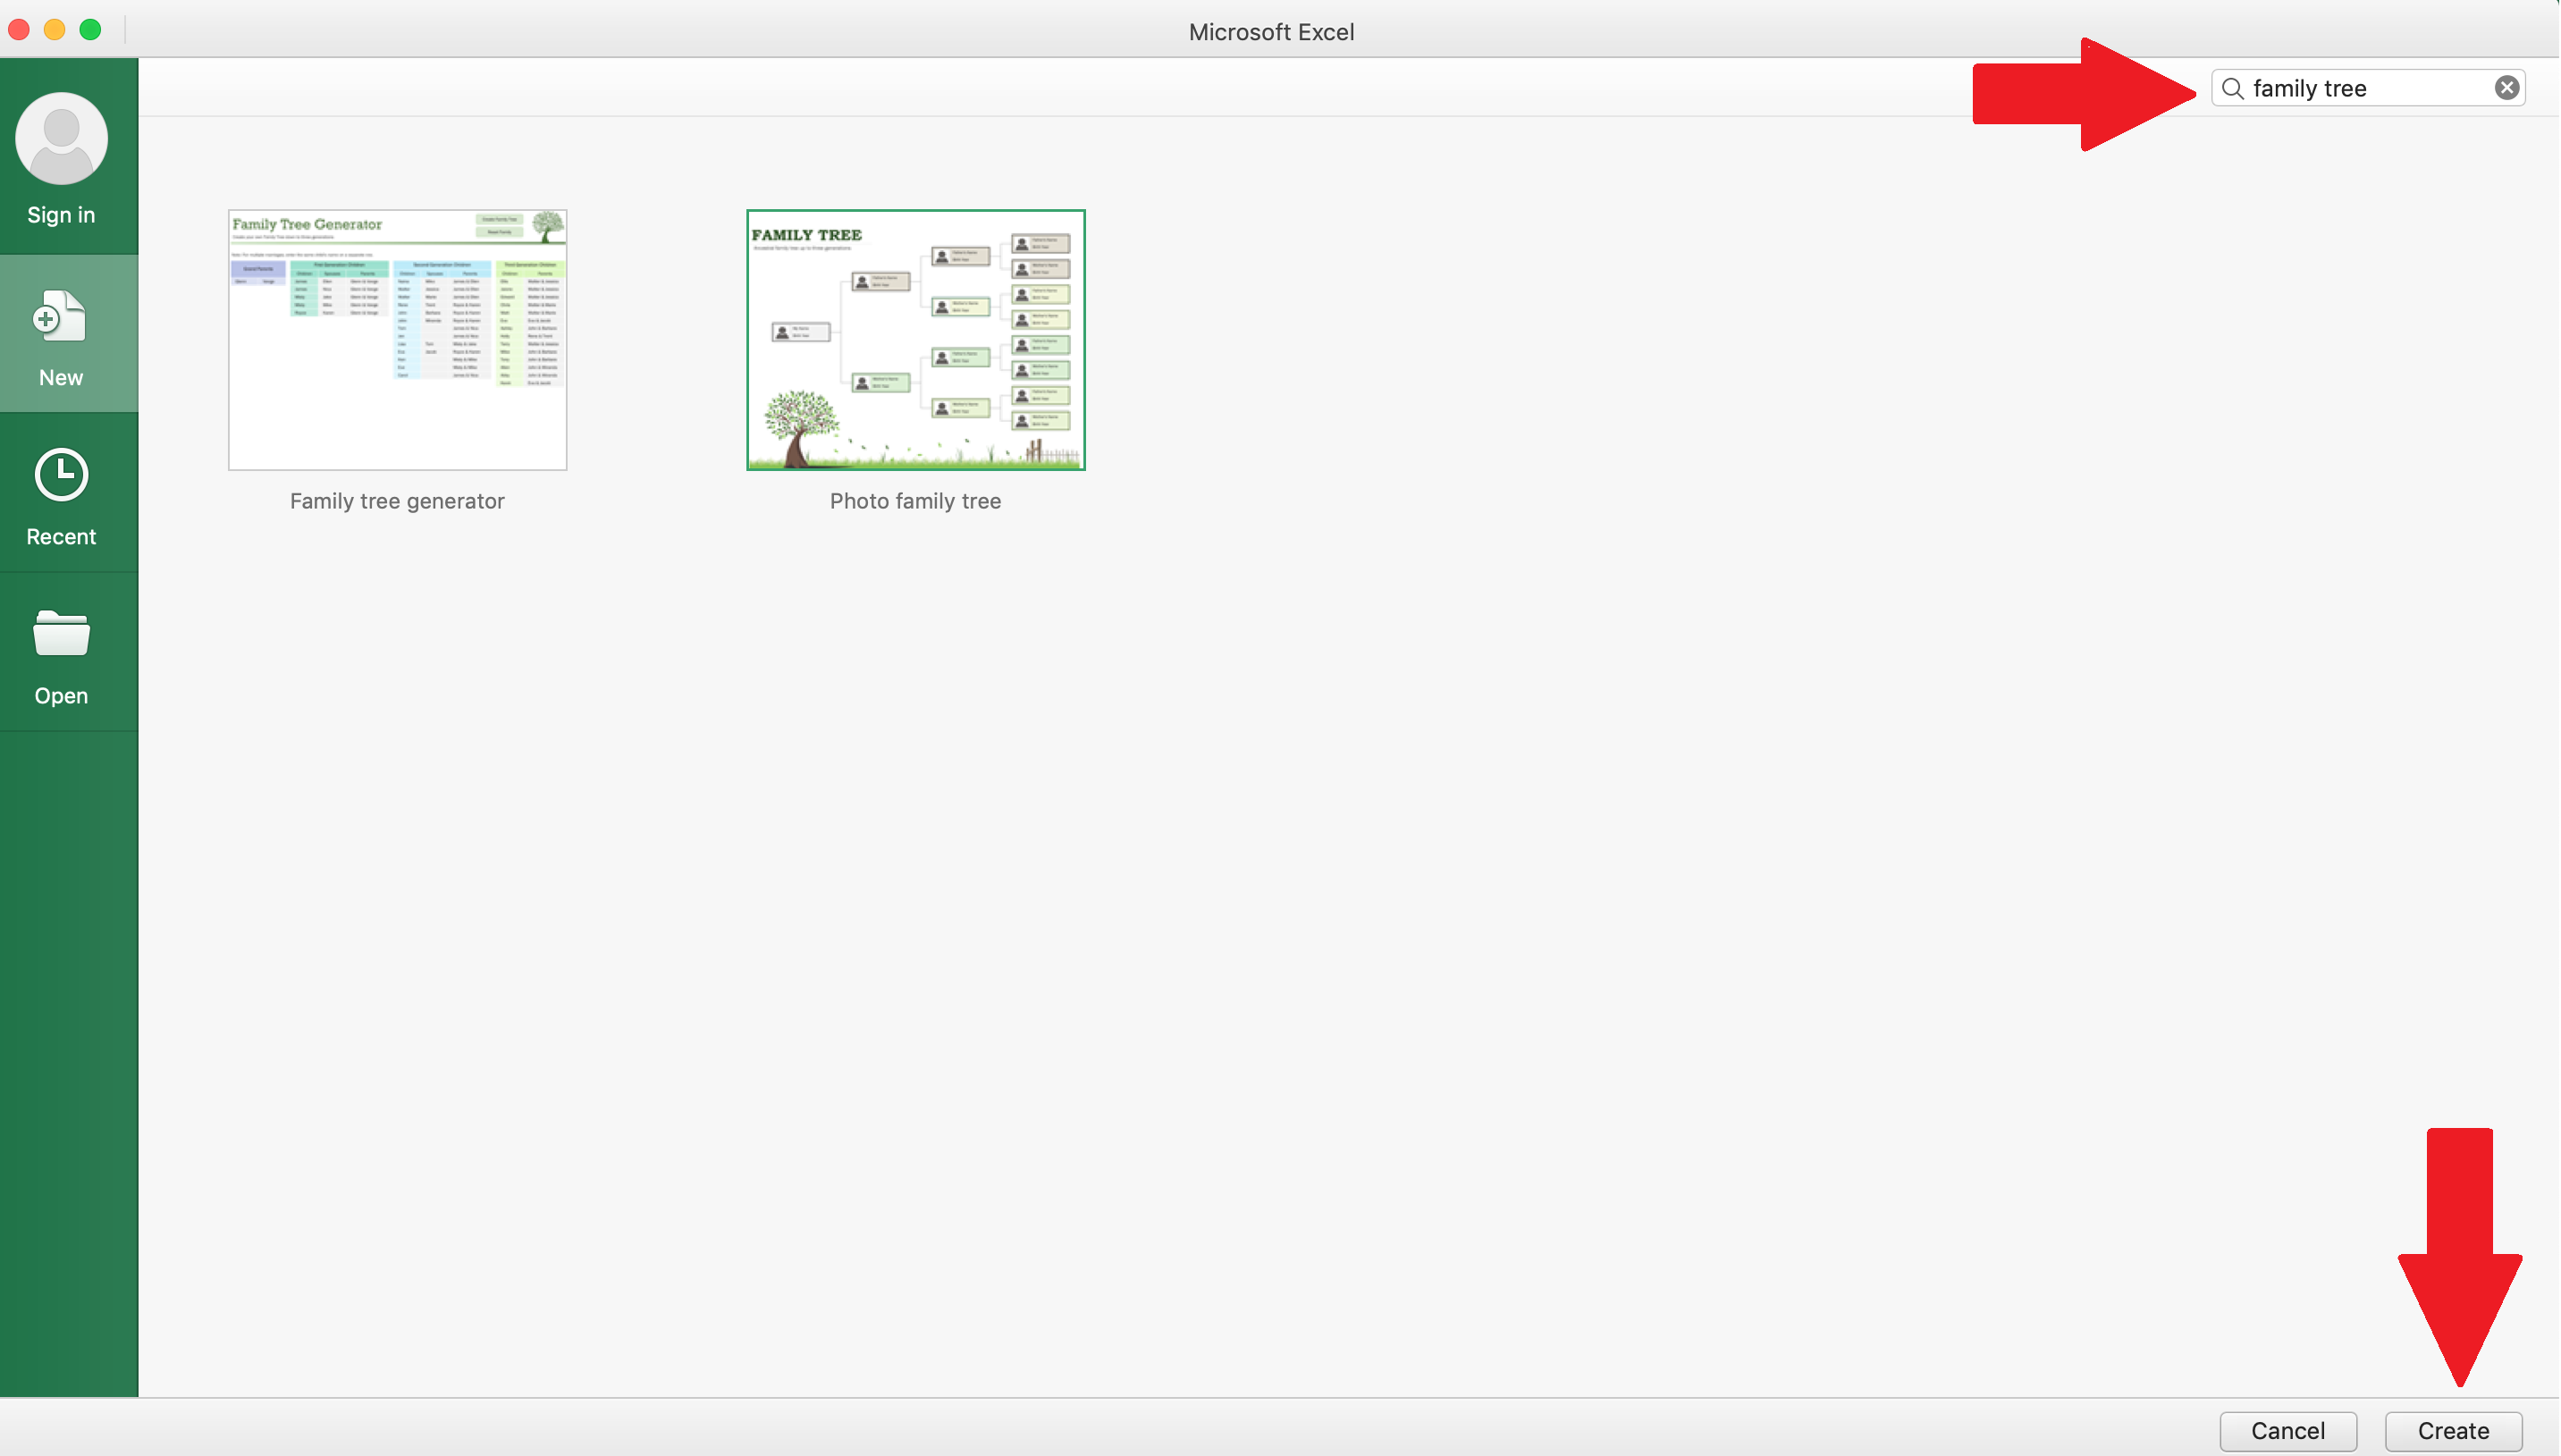
1. Select the New document icon, then type ‘family tree’ in the search bar. Pick a template and click Create.
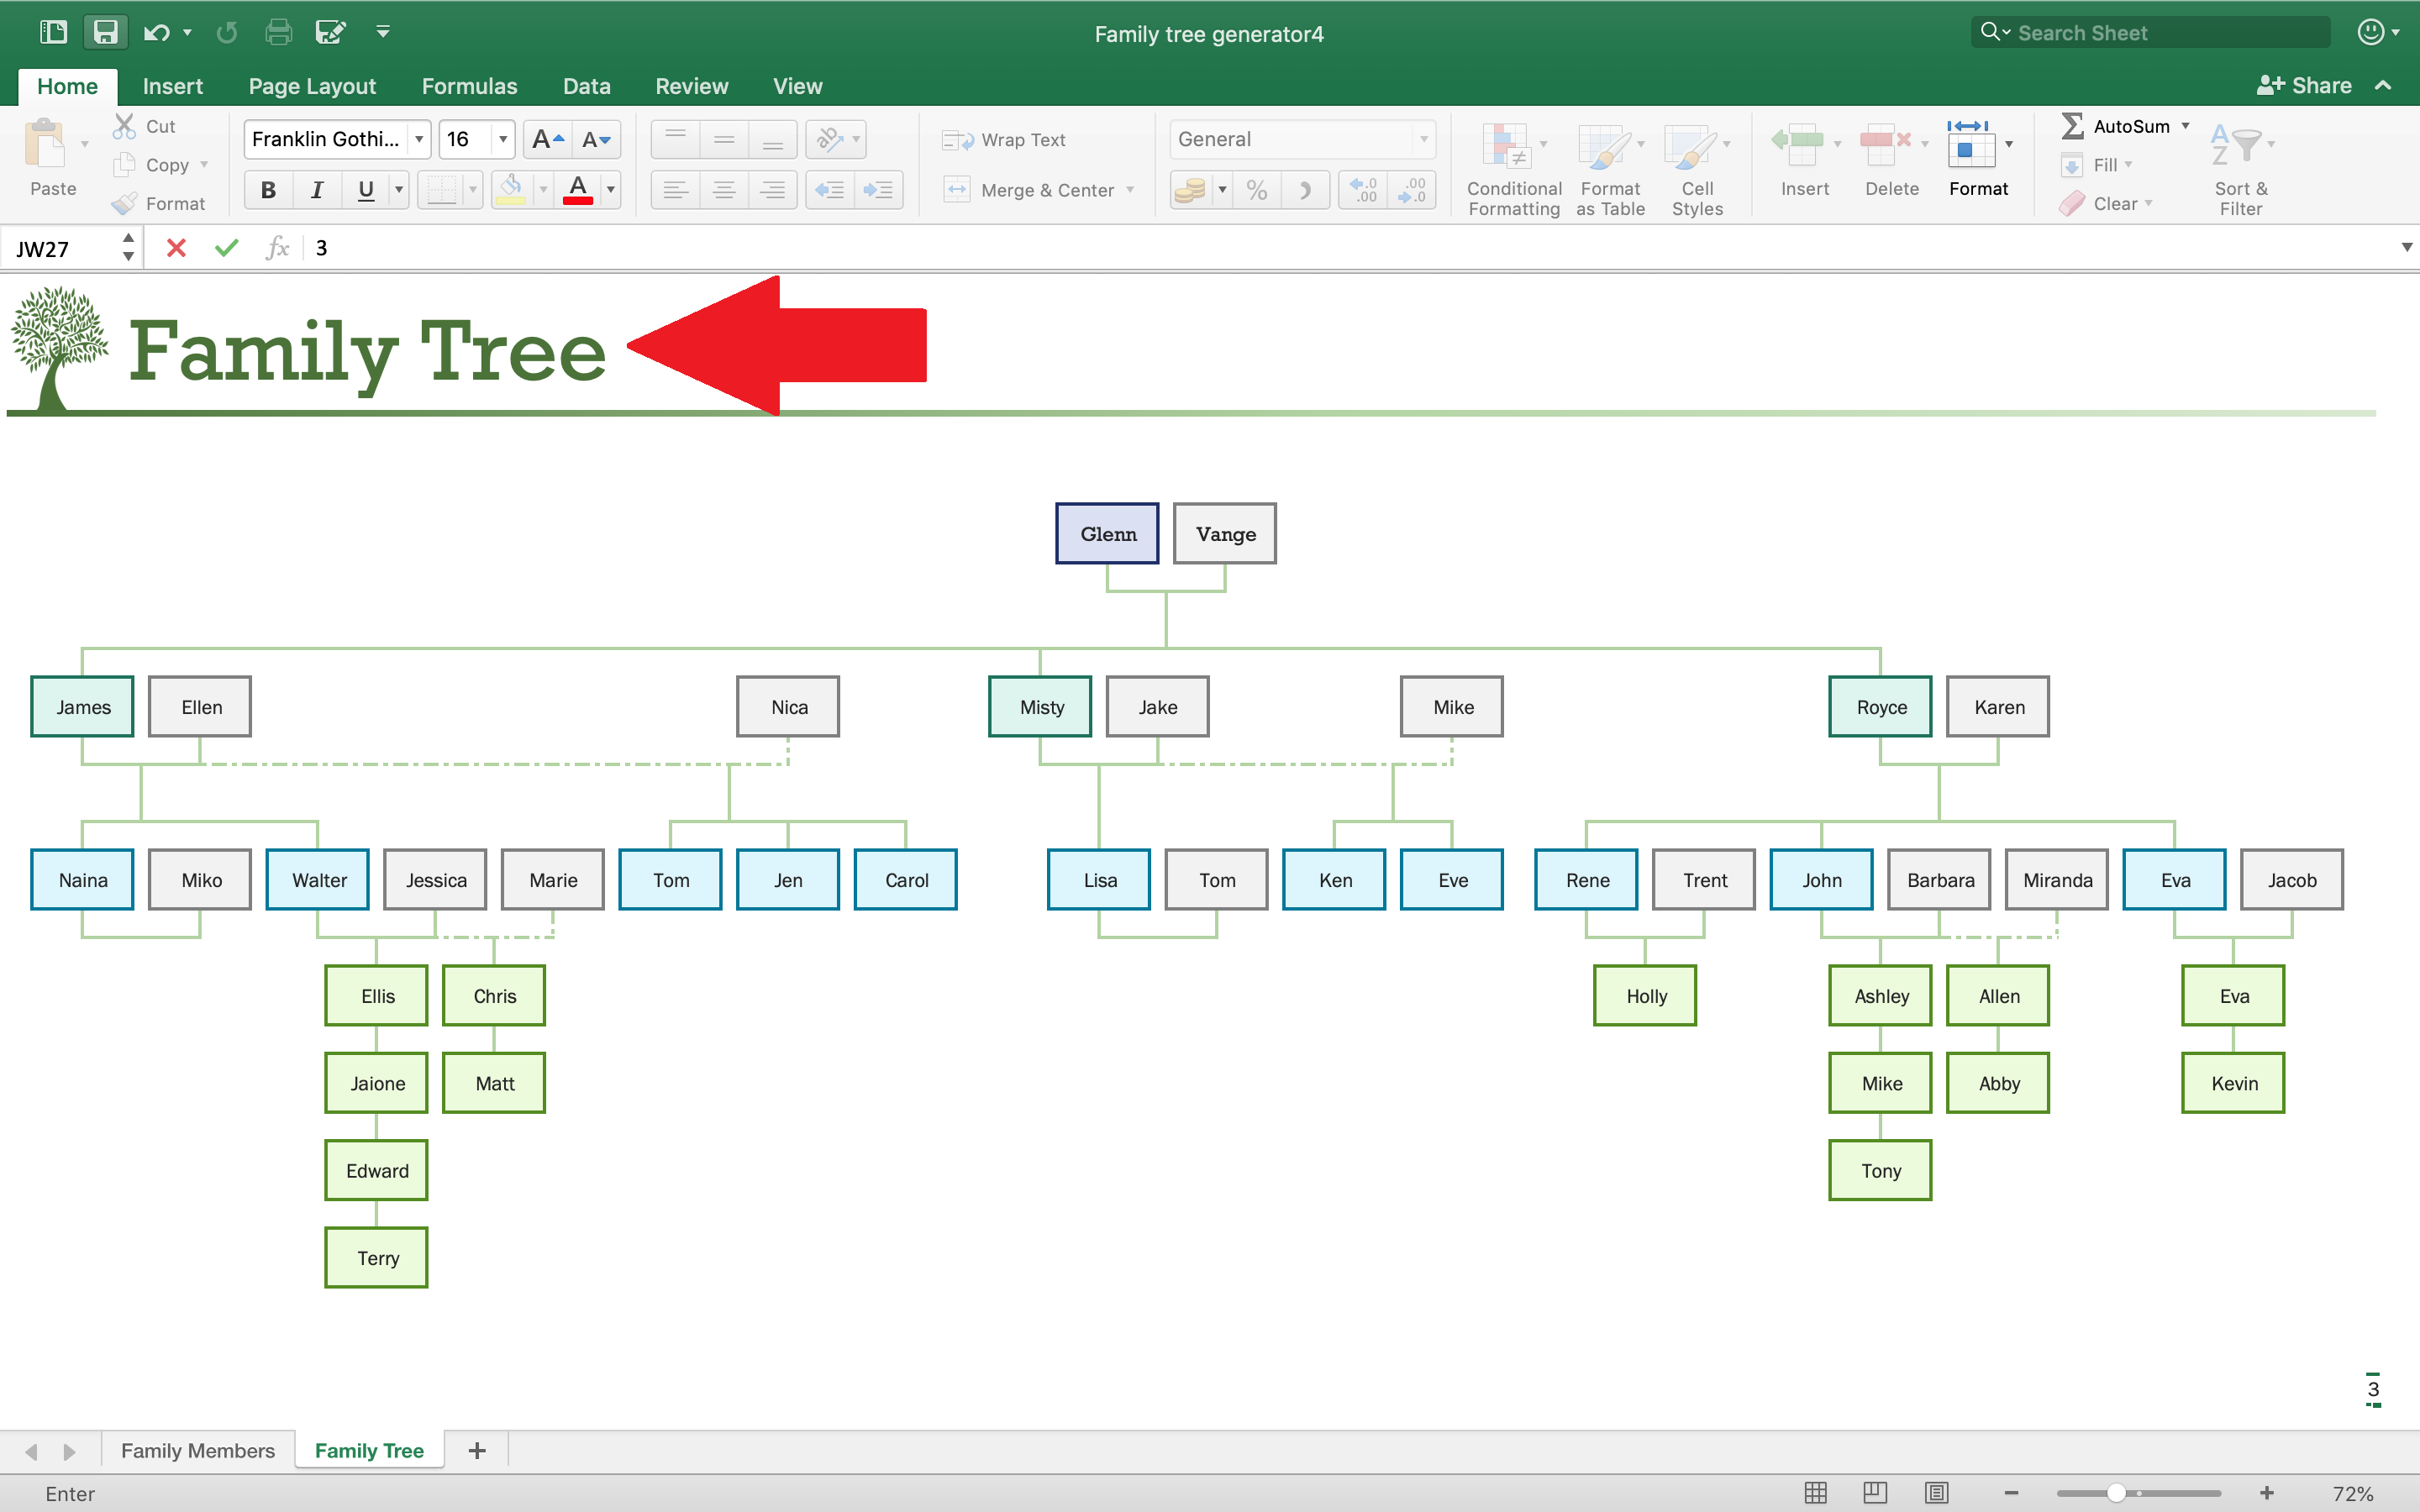
2. Edit the title or leave it as is. Insert the names of your family members in the boxes provided. Add or delete boxes, as needed.
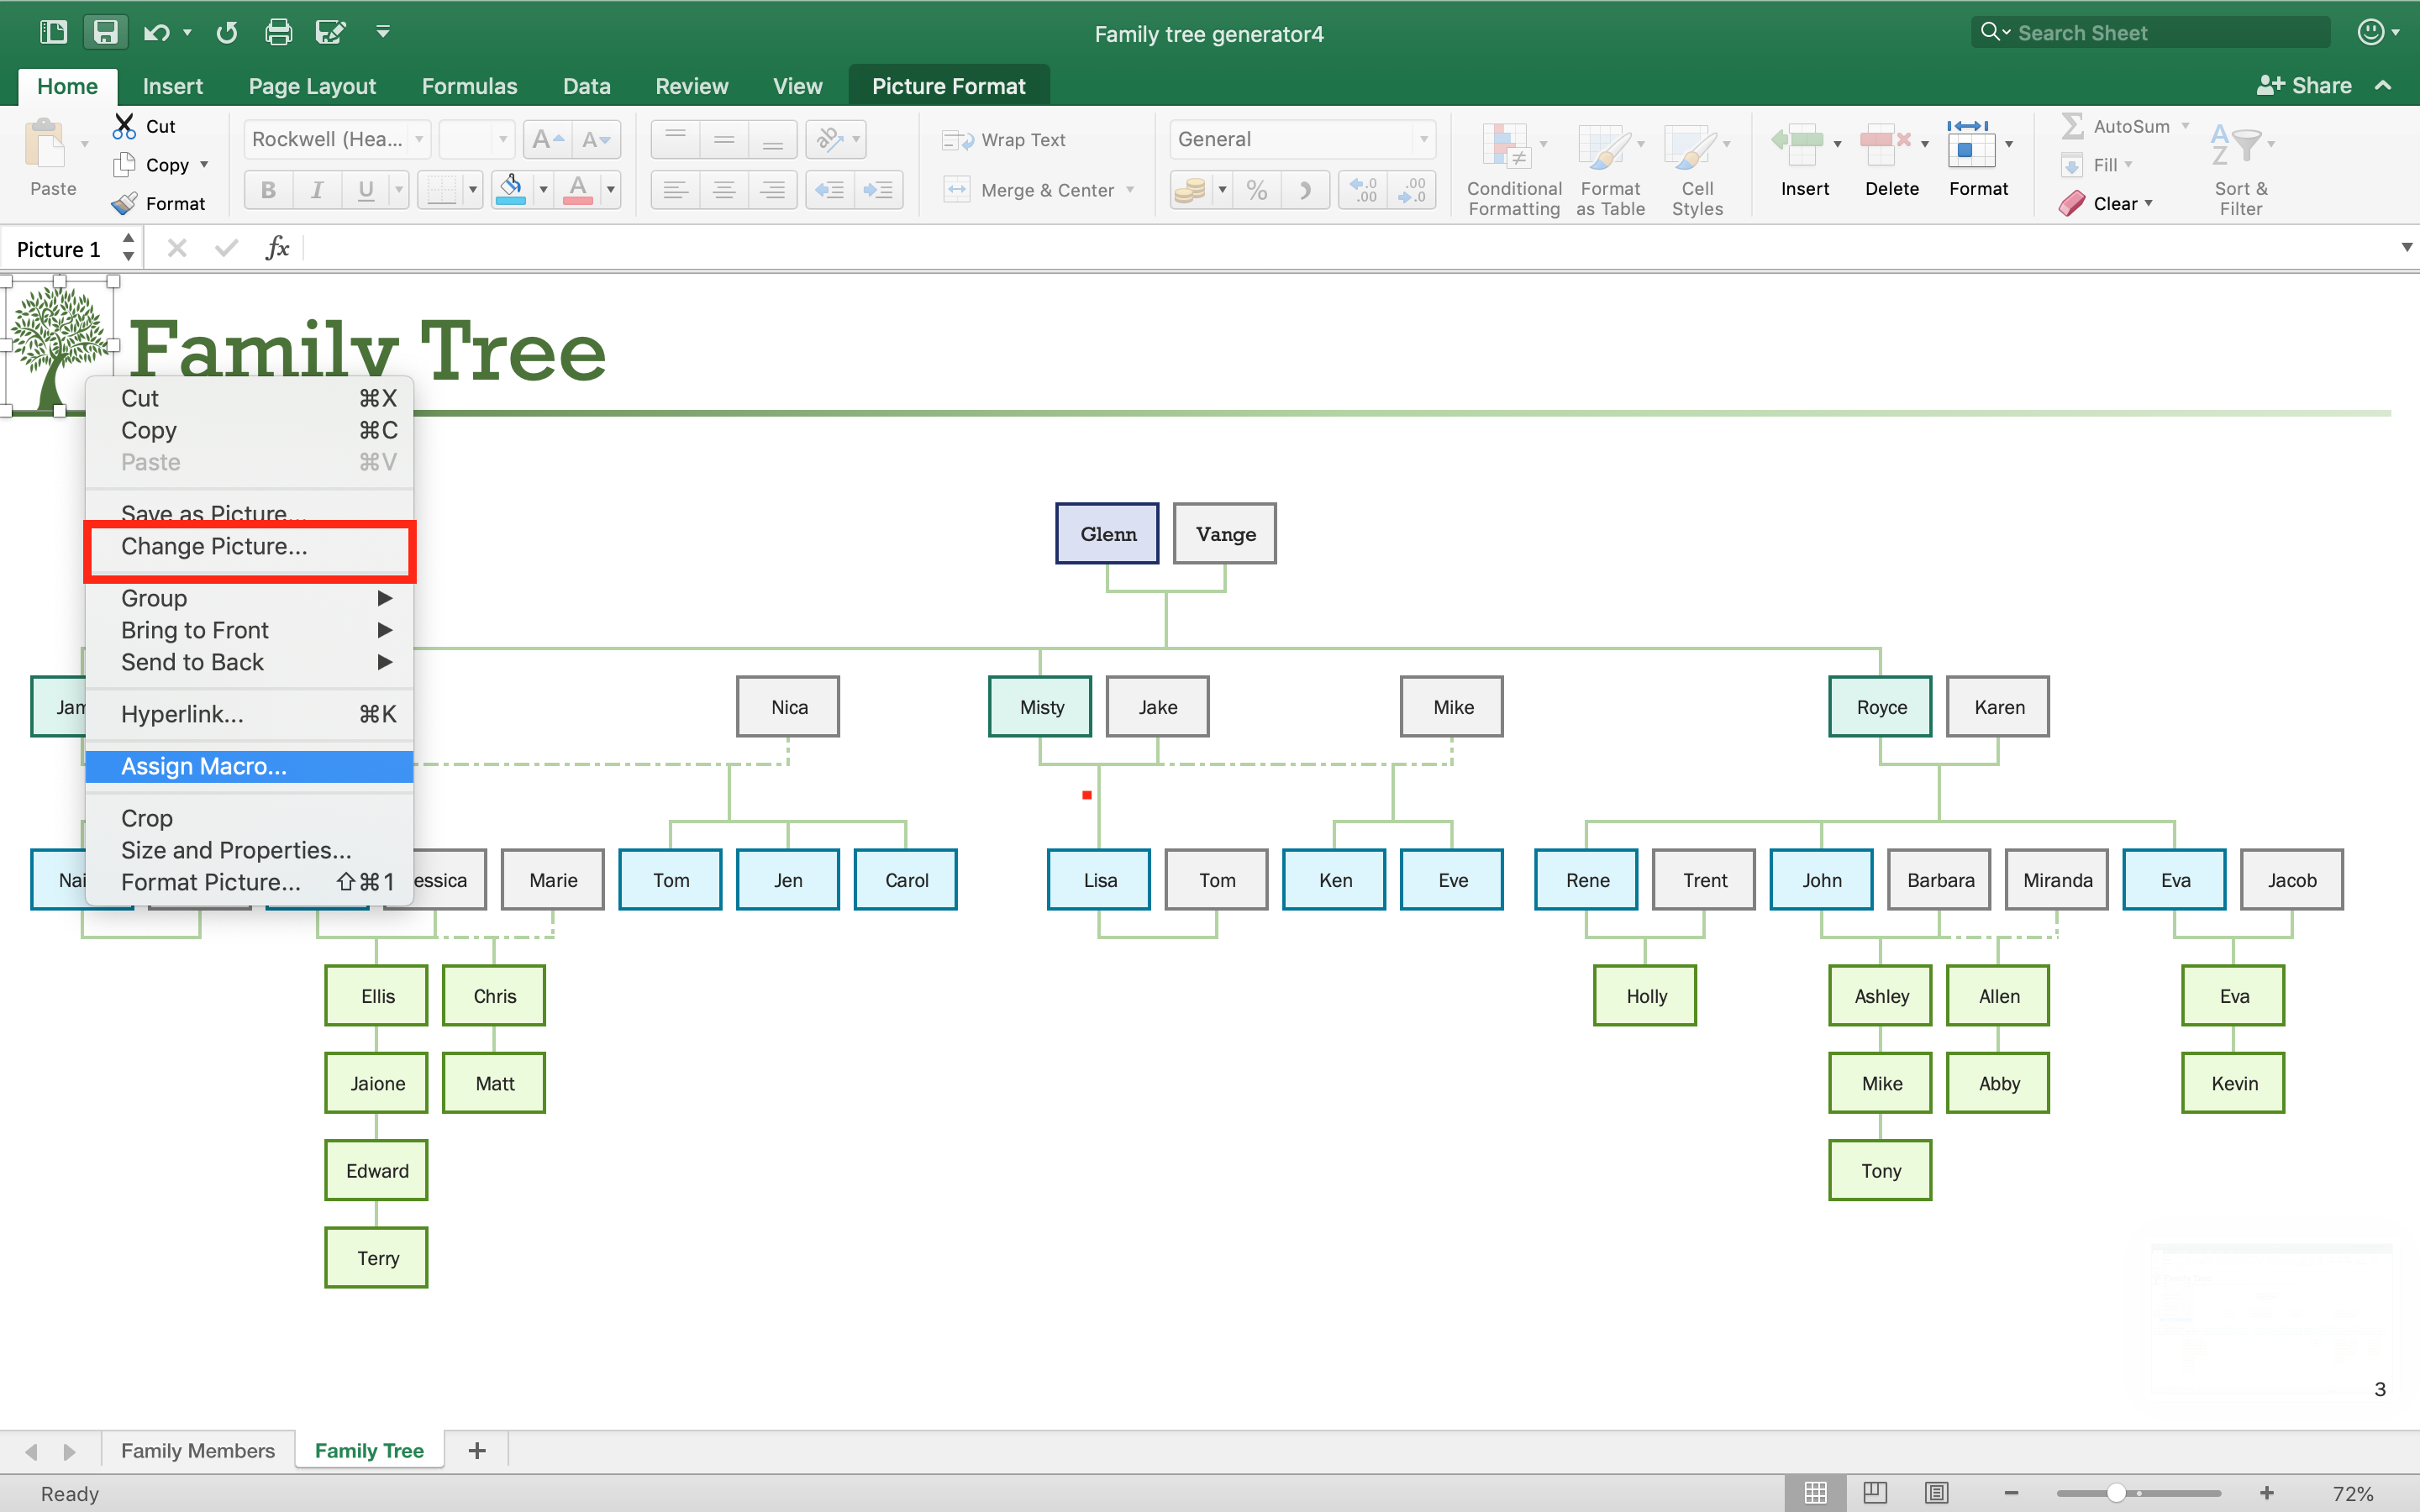
3. Feel free to change the image of the tree as well. To replace the image, select it then right click. Click Change Picture and upload your own photo.
4. Once you’re satisfied with your edits, save the Excel file. Share or send the file to family members and have them review or edit the family tree.

In need of a simple, easy, and effective way to communicate with your customers? If so, then a flyer made…
![How to Make/Create a Receipt in Microsoft Word [Templates + Examples] 2023](https://images.template.net/wp-content/uploads/2021/09/How-to-Make-a-Receipt-on-Word-788x428.jpg)
Receipt templates are important documents used as proof of sale or to transfer ownership from one party to another. Business…

Receipts are necessary documents for selling merchandise or services to clients. These pieces of paper are proof of financial transactions…
![How to Make/Create a Lesson Plan Template in Microsoft Word [Templates + Examples] 2023](https://images.template.net/wp-content/uploads/2021/09/How-to-Create-a-Lesson-Plan-Template-in-Word-788x429.jpg)
A lesson plan as its name suggests is a detailed description of the lessons that a learning instructor aims to…
![How to Make/Create a Mind Map in Microsoft Word [Templates + Examples] 2023](https://images.template.net/wp-content/uploads/2021/09/How-to-Make-a-Mind-Map-in-Microsoft-Word-Step-1.jpg)
A mind map is a visual representation of interconnected ideas showing the relationship between each concept. Mind mapping is used…
![How to Make/Create a Schedule in Microsoft Word [Templates + Examples] 2023](https://images.template.net/wp-content/uploads/2021/09/How-To-Create_Build-a-Schedule-in-Microsoft-Word-788x443.jpg)
Schedules are important tools for time management that can be used by individuals and organizations alike. This provides users with…
![How to Make/Create a Family Tree in Google Docs [Templates + Examples] 2023](https://images.template.net/wp-content/uploads/2021/09/How-To-Create_Build-a-Family-Tree-in-Google-Docs-788x443.jpg)
A family tree is a type of visual structure that shows the relationship between one individual to another. It is…

Most people would list family as one of their top priorities in life. Some take their heritage or genealogy seriously…

Planners enable people to prioritize and organize their days and routines. From weekly calendars, budget planners, to meal plans, it…