
How to Make a Flyer in Google Docs
In need of a simple, easy, and effective way to communicate with your customers? If so, then a flyer made…
Dec 26, 2022
Planners enable people to prioritize and organize their days and routines. From weekly calendars, budget planners, to meal plans, it is one of the most versatile documents there is. Sure, store-bought planners are more convenient but creating one using basic Microsoft Office applications is free and relatively easy to do- especially with the help of a template. So whatever you’re looking for a in a planner, be it simple or detailed, Excel has a collection of predesigned planners that’s sure to meet your needs and preferences. Follow the easy instruction guide below and start customizing a planner now!
SUMMARY:
Templates can make tasks easier and faster to accomplish. The basic and quick guide below will help you customize your own planner with the use of an Excel template.
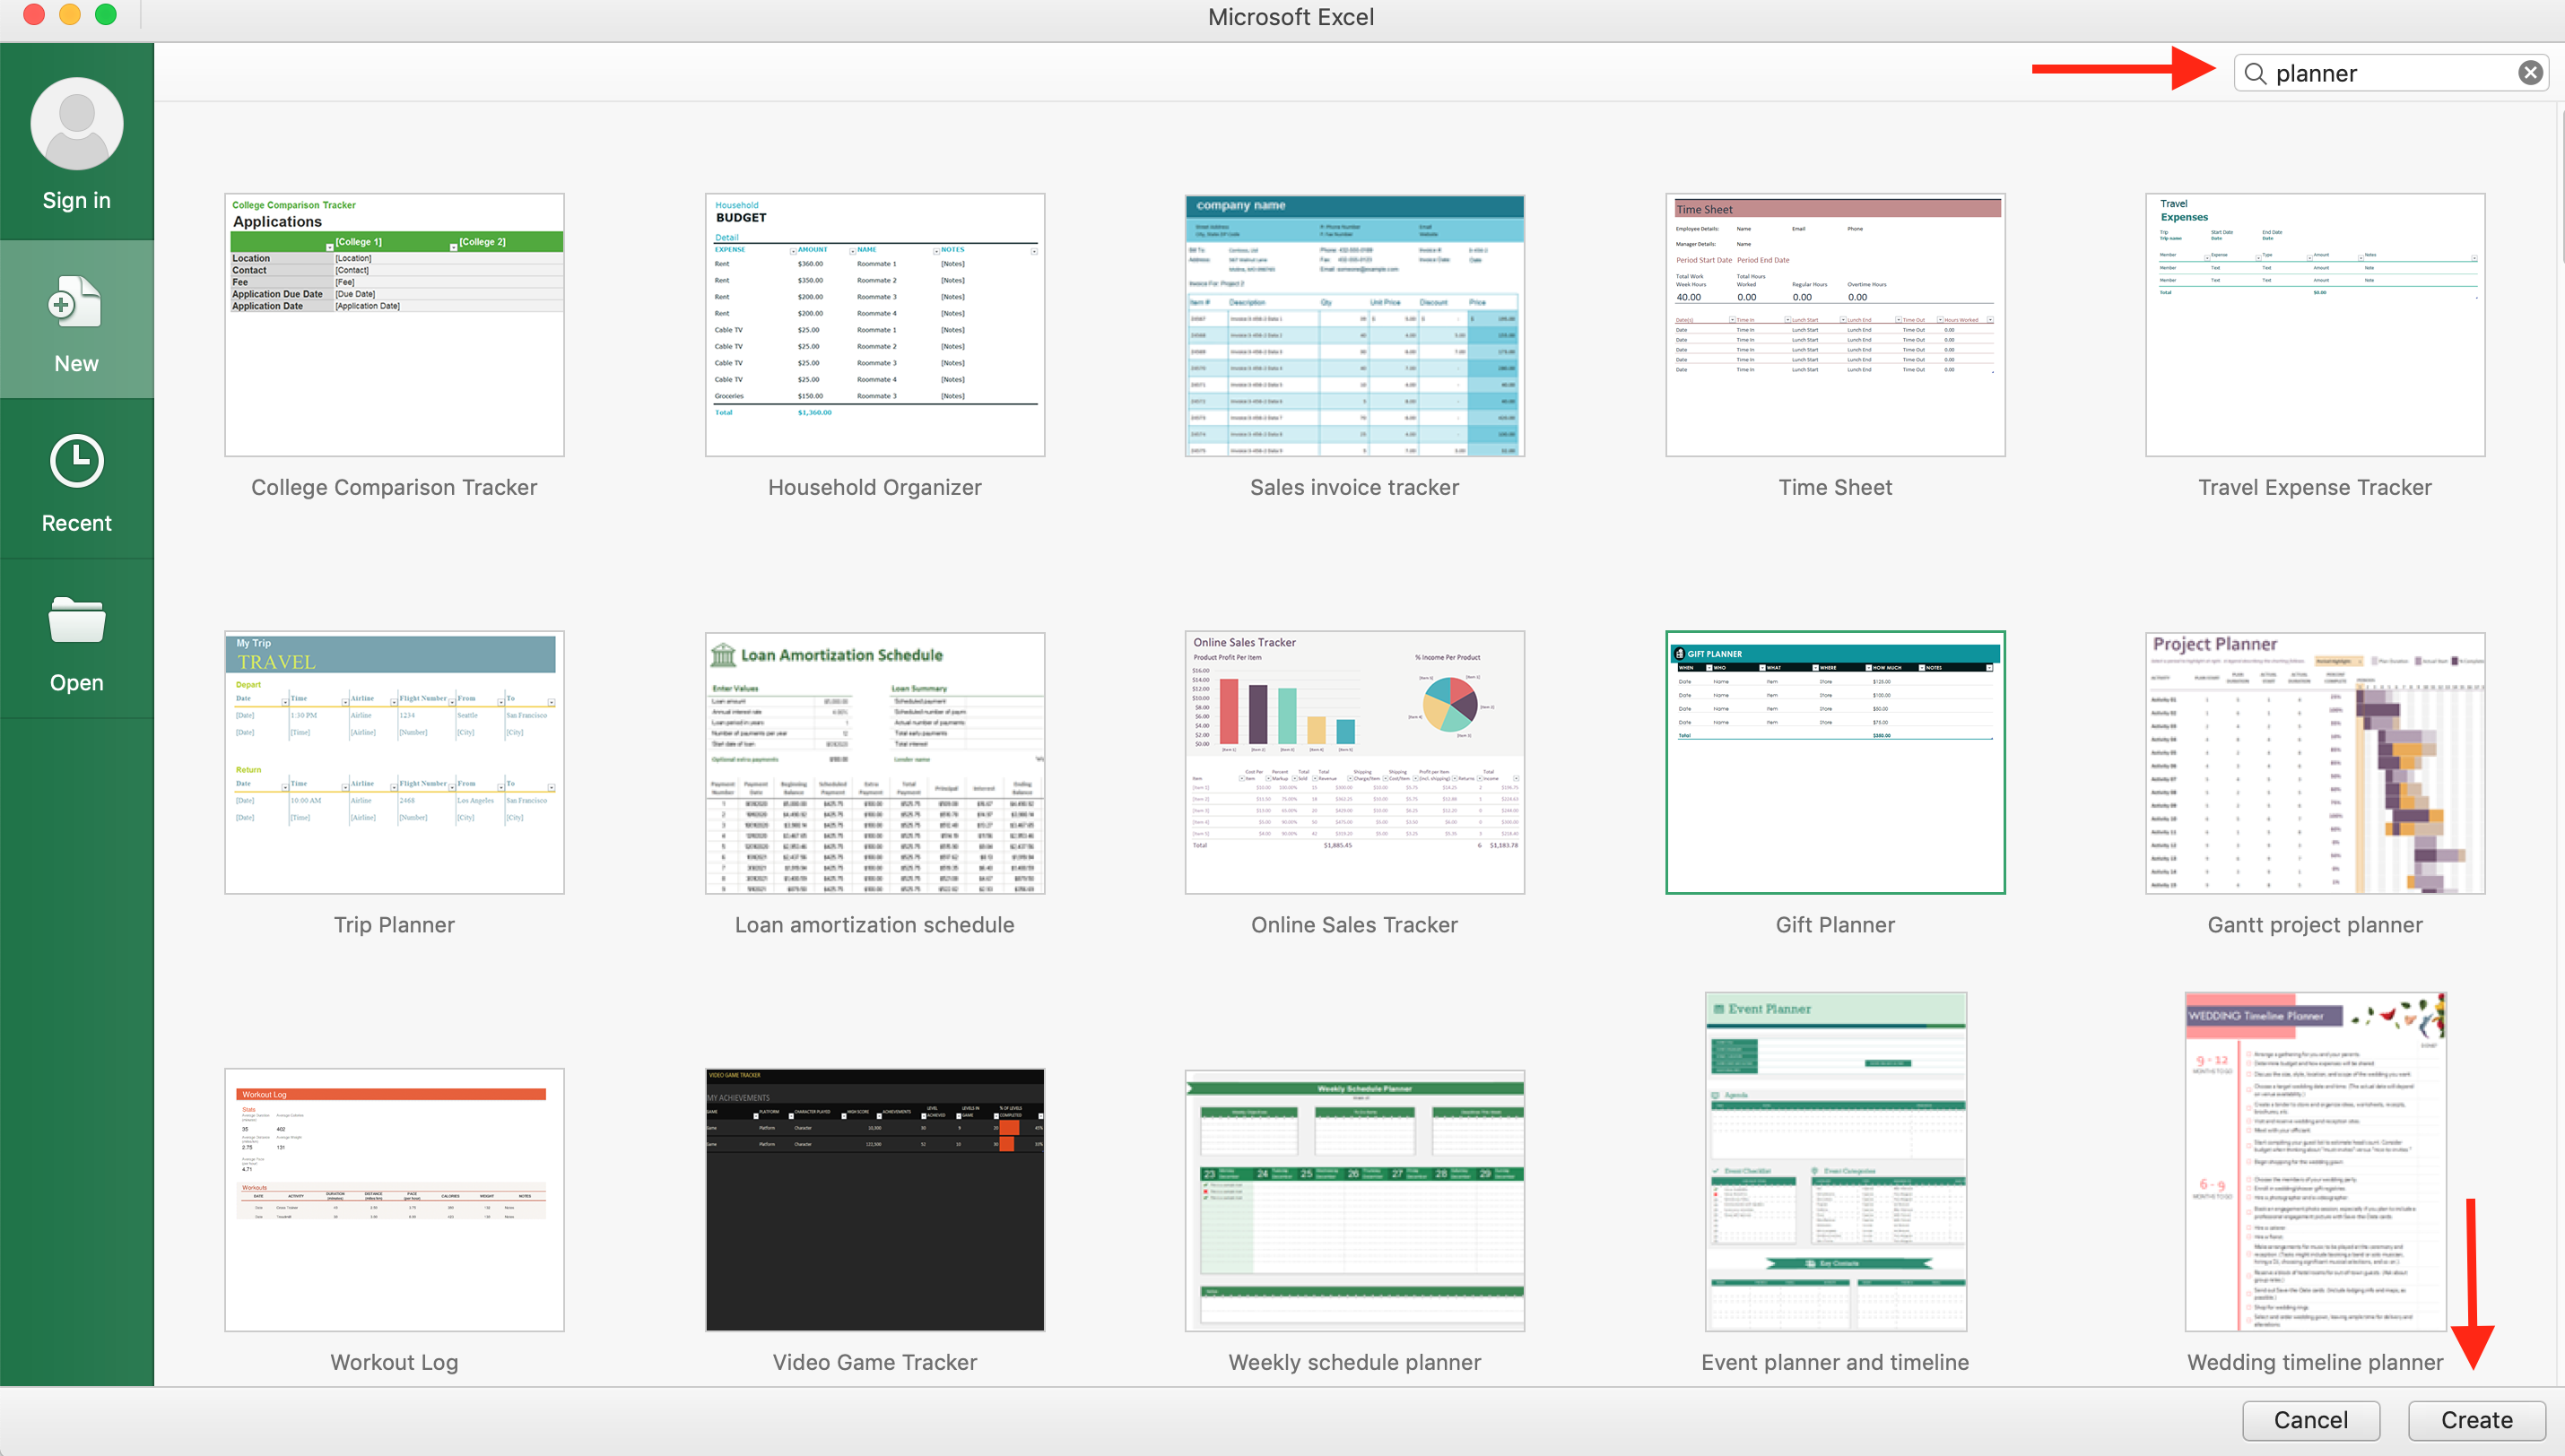
1. Open the Microsoft Excel application, then select New. Type in ‘planner’ in the search bar.
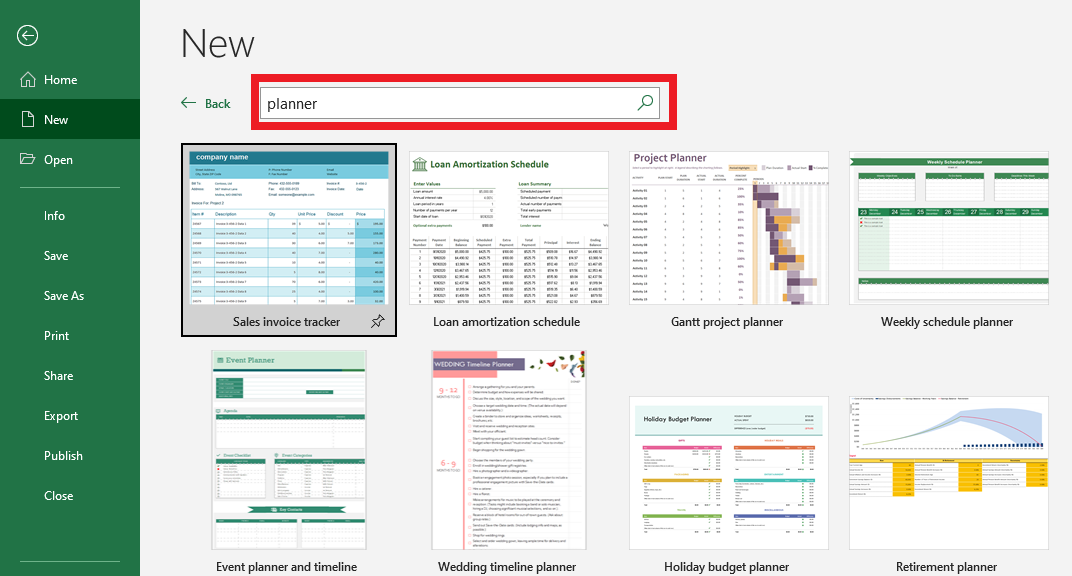
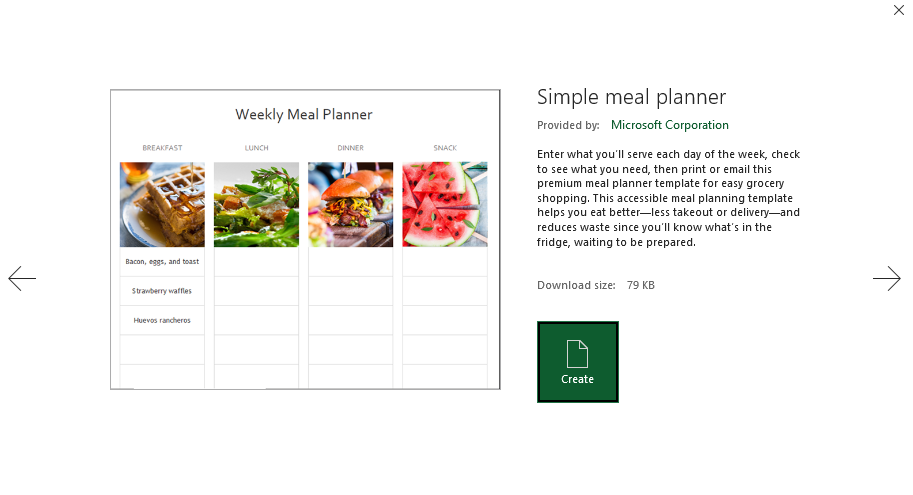
2. Click on your preferred template and hit Create. The template below is a simple meal planner.
3. Keep the template photo or change it whatever your want. To replace the photo, just select the image and right click. Click Change Picture to upload a photo from your files or an online source.
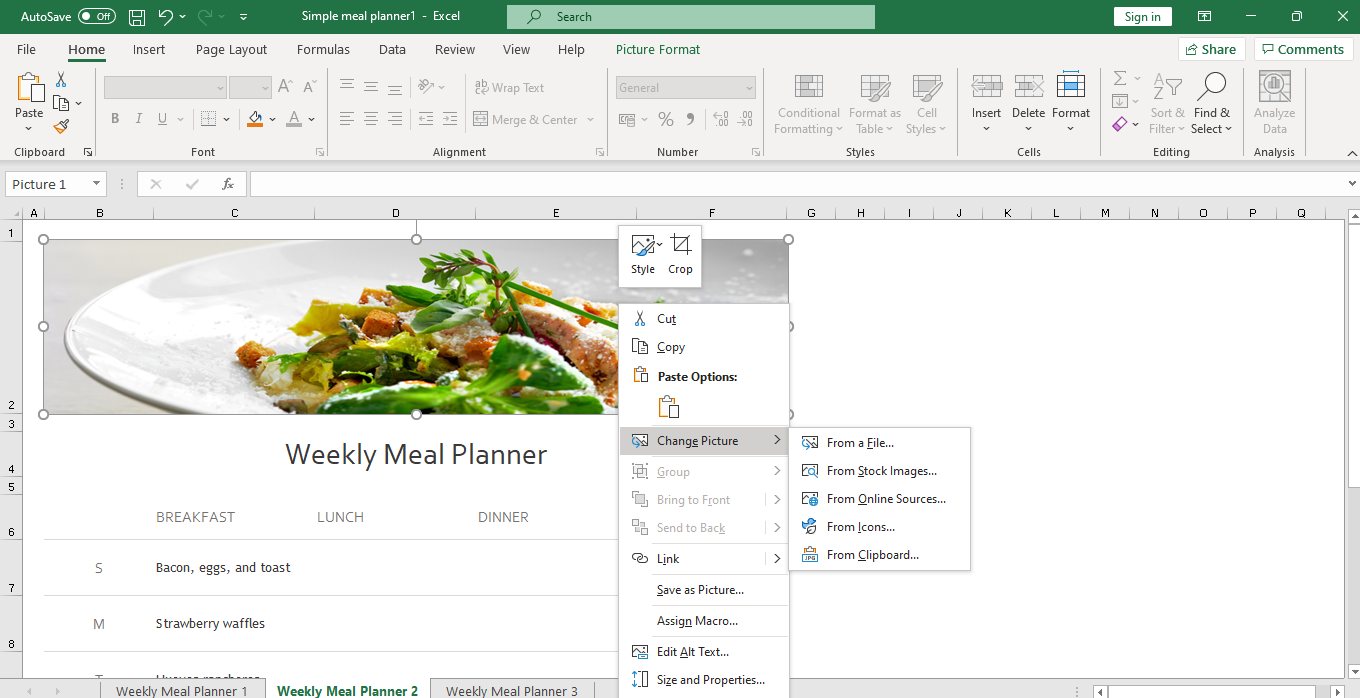
4. A template may come with different designs in the same document, as seen in the example below. Start by choosing a weekly meal planner design that suits your tastes. Then indicate all your meals for each day of the week. In the template below, the planner consists of breakfast, lunch, dinner, and snacks.
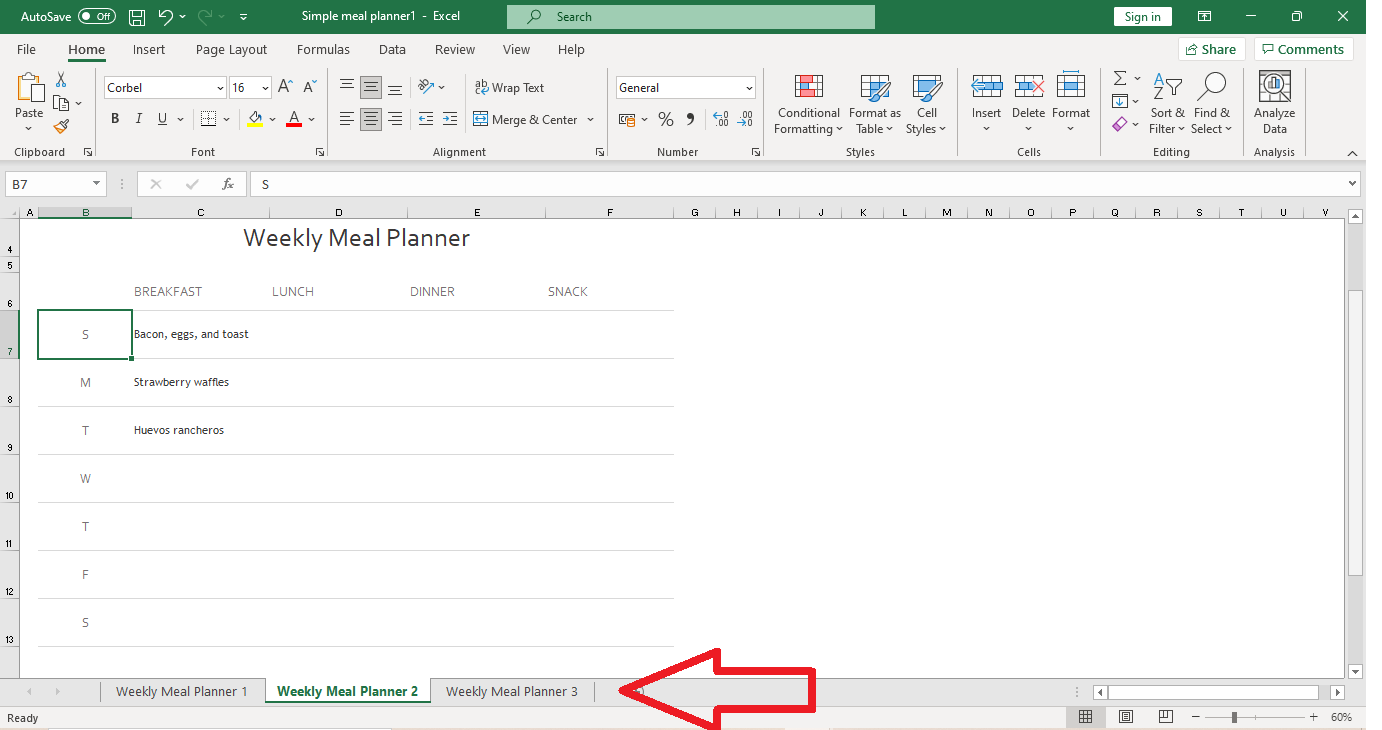
5. After inputting all your data, save the Excel file. If you want to modify or make changes to your plans, simply edit the spreadsheet as needed.
Note: If you are looking for more variety, feel free to check out Template.net for more Excel planner templates.
Use this easy step-by-step guide to customize your very own planner! The guide applies to most Excel versions including MS Excel for Mac 2011 and MS Excel for Mac 2016.
1. Open Microsoft Excel and click New. Look for ‘planners’ using the search bar. Pick your desired template and click Create.
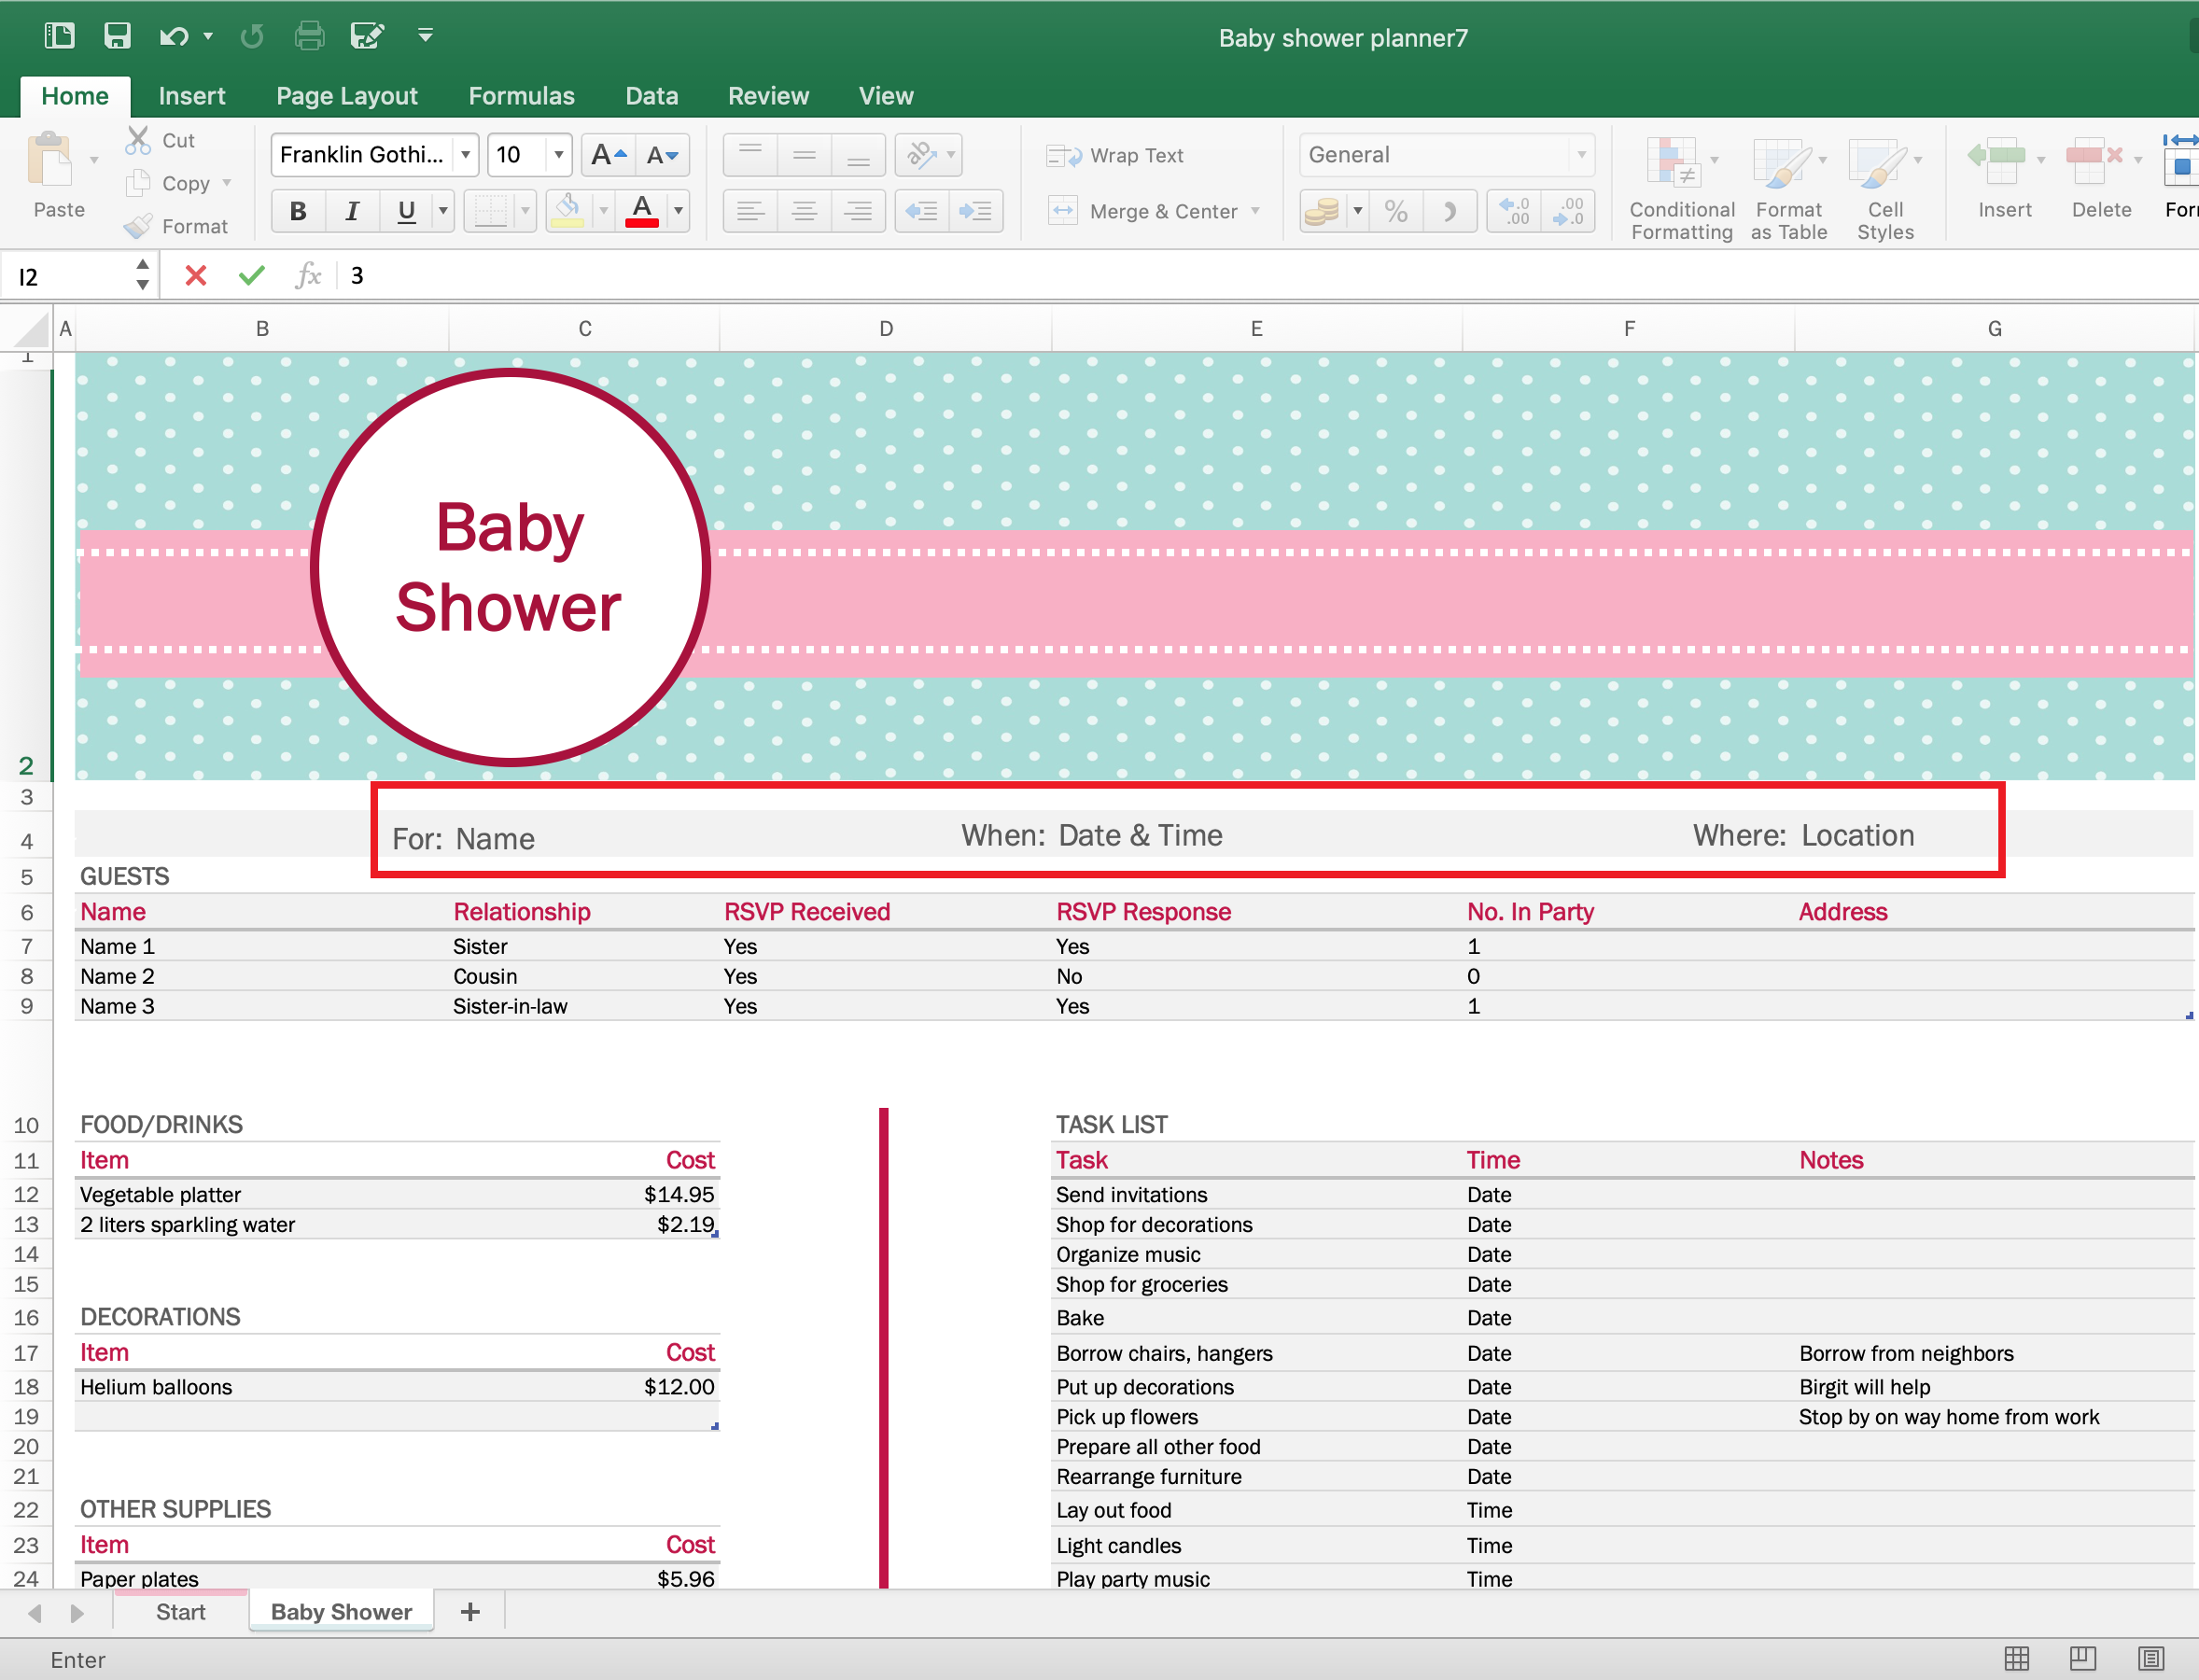
2. The sample template below is a baby shower party planner. Make sure to input the basic details of the event such as name of the host, the date and time, and location of the baby shower. List down the names of invited guests and their corresponding attendance status under the RSVP column. You can personalize all of these details as needed. Feel free to delete a column too if you don’t need it.
3. Planning an event can be a fun and challenging task. You want to cover as many details as you can. Note down everything you need for your event such as food, drinks, decorations, and other supplies. Once you’ve identified these items, provide the cost of each item.
4. Create a mini task list within your planner. In another column, assign the corresponding date or deadline, and any additional notes for each task.
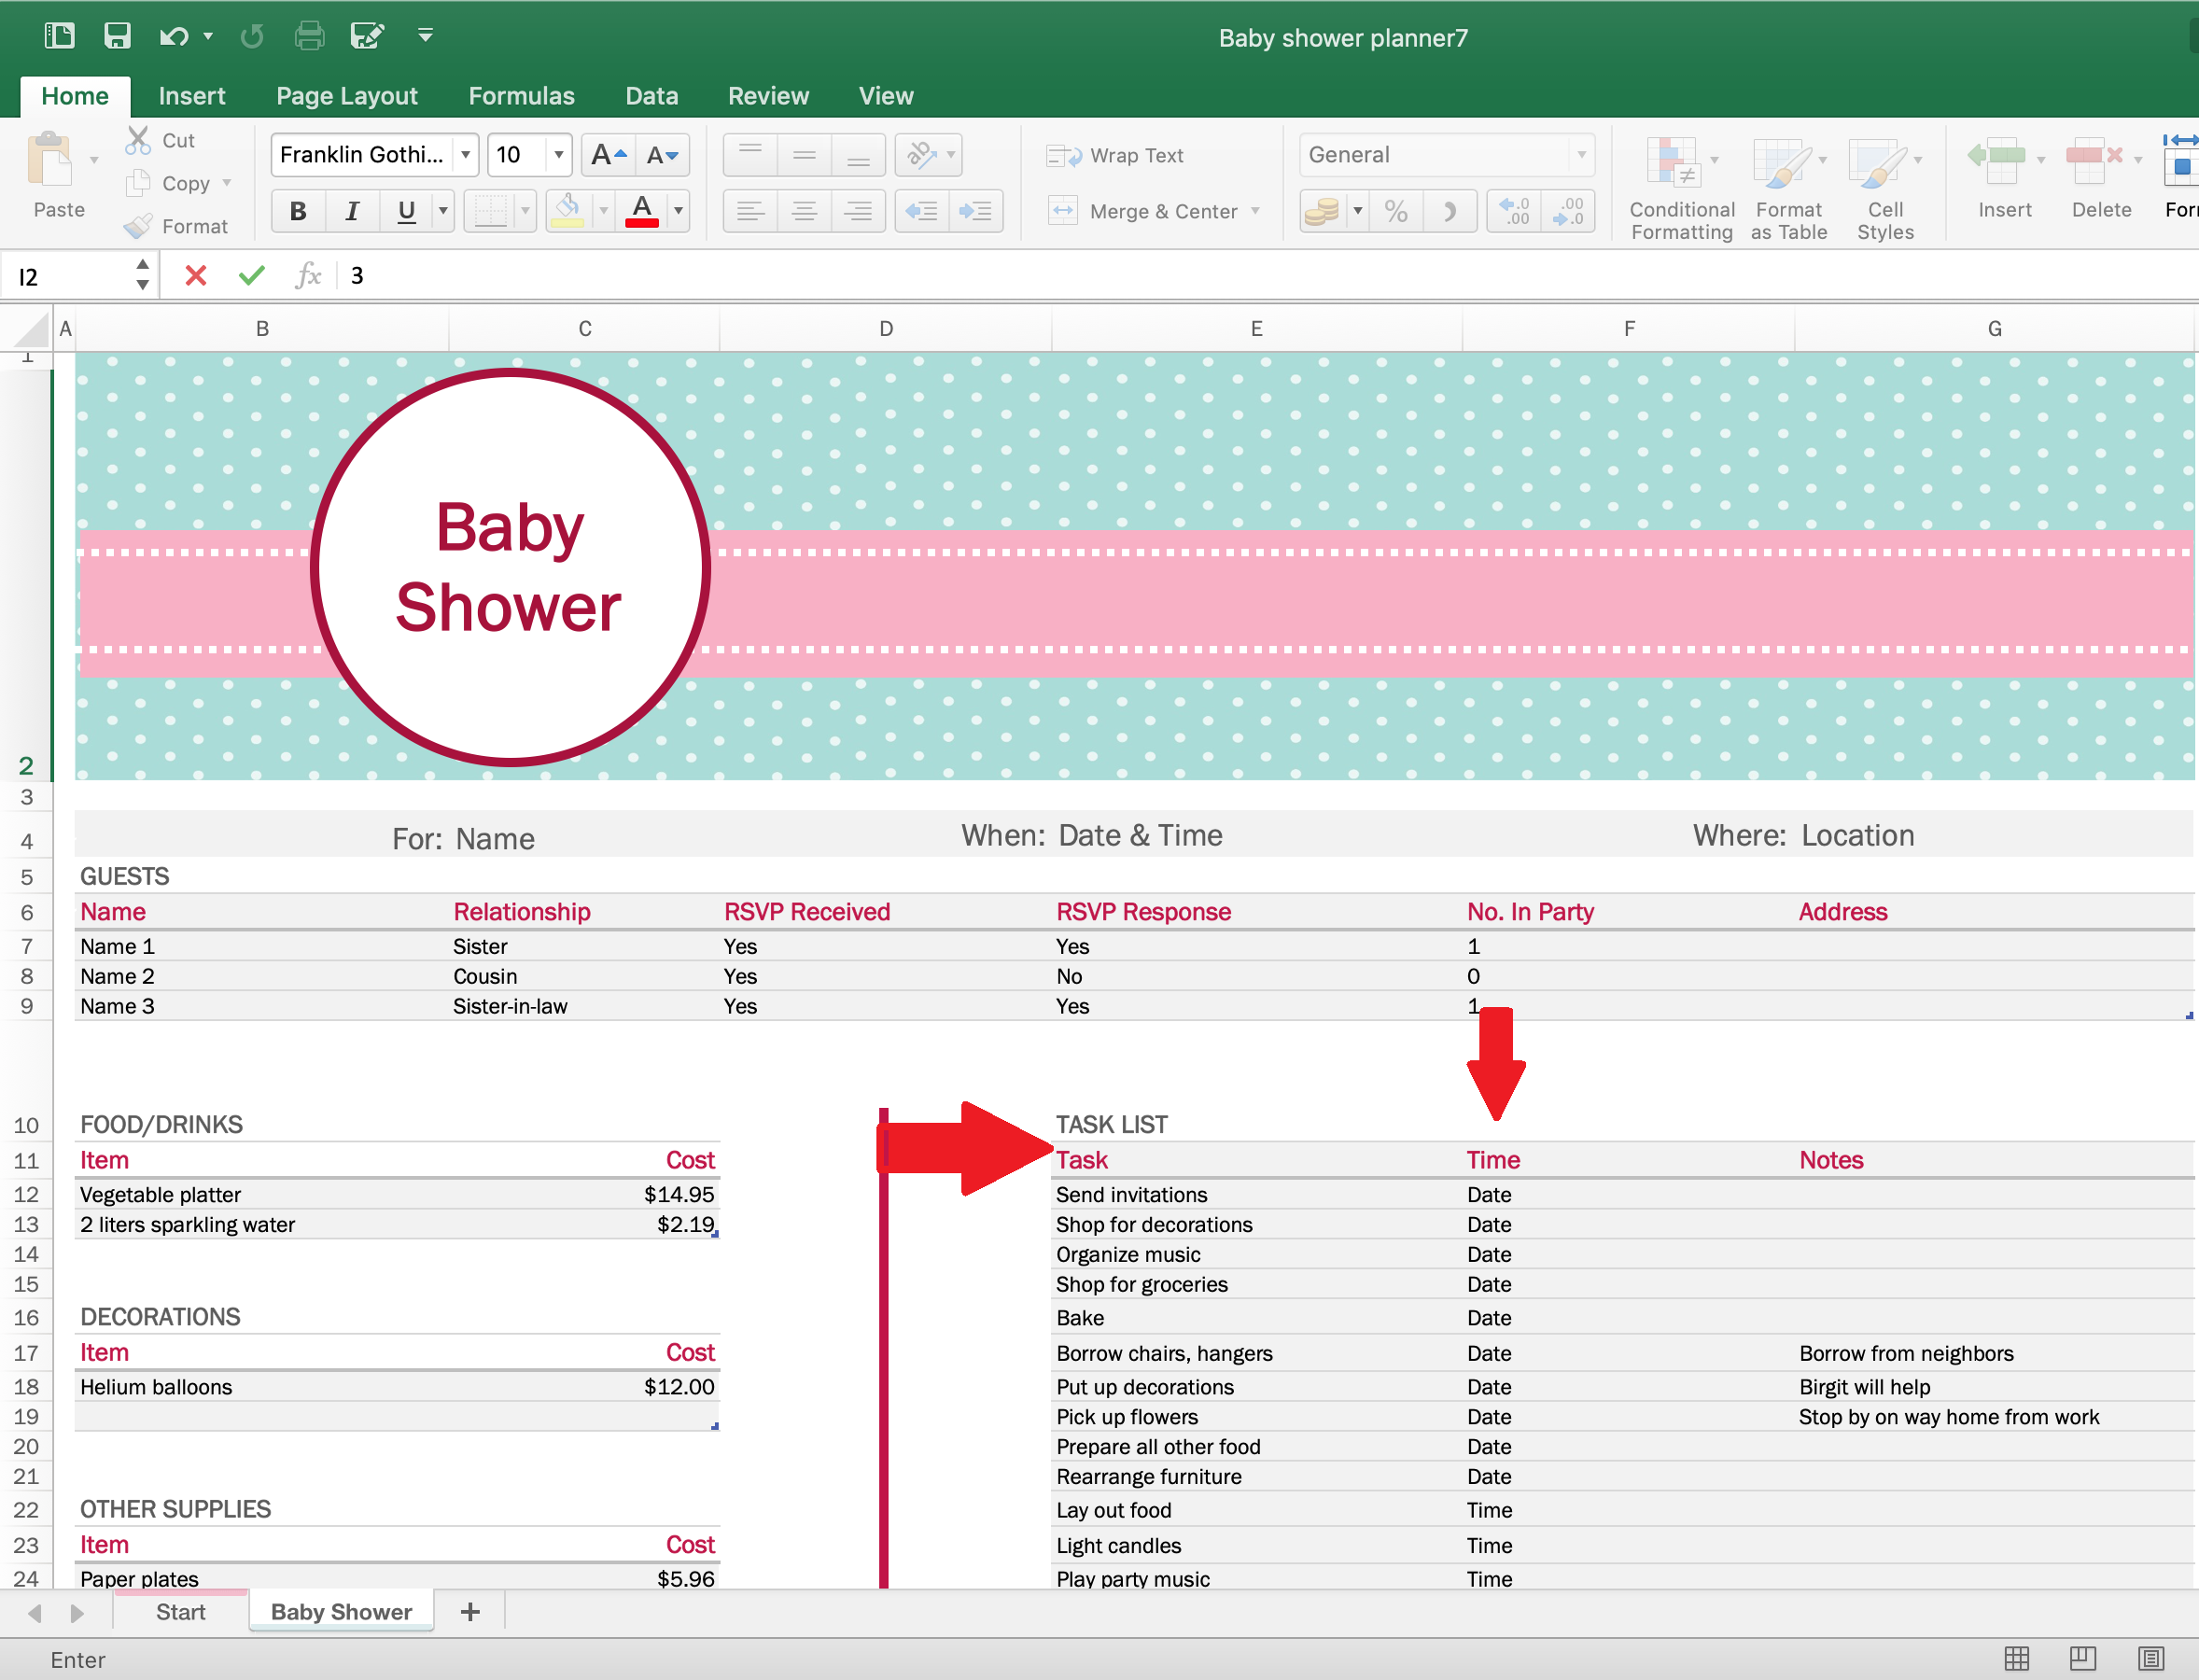
5. After you’re done editing, save the Excel document; then print it out or share the file with your contacts.

In need of a simple, easy, and effective way to communicate with your customers? If so, then a flyer made…
![How to Make/Create a Receipt in Microsoft Word [Templates + Examples] 2023](https://images.template.net/wp-content/uploads/2021/09/How-to-Make-a-Receipt-on-Word-788x428.jpg)
Receipt templates are important documents used as proof of sale or to transfer ownership from one party to another. Business…
Receipts are necessary documents for selling merchandise or services to clients. These pieces of paper are proof of financial transactions…
![How to Make/Create a Lesson Plan Template in Microsoft Word [Templates + Examples] 2023](https://images.template.net/wp-content/uploads/2021/09/How-to-Create-a-Lesson-Plan-Template-in-Word-788x429.jpg)
A lesson plan as its name suggests is a detailed description of the lessons that a learning instructor aims to…
![How to Make/Create a Mind Map in Microsoft Word [Templates + Examples] 2023](https://images.template.net/wp-content/uploads/2021/09/How-to-Make-a-Mind-Map-in-Microsoft-Word-Step-1.jpg)
A mind map is a visual representation of interconnected ideas showing the relationship between each concept. Mind mapping is used…
![How to Make/Create a Schedule in Microsoft Word [Templates + Examples] 2023](https://images.template.net/wp-content/uploads/2021/09/How-To-Create_Build-a-Schedule-in-Microsoft-Word-788x443.jpg)
Schedules are important tools for time management that can be used by individuals and organizations alike. This provides users with…
![How to Make/Create a Family Tree in Google Docs [Templates + Examples] 2023](https://images.template.net/wp-content/uploads/2021/09/How-To-Create_Build-a-Family-Tree-in-Google-Docs-788x443.jpg)
A family tree is a type of visual structure that shows the relationship between one individual to another. It is…
Most people would list family as one of their top priorities in life. Some take their heritage or genealogy seriously…
Planners enable people to prioritize and organize their days and routines. From weekly calendars, budget planners, to meal plans, it…