
How to Make a Flyer in Google Docs
In need of a simple, easy, and effective way to communicate with your customers? If so, then a flyer made…
Mar 13, 2023
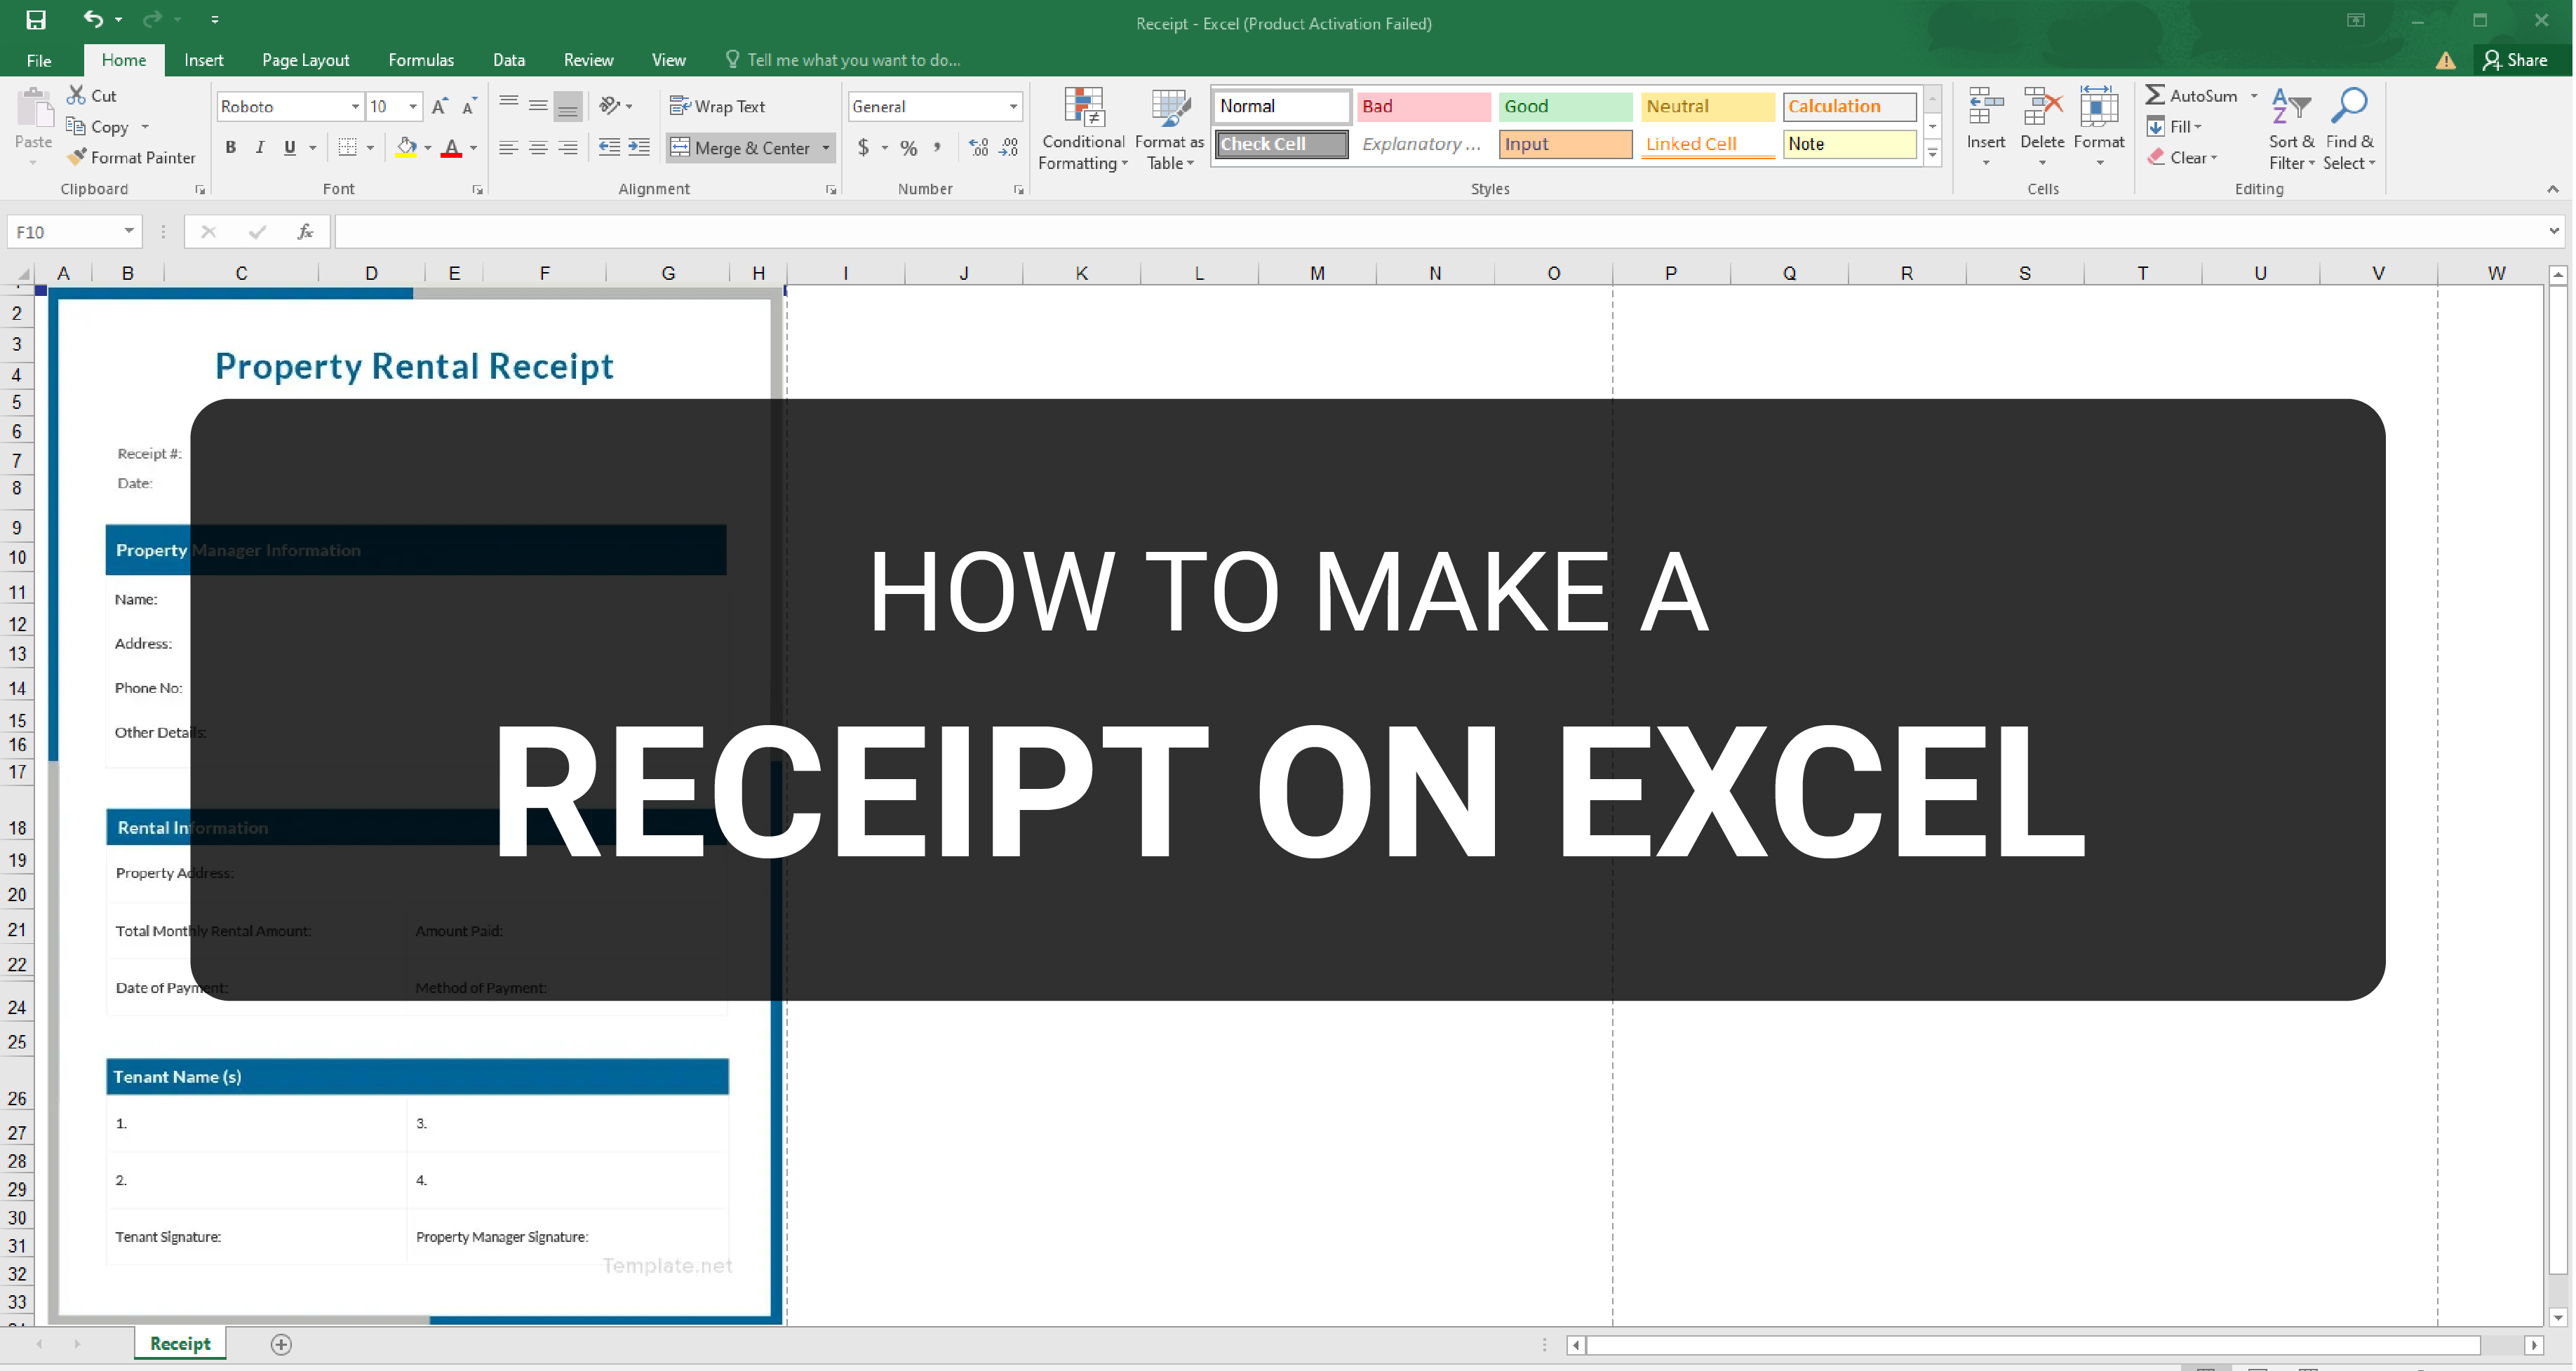
Receipts are necessary documents for selling merchandise or services to clients. These pieces of paper are proof of financial transactions and serve as official documents. There are different receipt samples, including receipts of payment, store receipts, bank receipts, and rent receipts. It is advantageous to utilize online receipt templates as a reference if the company is looking at its creation. Microsoft Excel is an excellent application to help with receipts, providing necessary formulas for computation. The guide below teaches how to make a receipt on Excel with and without the use of templates.
SUMMARY:
Microsoft Excel provides its users with a variety of receipts available through Office. Read and understand the guide below to help you make a receipt by using available templates on Excel.
1. Launch the Microsoft Excel application and select New.
2. Search for “receipt” on the search bar to view the available receipt templates you can use.
3. Left-click on the template to select it and click Create to start editing its content.
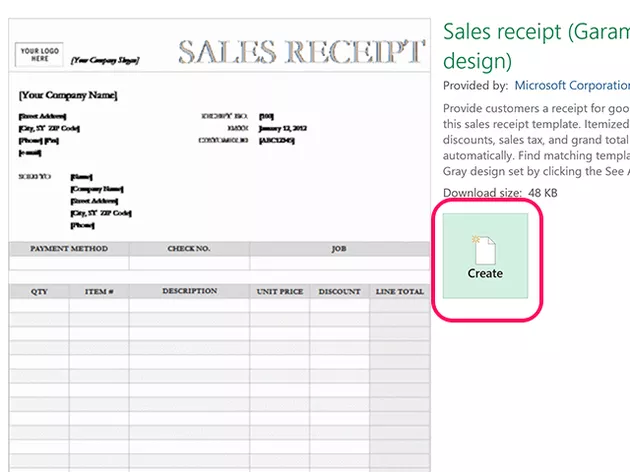
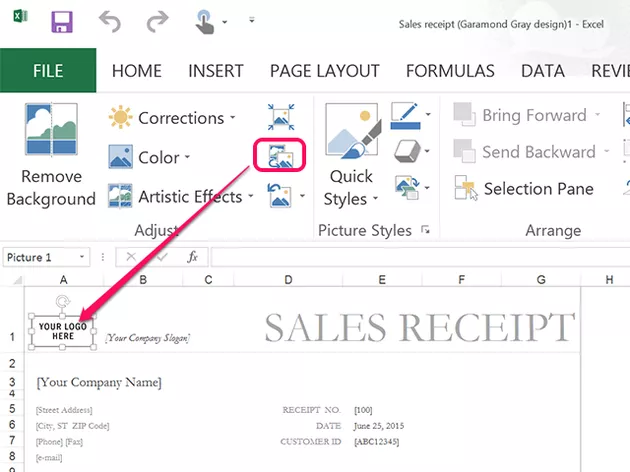
4. Replace all the model texts with the company’s information, including its name, address, and contact information. You can also replace the placeholder image by selecting the item and click the Replace Image button from the Format tab.
5. Make sure to test your template if the formulas work well and Save your work.
Note: If you are looking for a particular template, you can start browsing online. Template.net provides a wide array of receipt templates on Microsoft Excel you can use and download for your company.
In creating a receipt from scratch, be aware of the formulas for the cells for proper computation of accrued services or products of legal tender. The guide below is a step-by-step guide in creating your receipt. Read and follow the steps carefully.
1. Start your receipt by creating a Blank Workbook. Go to the View tab, then Page Layout, and ensure the receipt’s dimensions fit the paper.
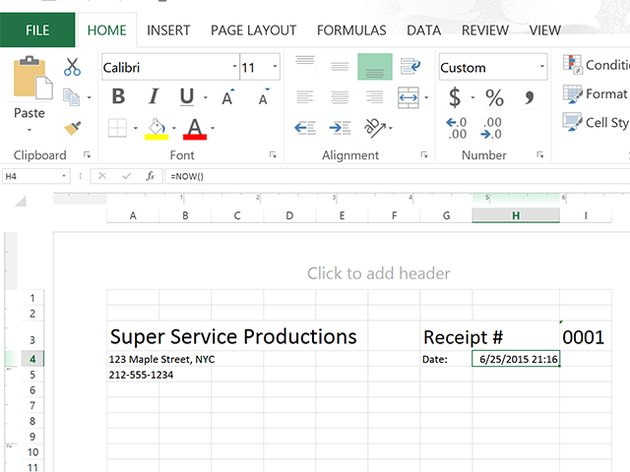
2. Insert your business’ information, the word Receipt, receipt number, and transaction date. Ensure that the receipt number shows the zeros by going to the Home menu, changing the option to Text on the Number tab. Use the formula =NOW() for the date to get the live date and time.
3. On the column headers, insert entries for Items, Units, Prices, Discounts, and Total. For the bottom, indicate the subtotal, tax, and total entries. Add borders and fill colors as you see fit.
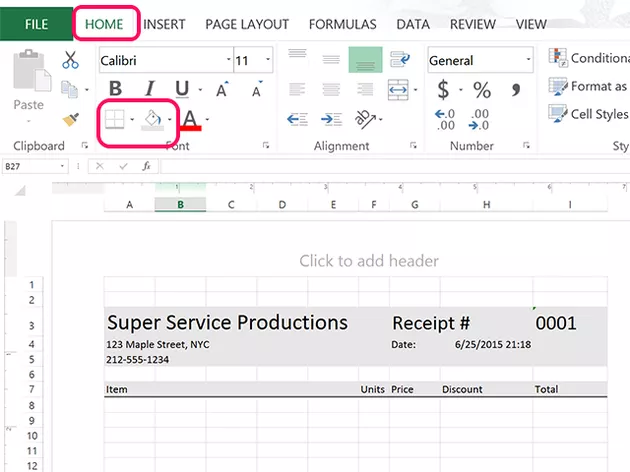
4. Start including formulas into the sheet. Select the Subtotal cell, go to the Formulas tab, and select the Autosum icon. Drag your cursor over all the cells in the Total column and press Enter.
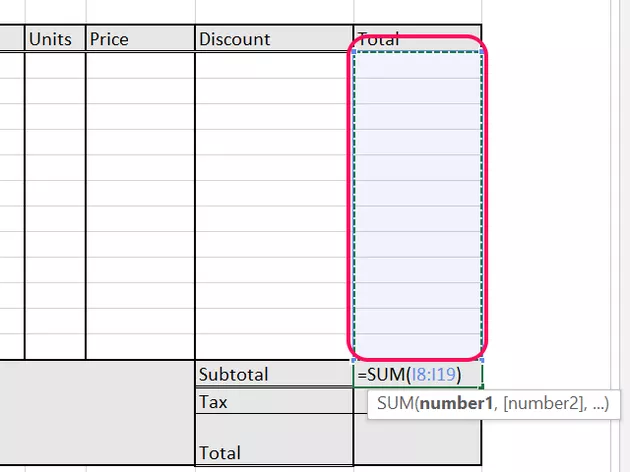
5. To compute for the tax, select the Tax cell. Insert (=) sign to indicate the start of the formula and click on the Subtotal cell. Input the (*) sign, then insert the tax percentage as a decimal. Press Enter to complete your formula.
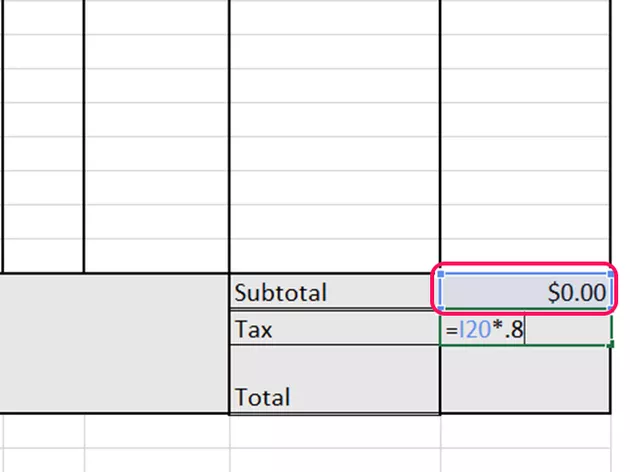
6. For computing the Total price, select the Total cell and click the Autosum icon on the Home menu. Select the Subtotal and Tax cells, then press Enter.
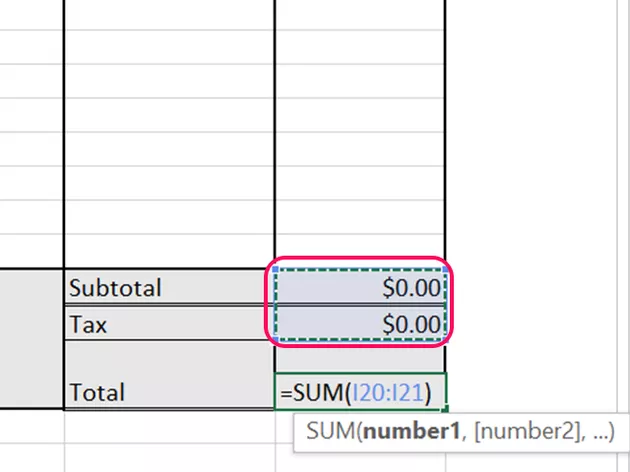
7. To compute for the discount, click on the first Total cell. Insert (=) sign, click on the first Unit cell. Then, indicate the (*) sign, selecting the Price cell. Afterward, insert the (–) sign and select the Discount cell, then press Enter. To duplicate the formula, copy and paste the initial formula to the empty cells.
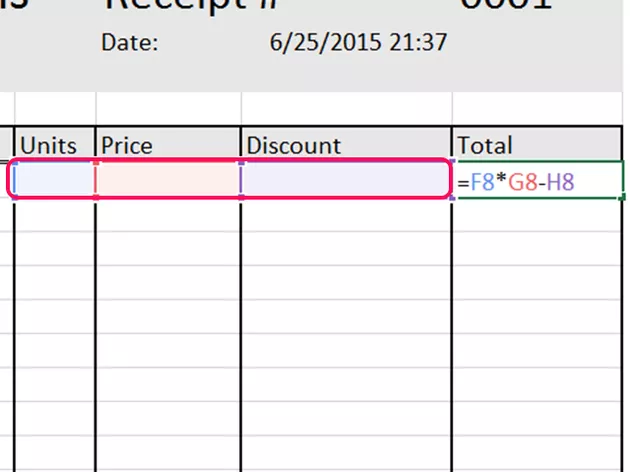
8. Finally, test your receipt by inputting entries into the cells for computation. Once everything is set, Save your work or Print it for distribution.

In need of a simple, easy, and effective way to communicate with your customers? If so, then a flyer made…
![How to Make/Create a Receipt in Microsoft Word [Templates + Examples] 2023](https://images.template.net/wp-content/uploads/2021/09/How-to-Make-a-Receipt-on-Word-788x428.jpg)
Receipt templates are important documents used as proof of sale or to transfer ownership from one party to another. Business…
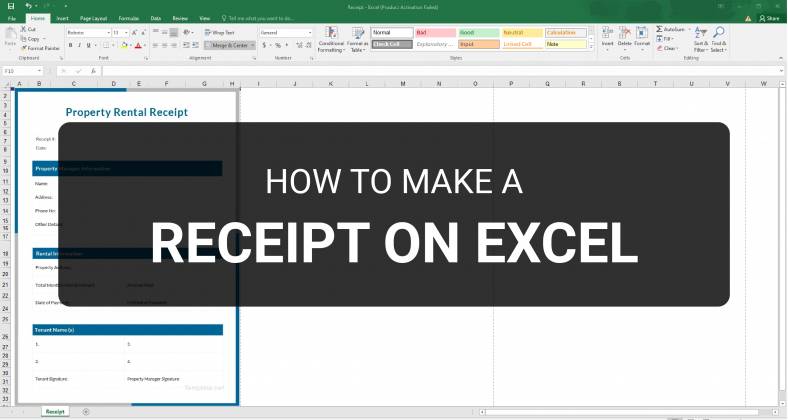
Receipts are necessary documents for selling merchandise or services to clients. These pieces of paper are proof of financial transactions…
![How to Make/Create a Lesson Plan Template in Microsoft Word [Templates + Examples] 2023](https://images.template.net/wp-content/uploads/2021/09/How-to-Create-a-Lesson-Plan-Template-in-Word-788x429.jpg)
A lesson plan as its name suggests is a detailed description of the lessons that a learning instructor aims to…
![How to Make/Create a Mind Map in Microsoft Word [Templates + Examples] 2023](https://images.template.net/wp-content/uploads/2021/09/How-to-Make-a-Mind-Map-in-Microsoft-Word-Step-1.jpg)
A mind map is a visual representation of interconnected ideas showing the relationship between each concept. Mind mapping is used…
![How to Make/Create a Schedule in Microsoft Word [Templates + Examples] 2023](https://images.template.net/wp-content/uploads/2021/09/How-To-Create_Build-a-Schedule-in-Microsoft-Word-788x443.jpg)
Schedules are important tools for time management that can be used by individuals and organizations alike. This provides users with…
![How to Make/Create a Family Tree in Google Docs [Templates + Examples] 2023](https://images.template.net/wp-content/uploads/2021/09/How-To-Create_Build-a-Family-Tree-in-Google-Docs-788x443.jpg)
A family tree is a type of visual structure that shows the relationship between one individual to another. It is…
Most people would list family as one of their top priorities in life. Some take their heritage or genealogy seriously…
Planners enable people to prioritize and organize their days and routines. From weekly calendars, budget planners, to meal plans, it…