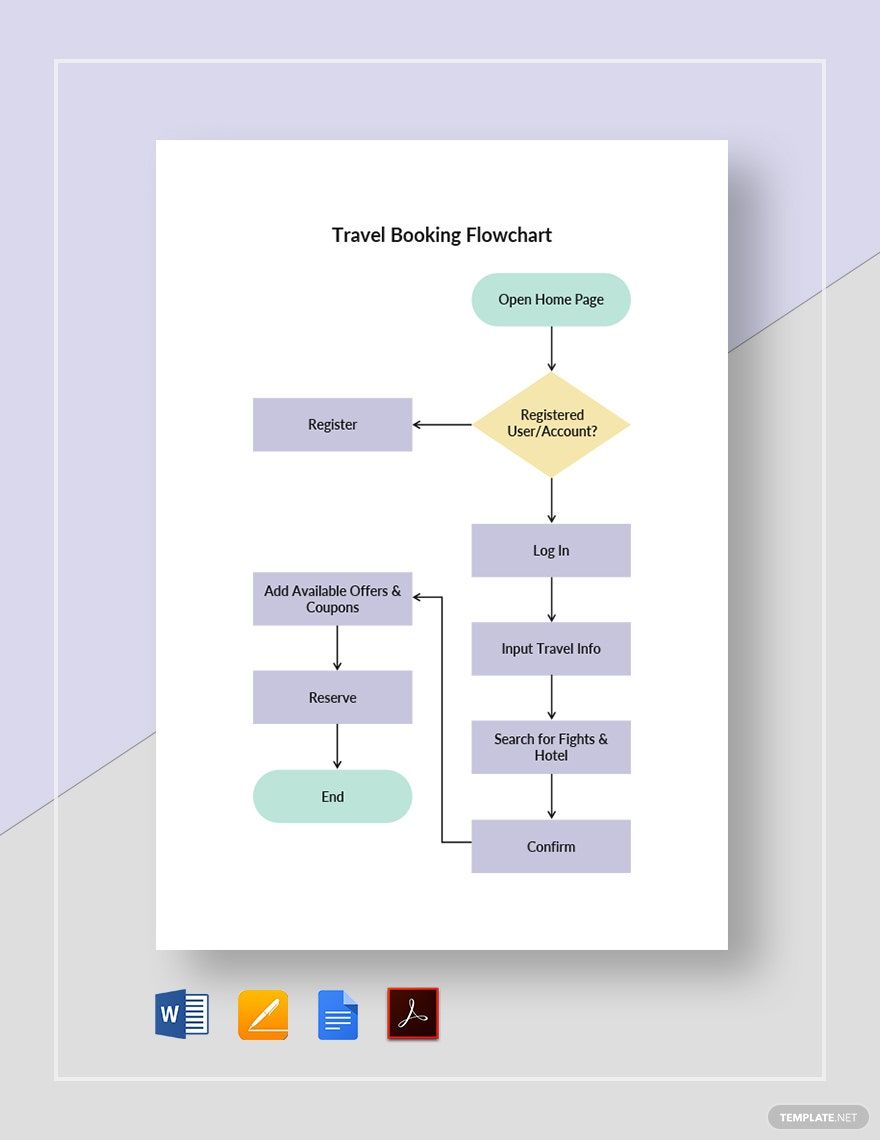
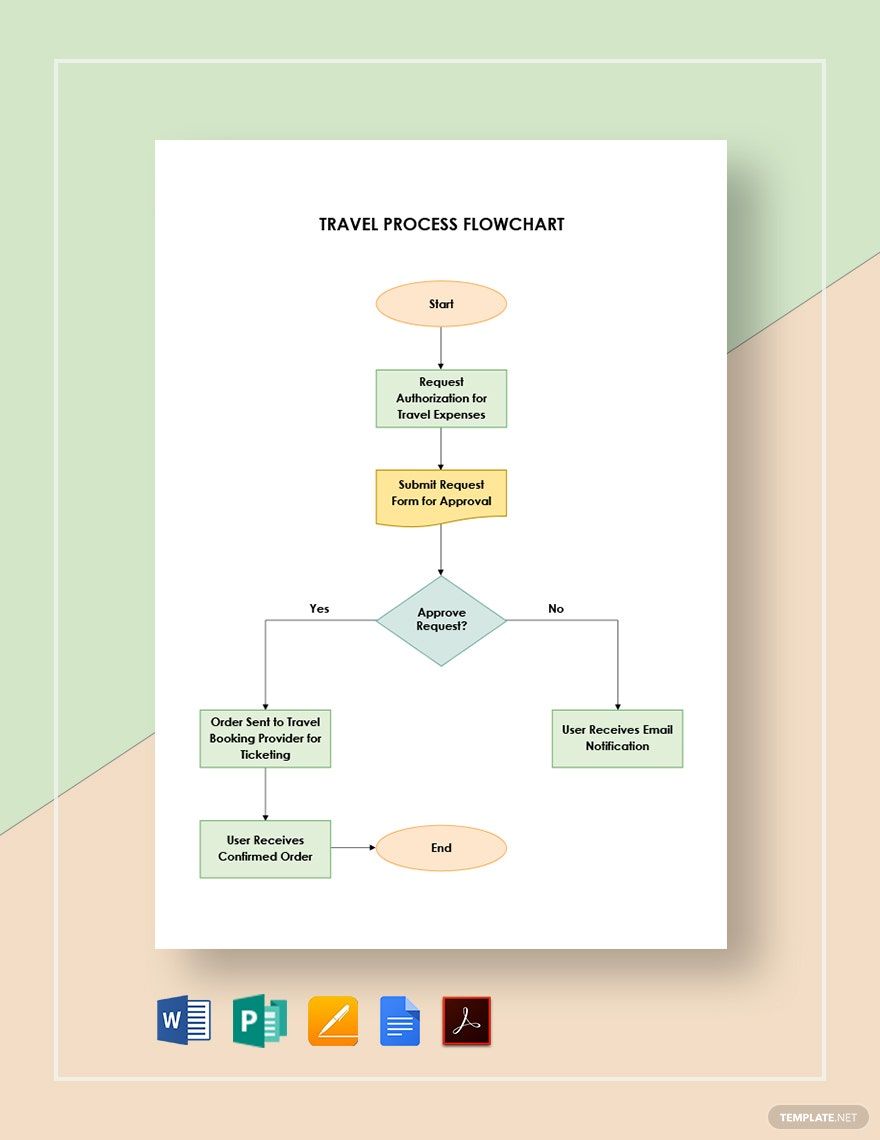
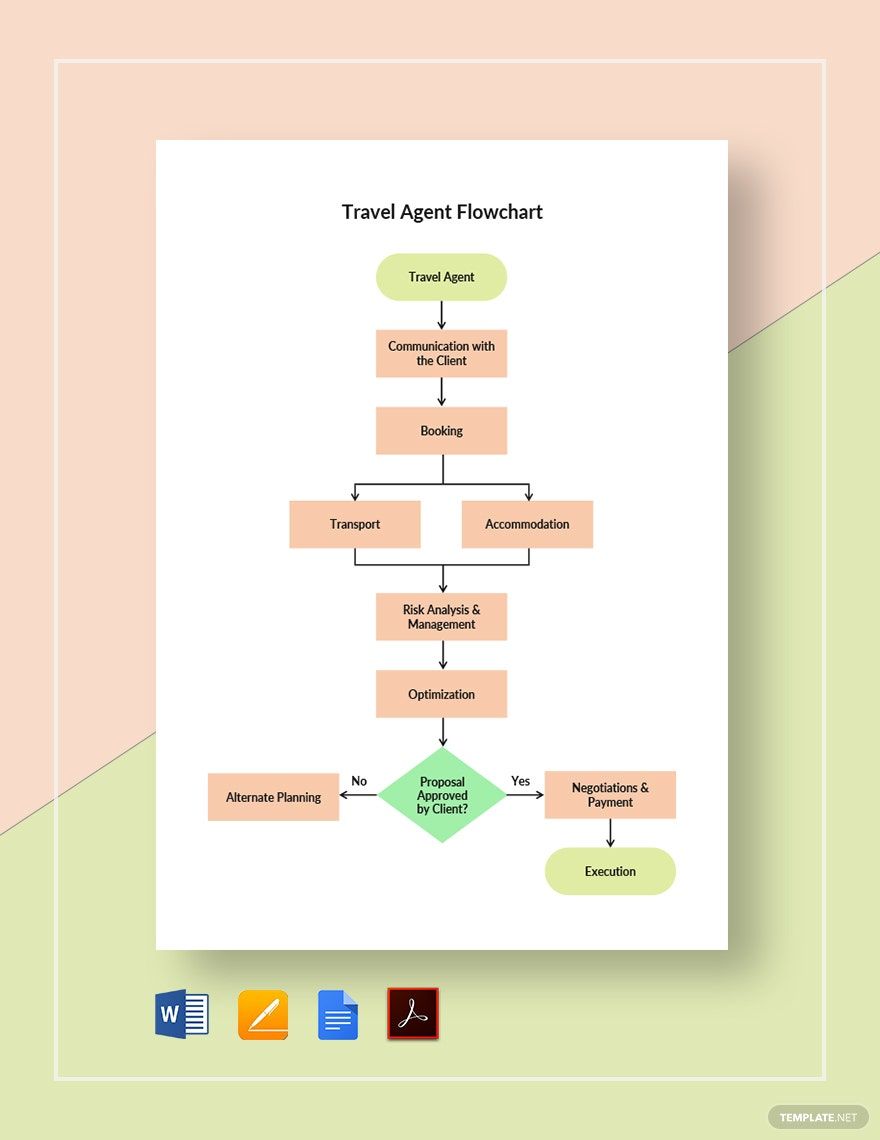
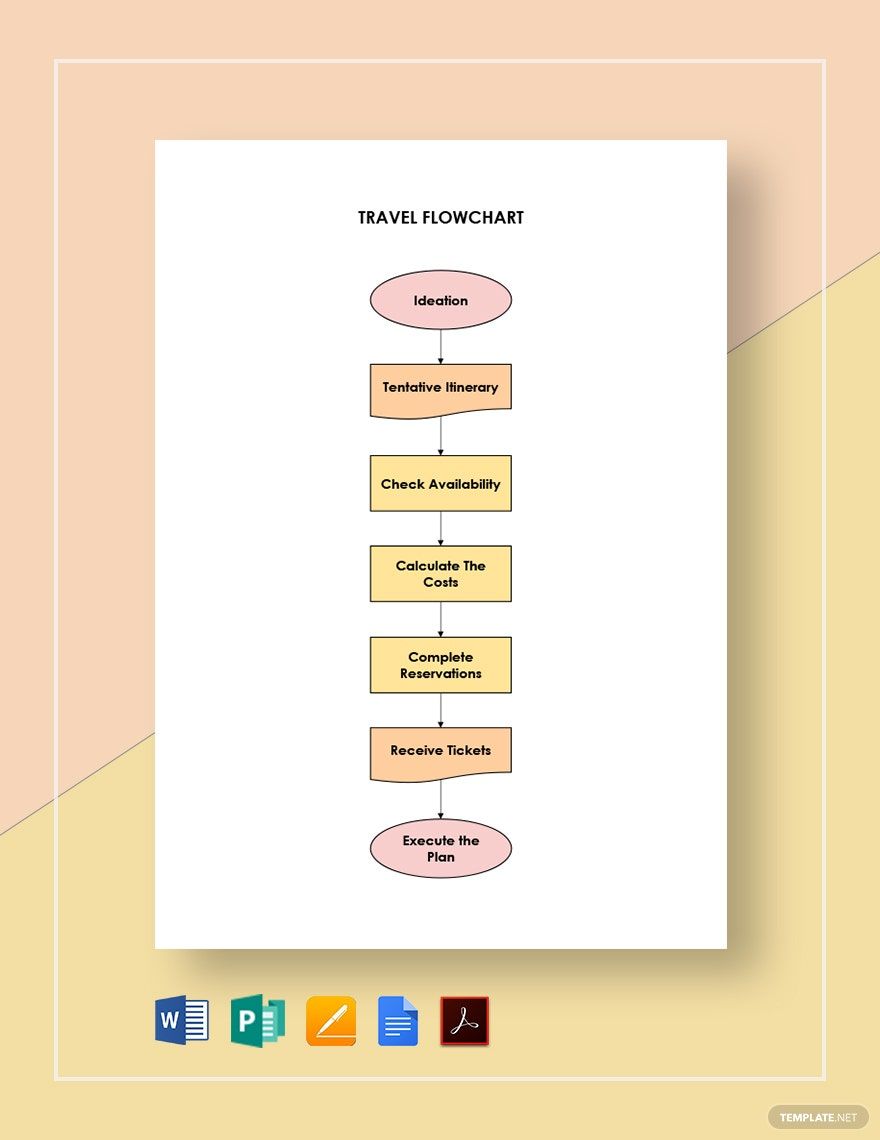
Over time, employees can secure travel bookings outside the premise of their organization. But little did you know, it could also prompt several risks and troubles. That’s why companies must implement a strict policy for their organization. But more than that, they also deploy the same rigorous procedure when it comes to travel plans. To help you cut travel costs and avoid poor travel management, we offer Ready-Made Travel Flow Chart Templates in Apple Pages. All files are available in A4 and US Letter sizes. Enforce the right travel policies by following the right step by step procedure. So, download our templates today!
How to Create a Travel Flowchart in Apple Pages
Traveling does not only cater to provide relaxation during vacation, but there are business travels that help you meet potential clients and increase your market. Over the decade, it is evident that there are reasons how traveling helps entrepreneurs. As this type of situation continues to go higher every year, it is expected to impact travel management. Different challenges could arise without a proper travel management workflow. From flight booking to the airport up to your tour, you will need to make sure that your plans will go accordingly.
Whenever you find it crucial for your company to go on a corporate trip, make sure to implement a travel policy. The process of travel planning is easy, but it’s another story when you create a structure for it. In making sure you avoid last-minute chaos within your organization, below are the steps that will help you create a travel flowchart in Apple Pages.
1. Determine the Purpose
There are several reasons why you need to create a corporate travel workflow. There is a travel request, travel reimbursement, and many more. So, always start by knowing what the purpose is. Keep in mind that your goal will impact the later steps. So, to make sure that you are creating the exact process, start writing down notes. Do your research and plan with your team later on.
2. Map It Out
Once you are done acquiring enough information, start visualizing the process. In using a Mac, you can either do it from scratch or prepare a ready-made template. There are lesser instructions to follow when you download a travel flowchart from our website. You need to download and customize it. Aside from that, it saves time. So, launch your Apple Pages. Set a new document, but make sure to use the preformatted template of your choice. You can see it from the My Templates category in your application.
3. Input the Steps
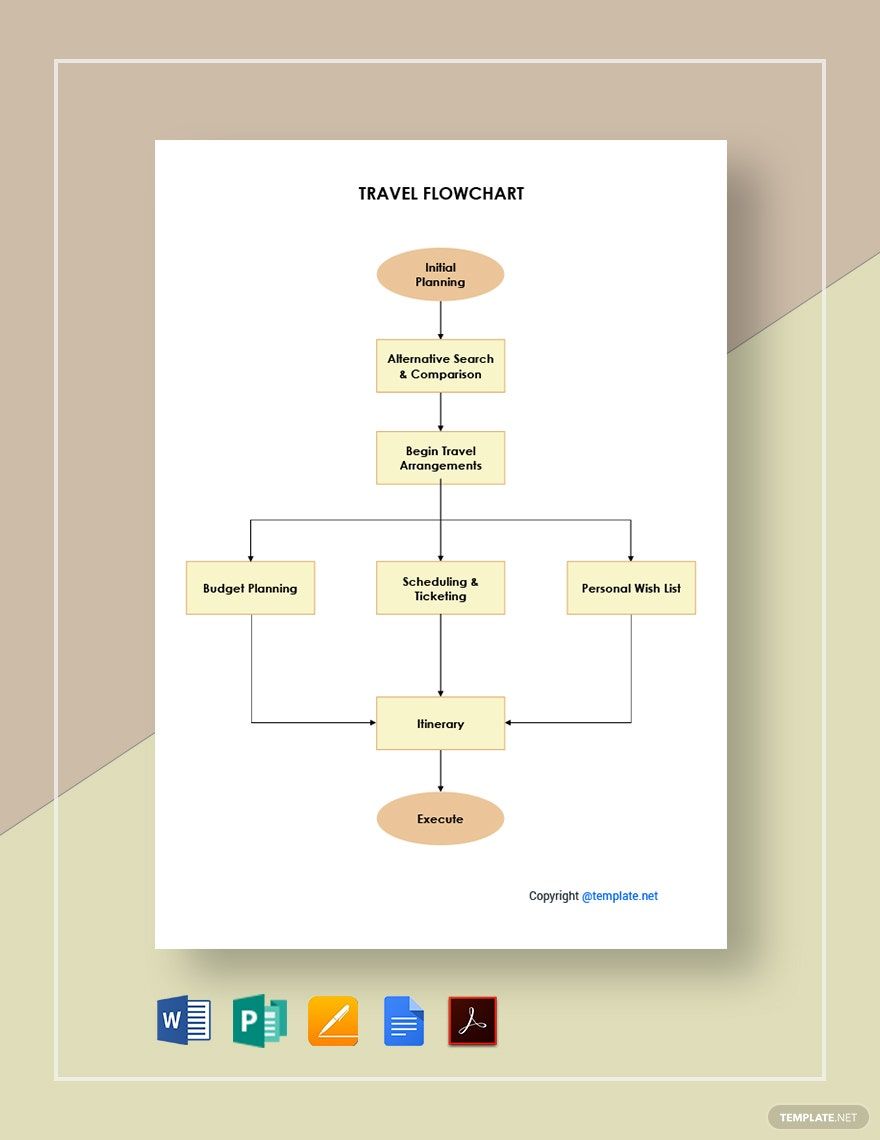
If your template is ready, you will need to input a step by step guide. Don’t hesitate to work with your team. Or, grab your notes and create a list of steps out from the information you gathered. Take for example, the travel management process flow should start with the initial planning. It is followed by search and comparison. Then that is the time you should begin with the travel arrangements. The rest of the steps will follow accordingly. Do this in Pages by clicking the Text button from the Basic Category. Once the box appears, drag it to where you want the text to be.
4. Incorporate Other Elements
It’s not enough to write down the steps, but you have to connect them accordingly. Do this by using lines or arrow connectors. Make sure that the direction is understandable. The flow should run from top to bottom or left to right, and not the other way around. It needs to follow the exact business operation process. For designs, it’s alright to play with colors. But remember to keep a simple chart.
5. Recheck and Deploy
To recheck your chart correctly, ask someone from your company to do it for you. Check if the shapes have the proper label and sequence. When rechecking is done, you can finally save and print your document. You can start implementing a more accurate travel process flow. Don’t forget to save a file you can update in the future.
