How to Calculate Margin of Error in Microsoft Excel
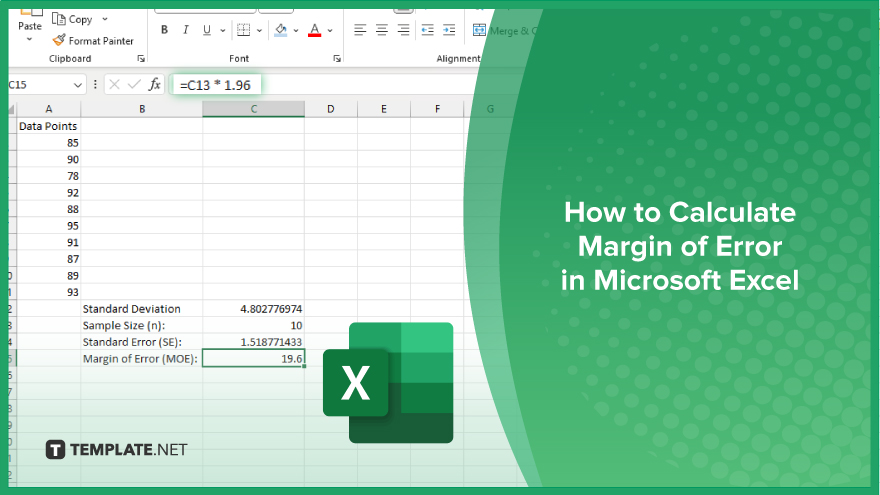
Microsoft Excel simplifies the process of calculating the margin of error, enabling you to measure the accuracy of your statistical…
Jun 11, 2024


Jan 19, 2024
Microsoft Excel offers versatile features, including the ability to define custom paper sizes for your spreadsheets. This guide provides a clear process for setting up your documents to print exactly as needed.

Customizing the paper size for your Excel printouts is a valuable skill, especially when you need to fit your data onto a specific paper size. This straightforward guide will help you navigate through the process, making it easy for anyone to follow.

To start, open the Excel worksheet you wish to print. Click on the “File” tab and select “Print.” In the print settings, find and click on the “Page Setup” link. This opens the “Page Setup” dialog box where you’ll see a “Paper” tab. Here, choose the “Custom Size” option from the “Paper Size” dropdown menu. You can then enter the dimensions for the width and height of your desired paper size. After entering these values, click “OK” to save your settings. Excel will remember this custom size for future print jobs unless you change it again. It’s essential to keep in mind that the steps can slightly vary depending on your Excel version and operating system.
While setting a custom paper size in Excel, remember to check your printer’s capabilities first. Not all printers support every paper size, so it’s crucial to ensure your printer can handle the size you want. Another important aspect is the scaling of your data. Changing the paper size might automatically adjust the scale, potentially making your data appear smaller or larger than expected. To control this, manually adjust the scale in the “Page Setup” dialog box. Finally, think about the page orientation. Excel offers portrait and landscape options, and the choice you make can significantly impact how your data fits on the page. Portrait orientation is taller than it is wide, suitable for most text-heavy documents, while landscape is wider and works well for spreadsheets with wider columns.
You may also find valuable insights in the following articles offering tips for Microsoft Excel:
Go to ‘File’ > ‘Print’ > ‘Page Setup,’ select the ‘Paper’ tab, choose ‘Custom Size,’ and enter your desired dimensions.
Yes, Excel will retain the custom paper size for subsequent print jobs until you modify it again.
Not necessarily; check your printer’s specifications to ensure it can accommodate the custom size you set in Excel.
Changing the paper size may automatically adjust the scale of your data, making it appear smaller or larger.
Choose between portrait (taller than wide) or landscape (wider than tall) orientation based on how your data best fits the page.

Microsoft Excel simplifies the process of calculating the margin of error, enabling you to measure the accuracy of your statistical…
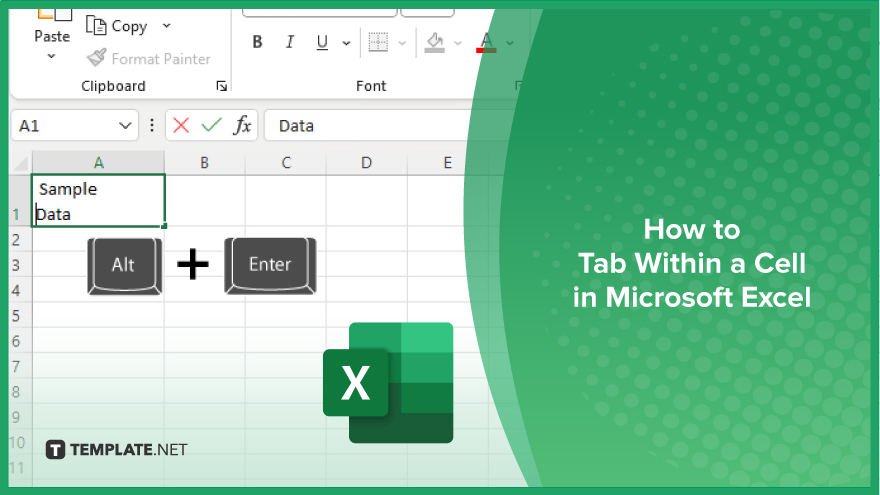
Microsoft Excel users often need to format data within a single cell, and one common requirement is to indent text…
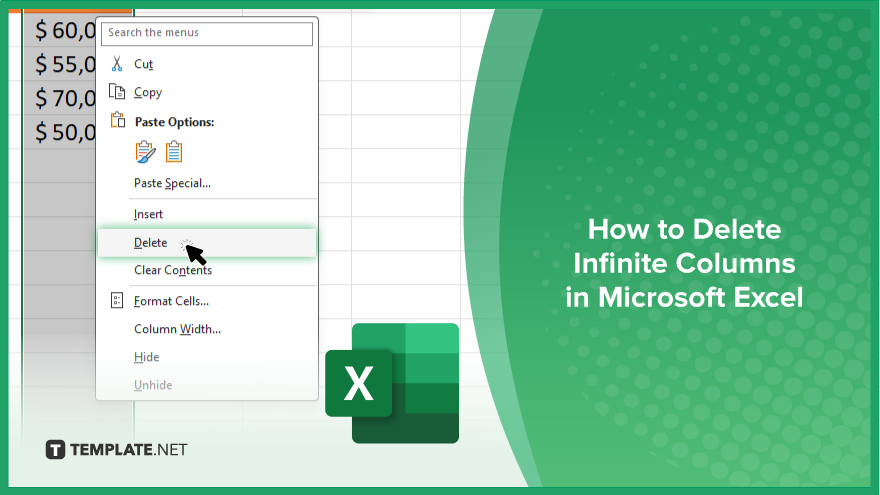
In Microsoft Excel, dealing with infinite columns can be a headache, cluttering your workspace and slowing your workflow.…
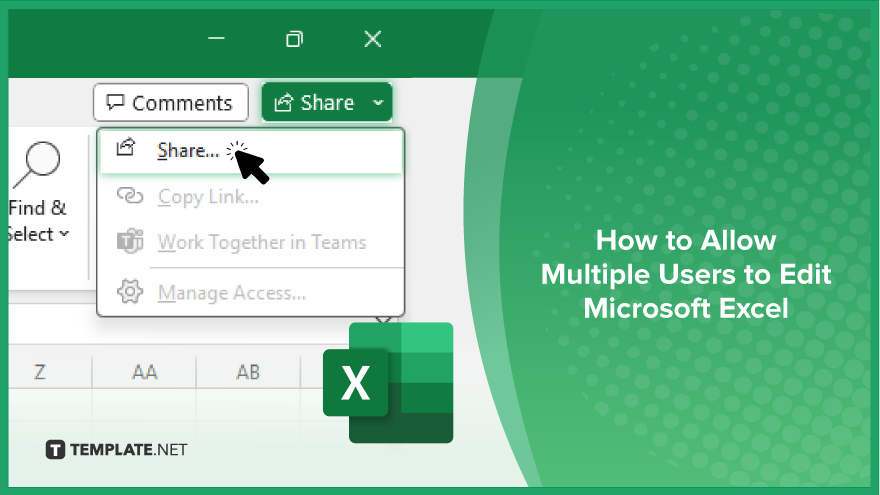
Microsoft Excel revolutionizes teamwork by allowing multiple users to edit spreadsheets simultaneously. This collaborative feature streamlines workflow and boosts productivity…
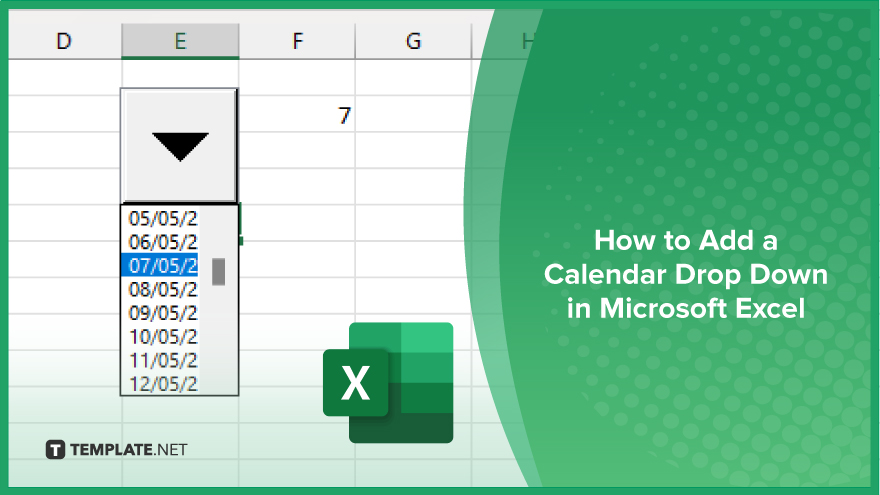
In Microsoft Excel, simplifying data entry just got easier with calendar drop-downs. Learn how to integrate this feature into…
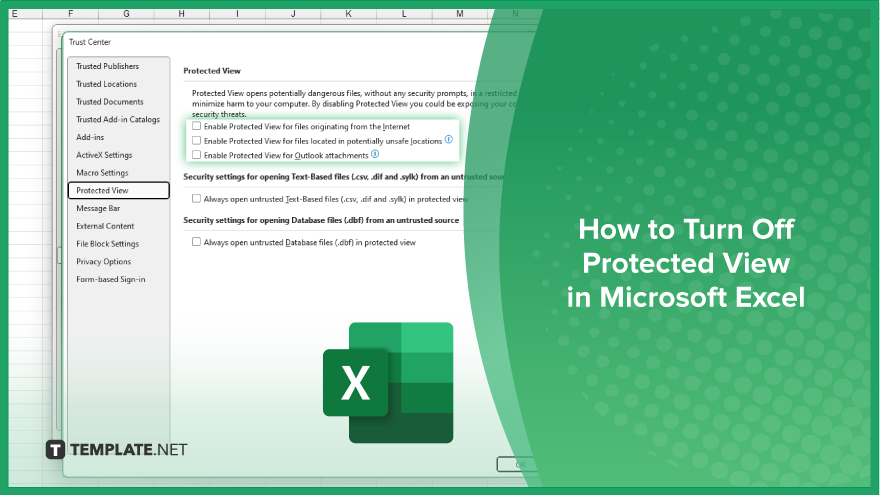
Microsoft Excel users, have you ever encountered the frustration of being unable to edit or interact with a…
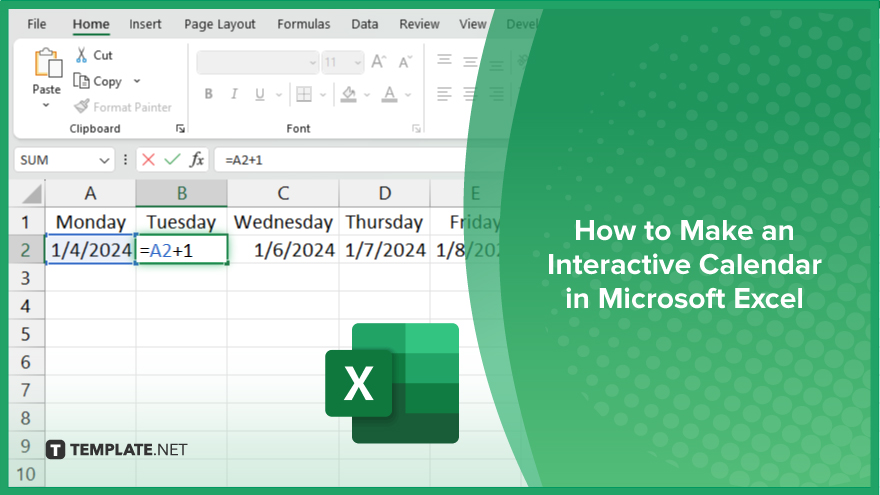
Microsoft Excel is not just for crunching numbers—it can also be transformed into a powerful planning tool by integrating interactive…
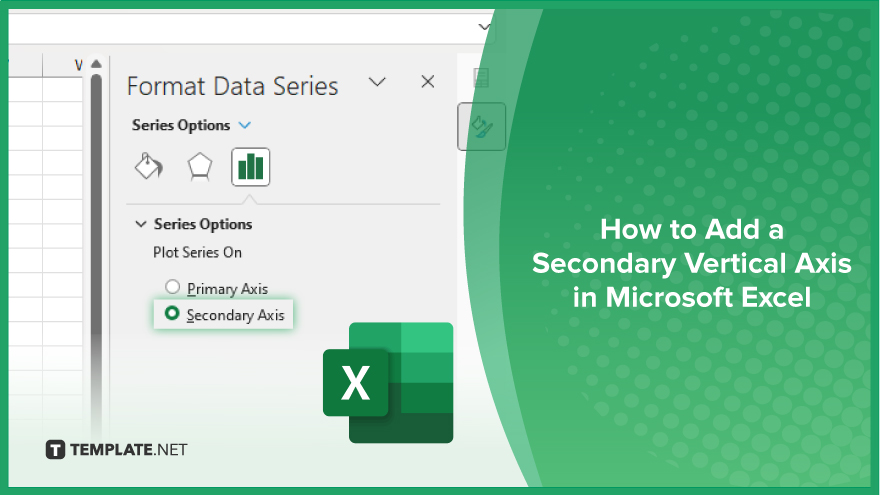
Microsoft Excel users, are you struggling to effectively visualize your data? In this article, we’ll show you how…
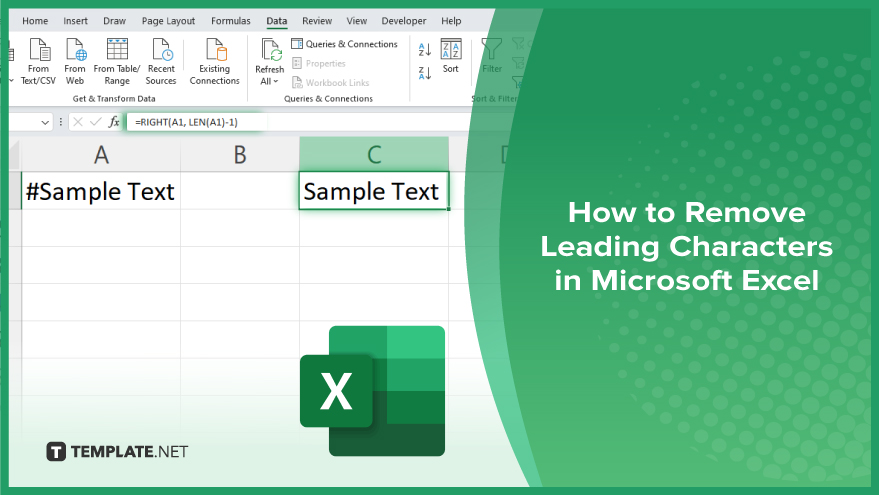
Microsoft Excel provides versatile tools to refine your data, including removing leading characters from cell values. This skill is crucial…