Get Access to World’s largest Template Library & Tools

How to Lock Rows in Microsoft Excel

Microsoft Excel offers a straightforward solution for locking rows, a crucial feature for maintaining data integrity and organization in your spreadsheets. This guide provides step-by-step instructions on how to effectively secure rows in your Excel documents, ensuring that your important data remains unaltered and easily accessible.
How to Lock Rows in Microsoft Excel


  • Step 1. Selecting Rows for Locking

    Initiating the row-locking process in MS Excel begins with selecting the rows you wish to secure. Click on the row number located on the left side of your spreadsheet to select a single row. For multiple contiguous rows, press and hold the Shift key while clicking the row numbers. Alternatively, for non-contiguous rows, use the Ctrl key. This action will highlight the selected rows, preparing them for the locking procedure. Also, you can use the keyboard shortcut to lock cells in Excel.

  • Step 2. Applying the Lock Feature

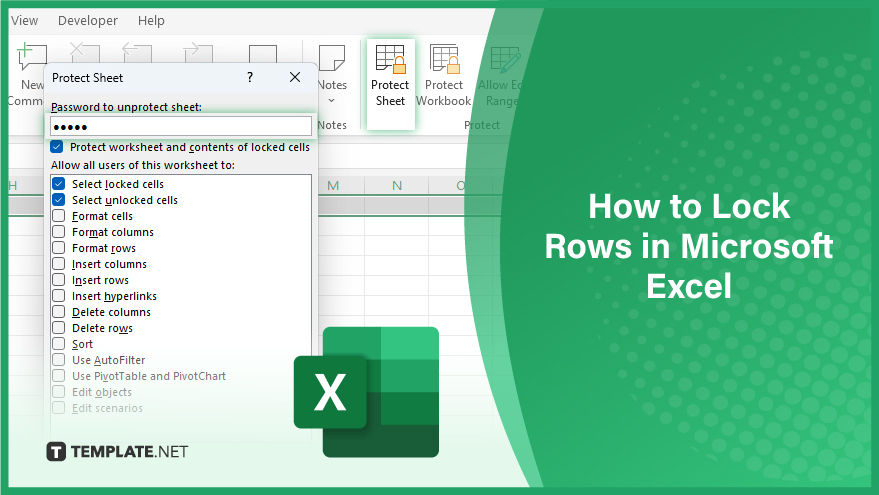
    Once your rows are selected, proceed to apply the lock. Navigate to the ‘Review’ tab on Excel’s ribbon. Here, click on ‘Protect Sheet.’ A dialog box will emerge, prompting you to create a password. This password is crucial as it’s required to unlock the rows later. Enter your chosen password and click ‘OK.’ You will need to re-enter the password for confirmation. After this step, the selected rows become locked, safeguarding them against modifications or deletions without the set password.

You may also find valuable insights in the following articles offering tips for Microsoft Excel:


Step 3. Considerations for Row Locking

Now that you know how to lock rows, it’s important to note a few key points. Locking rows prevents their modification or deletion but does not hide them or restrict selection. To conceal rows, use the ‘Hide Rows’ function. Also, locking rows doesn’t stop the addition of new rows adjacent to them. For comprehensive protection, consider locking the entire worksheet. Remember, the password for unlocking rows is case-sensitive; ‘PASSWORD’ and ‘password’ would be treated differently. Ensure you recall the exact casing of your password.

Step 4. Unlocking Rows in Excel
step

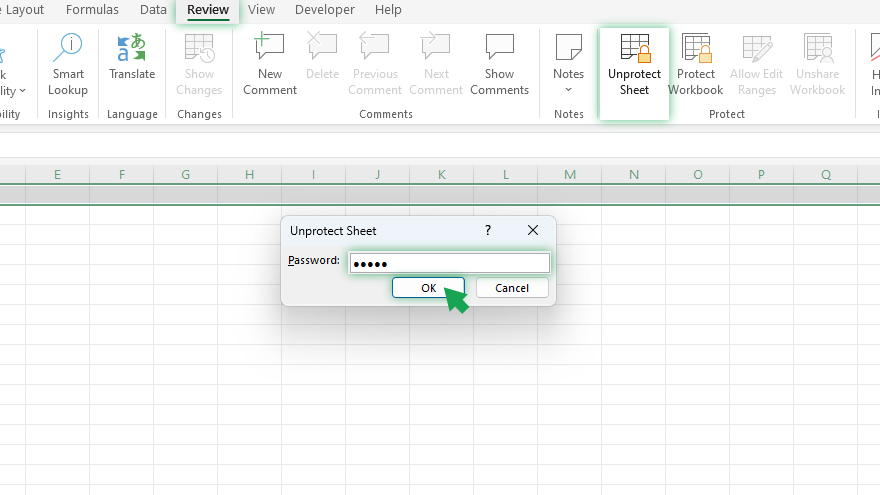
To reverse the lock on rows, return to the ‘Review’ tab and select ‘Unprotect Sheet.’ You’ll be prompted to enter the previously set password. Upon correct entry, the lock is lifted, allowing modifications or deletions once more. Note that this action unlocks all rows in the worksheet. If you need to unlock only specific rows, you must first unlock all rows and then re-apply the lock to those you wish to remain secure.

note iconNote

Unlock Your Productivity with Over 100,000 Microsoft Excel Templates! Exclusively Available at Template.net – Download Now and Transform Your Data Handling Experience!

FAQs

What does locking rows in Microsoft Excel mean?

Locking rows in Excel means securing specific rows to prevent unauthorized editing or deletion.

Can I lock multiple non-contiguous rows in Excel?

Yes, you can lock multiple non-contiguous rows by holding the Ctrl key while selecting them.

Will locking rows in Excel also hide them?

No, locking rows does not hide them; it only prevents editing or deletion.

Is it possible to unlock rows once they are locked?

Yes, locked rows can be unlocked by using the ‘Unprotect Sheet’ option and entering the correct password.

Do I need a password to lock rows in Excel?

A password is required only if you use the ‘Protect Sheet’ feature, which includes the option to lock rows.

More in Excel

How to Freeze a Line in Microsoft ExcelHow to Create If Then in Microsoft Excel
How to Add Text in Microsoft ExcelHow to Return to Normal View in Microsoft Excel
How to Add Secondary X-Axis in Microsoft ExcelHow to Export Google Calendar to Microsoft Excel
How to Calculate R Squared in Microsoft ExcelHow to Select 2 Columns in Microsoft Excel
How to Go to the Next Line in Microsoft Excel CellHow to Insert a Blank Row in Microsoft Excel
How to Format a Microsoft Excel SpreadsheetHow to Do a Multiplication Formula in Microsoft Excel
How to Email an Excel DocumentHow to See Edit History in Microsoft Excel
How to Color Rows in Microsoft ExcelHow to Average Time in Microsoft Excel
How to Add a Header and Footer in Microsoft ExcelHow to Create a Monthly Calendar in Microsoft Excel
How to Lock an Excel Workbook from EditingHow to Custom Sort in Microsoft Excel
How to Do a Waterfall Chart in Microsoft ExcelHow to Remove Line Breaks in Microsoft Excel
How to Unlock Arrow Keys in Microsoft ExcelHow to Create a Monthly Budget in Microsoft Excel
How to Find the Probability in Microsoft ExcelHow to Get Solver in Microsoft Excel
How to Edit a Cell in Microsoft ExcelHow to Pin Columns in Microsoft Excel
How to Remove Scientific Notation in Microsoft ExcelHow to Turn Off Compatibility Mode in Microsoft Excel
How to Edit an Excel SpreadsheetHow to Change Formulas to Values in Microsoft Excel
How to Create a Mailing List in Microsoft ExcelHow to Write Formulas in Microsoft Excel
How to Link a PDF in Microsoft ExcelHow to Add a Comma in Microsoft Excel
How to Create a Project Timeline in Microsoft ExcelHow to Sum Filtered Cells in Microsoft Excel
How to Do a Sum in Microsoft ExcelHow to Combine Data in Two Columns in Microsoft Excel
How to Download a Microsoft Excel SpreadsheetHow to Create Sequential Numbers in Microsoft Excel
How to Edit Named Ranges in Microsoft ExcelHow to Rearrange Rows in Microsoft Excel
How to Make a Graph Using Microsoft ExcelHow to Add Weeks to a Date in Microsoft Excel
How to Create a Line Chart in Microsoft ExcelHow to Add a Regression Line in Microsoft Excel
How to Split Rows in Microsoft ExcelHow to Delete Multiple Tabs in Microsoft Excel
How to Create a Bullet Point in Microsoft ExcelHow to Separate Words in Microsoft Excel
How to Delete a Graph in Microsoft ExcelHow to Sort Cells in Microsoft Excel
How to Merge Duplicates in Microsoft ExcelHow to Calculate Interest in Microsoft Excel
How to Find the Percentage of Two Numbers in ExcelHow to Rename Legends in Microsoft Excel
How to Merge 3 Columns in Microsoft ExcelHow to Combine Two Tables in Microsoft Excel
How to Insert Images in an Excel CellHow to Find Hidden Columns in Microsoft Excel
How to Find Percentiles in Microsoft ExcelHow To Make an Excel Spreadsheet
How to Force Quit Microsoft Excel on WindowsHow to Freeze the First Row and Column in Microsoft Excel
How to Clear a Clipboard in Microsoft ExcelHow to Set the Row Height in Microsoft Excel
How to Delete a Formula in Microsoft ExcelHow To Restore a Previous Version of Excel
How To Find Duplicate Cells in Microsoft ExcelHow To Pivot Tables in Microsoft Excel
How to Do Subtotals in Microsoft ExcelHow to Insert an Object in Microsoft Excel
How to Copy Rows in Microsoft ExcelHow to Get a Sum in Microsoft Excel
How to Put Exponents in Microsoft ExcelHow to Split Information in a Microsoft Excel Cell
How to Duplicate a Tab in Microsoft ExcelHow to Calculate R2 in Microsoft Excel
How to Consolidate Duplicates in Microsoft ExcelHow to Create Collapsible Rows in Microsoft Excel
How to Calculate the Coefficient of Variation in Microsoft ExcelHow to Insert a Microsoft Excel File in Word
How to Save a Microsoft Excel Sheet as PDFHow to Create a Box and Whisker Plot in Microsoft Excel
How to Disable Scroll Lock in Microsoft ExcelHow to Insert a Symbol in Microsoft Excel
How to Remove Minus Sign in Microsoft ExcelHow to Insert an Email into Microsoft Excel
How to Round in Microsoft Excel FormulaHow to Exit Header and Footer in Microsoft Excel
How to Add the Add-Ins in Microsoft ExcelHow to Find Blank Cells in Microsoft Excel
How to Shift Rows Up in Microsoft ExcelHow to Select a Range of Cells in Microsoft Excel
How to Get Solver on Microsoft ExcelHow to Create a Calculated Field in Microsoft Excel
How to Make a Paragraph in Microsoft ExcelHow to Create Mail Merge from Microsoft Excel
bottom banner