


How to Make a Schedule on Microsoft Excel
Microsoft Excel scheduling templates provide a clear guide for organizing your time and tasks, detailing how to structure your agenda with features like task descriptions, timelines, and priority settings. Scheduling in spreadsheets simplifies the process of creating a coherent schedule, ensuring consistency and efficiency in your time management.

How to Make a Schedule on Microsoft Excel
-
1. Initialize Your Schedule Layout
Begin by opening a new Excel workbook. In the first row, label the days of the week, starting from cell B1 and extending rightward. Next, delineate your time slots in the first column, beginning from cell A2 and proceeding downward. For instance, you might start at 8:00 AM and conclude at 5:00 PM, assigning each cell to represent a one-hour interval.
-
2. Populate Your Schedule
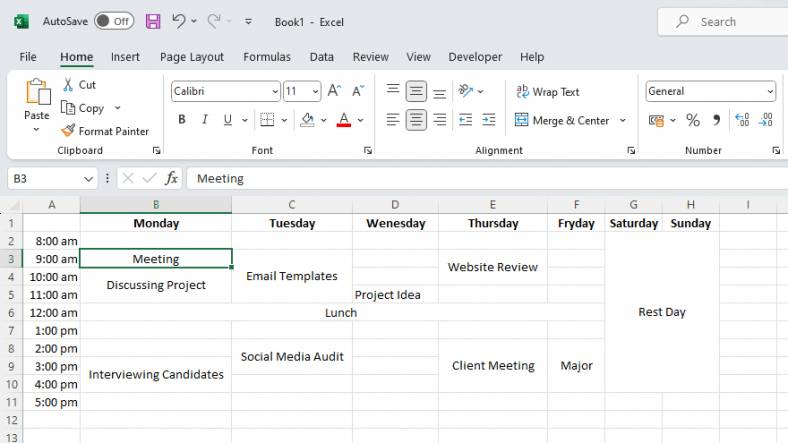
With your framework of time slots and days established, it’s time to fill in your activities. Select a cell corresponding to the desired time and day, and input the relevant activity. For example, to note a recurring 9:00 AM Monday meeting, simply click the cell at the intersection of Monday and 9:00 AM and type “Meeting.”
-
3. Enhance Schedule Readability through Formatting
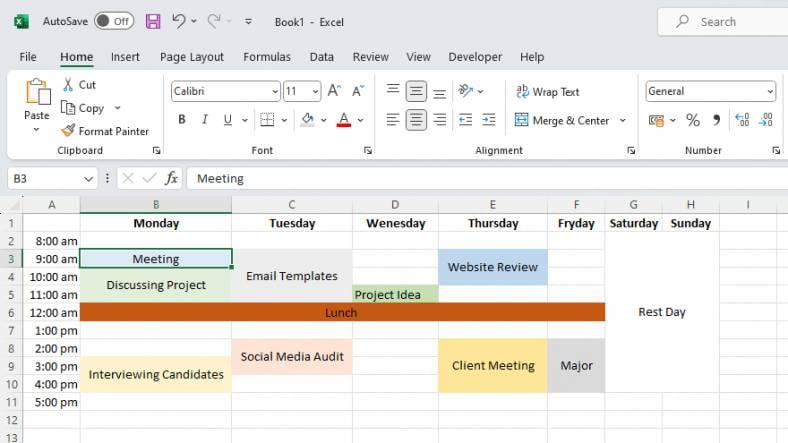
After entering your activities, utilize Excel’s formatting tools to improve readability. You might apply cell shading to differentiate various activity types – for example, distinct colors for work and personal tasks. This visual distinction aids in quick schedule comprehension.
-
4. Implement Conditional Formatting
Conditional formatting is a dynamic tool for automatically styling cells based on their content. For instance, you could set it to highlight all cells containing “Meeting” in red, making these entries stand out. To apply conditional formatting, select your targeted cells, navigate to the ‘Conditional Formatting’ button in the Home tab, and explore options like ‘Highlight Cells Rules’ or ‘Top/Bottom Rules.’
You can also refer to these helpful articles on how to use Excel shortcuts:
5. Integrating Formulas into Your Schedule
Formulas are pivotal for executing calculations on your data. Although not immediately obvious for scheduling, they are invaluable for tracking time allocation across various activities. For example, a formula could sum up weekly hours spent in meetings. To implement this, enter “=SUM(B2:B8)” in a cell, assuming B2 through B8 represents your meeting hours. Study the 5 Simple Ways to Display Formulas in Excel for more tips.
6. Analyzing Data with Pivot Tables
Pivot tables offer a robust means to summarize and scrutinize your scheduling data. They can, for example, calculate the total weekly hours devoted to different activities, providing insights into your time management patterns. To create a pivot table, click the ‘PivotTable’ button under the Insert tab, select your data, and decide on the summary criteria. Don’t forget to access the Pivot Table Shortcut Cheat Sheet for Excel to make the most out of your experience.
FAQs
How do I start creating a schedule in Microsoft Excel?
Begin by opening a new workbook and labeling the days of the week and time slots in the first row and column, respectively.
Can I color-code different types of activities in my Excel schedule?
Yes, use Excel’s cell shading feature to color-code activities for easy differentiation.
Is it possible to automatically highlight certain activities in my schedule?
Apply conditional formatting to automatically highlight specific activities based on your criteria.
How can I use formulas in my Excel schedule?
Formulas in Excel can be used to calculate totals, such as the total hours spent on a type of activity each week.
Can I analyze my schedule data in Excel for better time management?
Yes, pivot tables in Excel are ideal for summarizing and analyzing your schedule data to identify time management patterns.
More in Excel

