Get Access to World’s largest Template Library & Tools

Table of Contents

  1. Build a Basic Timesheet Template in Microsoft Excel – Step-by-Step Instructions
  2. FAQs

How To Make/Create a Basic Timesheet Template in Microsoft Excel

Basic Timesheet templates in Microsoft Excel are among the tools that HR managers and employers handle regularly, providing clear instructions on structuring your time-tracking document. This guide outlines essential elements like employee details, hours worked, and project descriptions, ensuring accuracy and professionalism in your time management efforts.

Build a Basic Timesheet Template in Microsoft Excel – Step-by-Step Instructions

Microsoft Excel makes the basic timesheet creation process as simple as it sounds. If you’re a manager or an HR professional, this guide will show you the most efficient way to prepare timesheets.

  • Step 1: Optimize a Basic Timesheet Template

    step

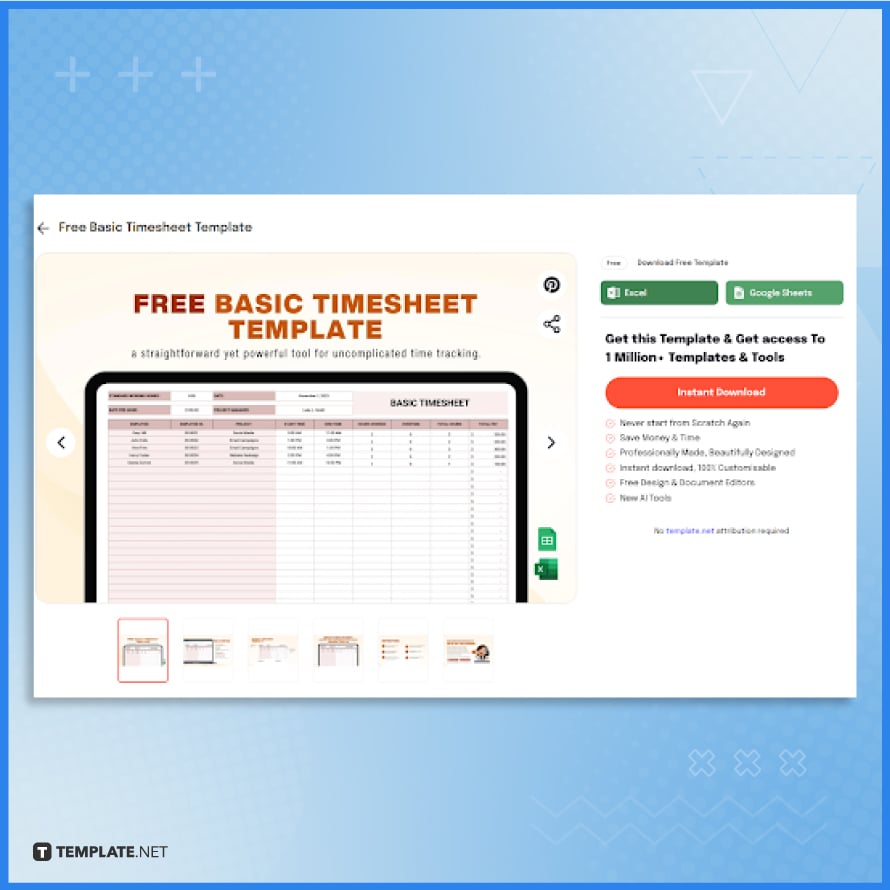
    Visit Template.net and explore their range of timesheet templates. Opt for the Basic Timesheet Template to streamline your role as a timekeeper in your organization. Navigate to its official page on the site to download an editable version.

  • Step 2: Download the MS Excel Format

    step

    To download the template in MS Excel format, simply select the Excel option under the ‘Download Free Template’ section. There’s also a choice for the Google Sheets file format, catering to diverse user preferences.

  • Step 3: Allow Editing

    step

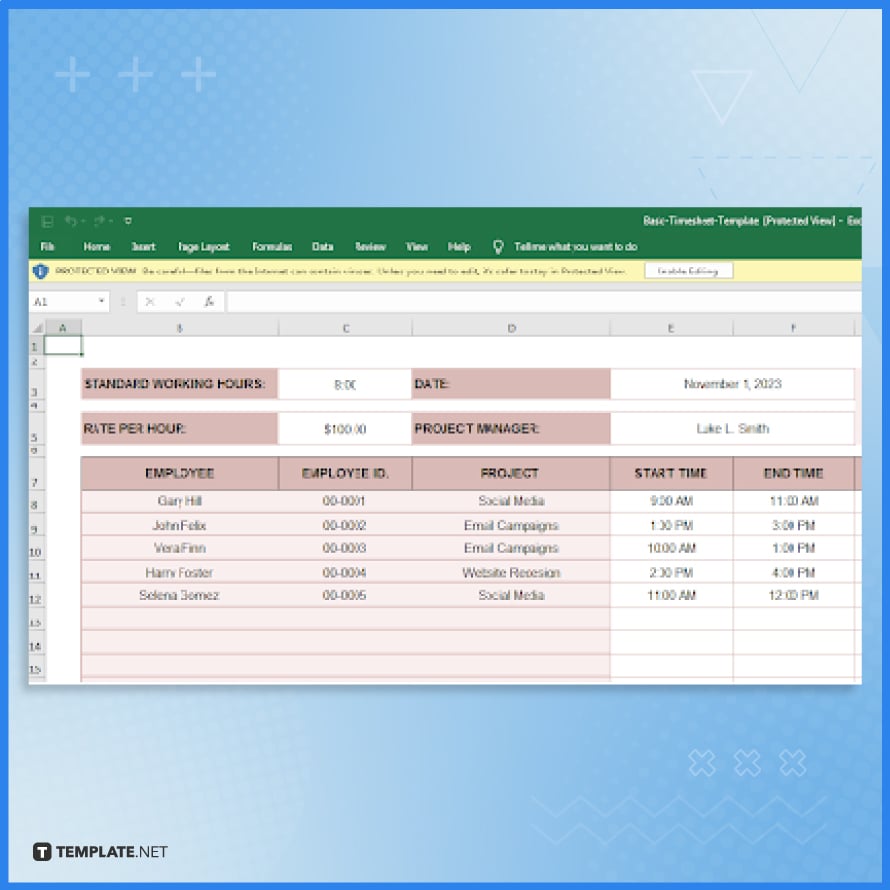
    After downloading, find the Basic Timesheet Template file in your computer’s downloads folder. Open it in Microsoft Excel and click ‘Enable Editing’ to start personalizing the template to your needs.

  • Step 4: Rewrite the Standard Timesheet’s Content
    step

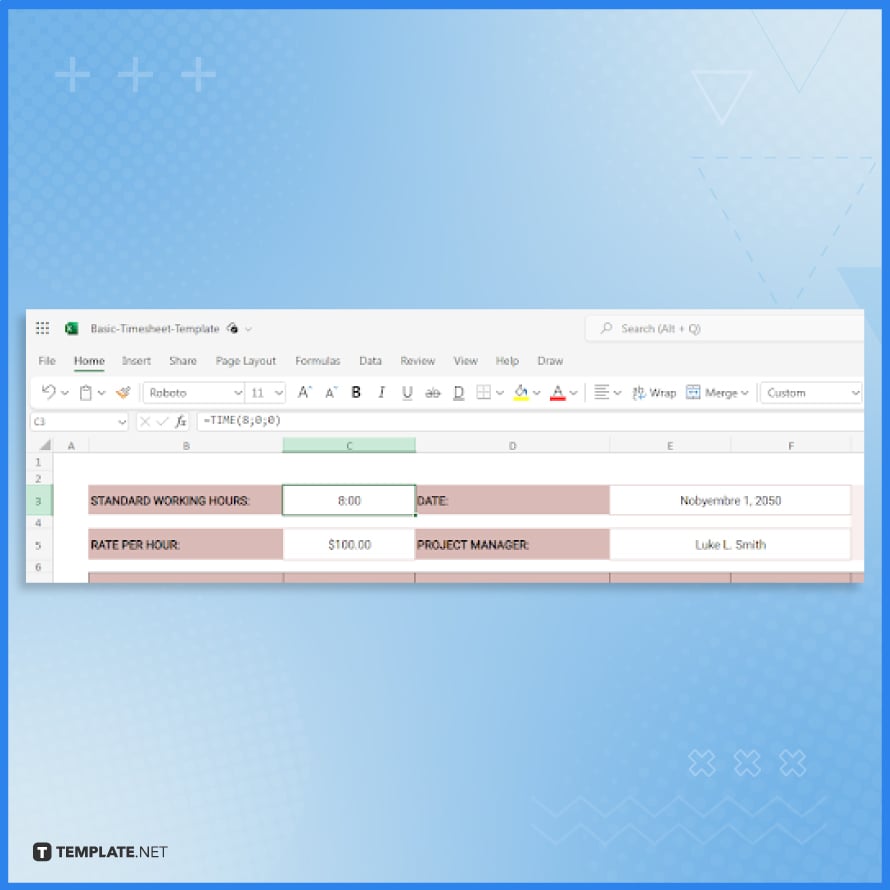
    The template includes designated spaces to fill in standard working hours, date, hourly salary rate, and project manager’s name. Ensure you enter this information accurately. For the salary rate, remember to specify the currency used in your region to avoid any confusion.

  • Step 5: Log the Employee and Project Details
    step

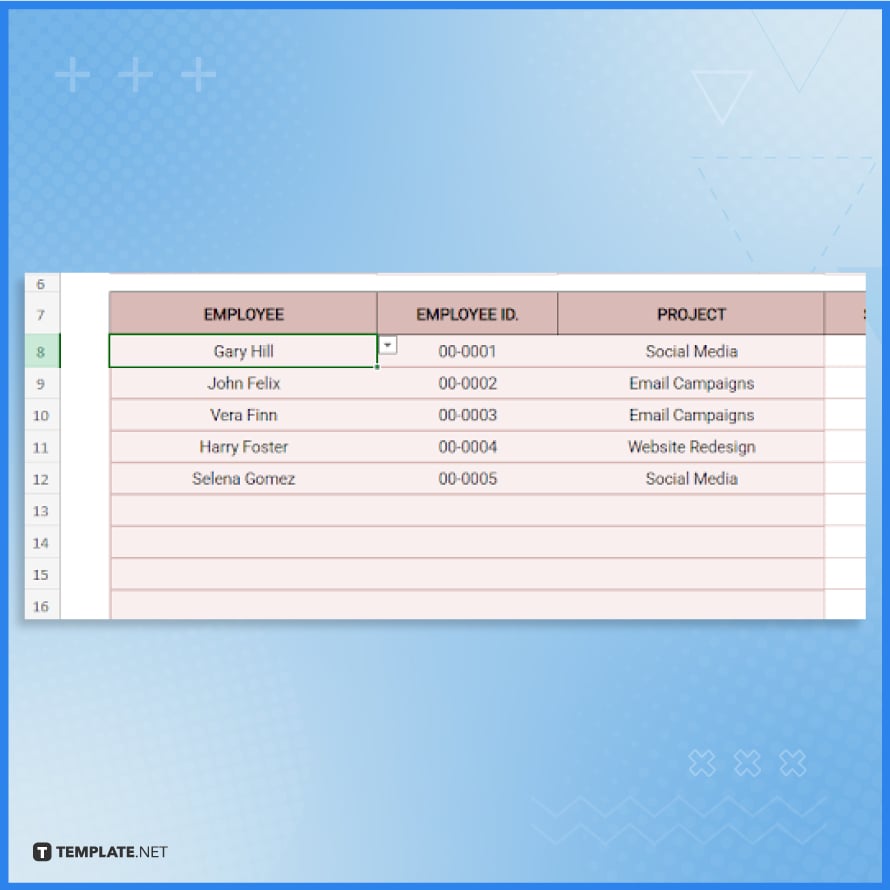
    Incorporate each employee’s full name and a concise description of their daily tasks and assignments into the timesheet. It’s important to also include their employee ID numbers, ensuring that each individual’s information aligns correctly with their respective data.

  • Step 6: Review the Time and Pay Details
    step

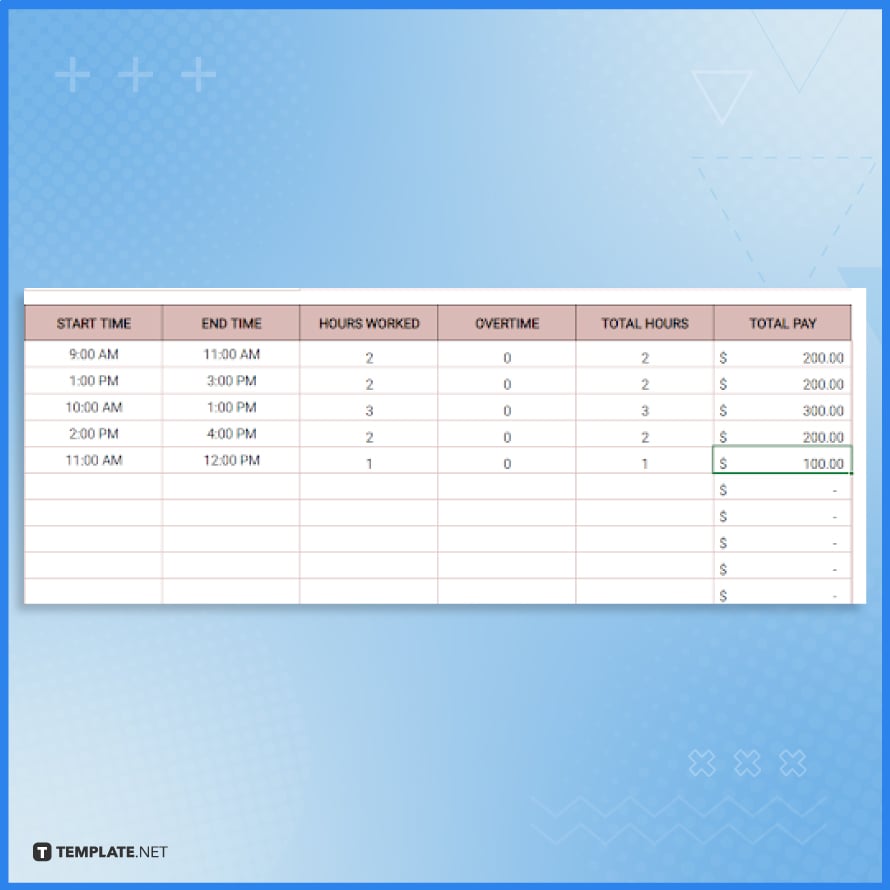
    Enter the precise start and end times in the designated ‘Start Time’ and ‘End Time’ columns. Additionally, record details in the ‘Hours Worked’, ‘Overtime’, ‘Total Hours’, and ‘Total Pay’ sections. Microsoft Excel simplifies this process with automatic calculations, visible in the formula bar of the corresponding cells.

  • Step 7: Edit the Employee Information Table
    step

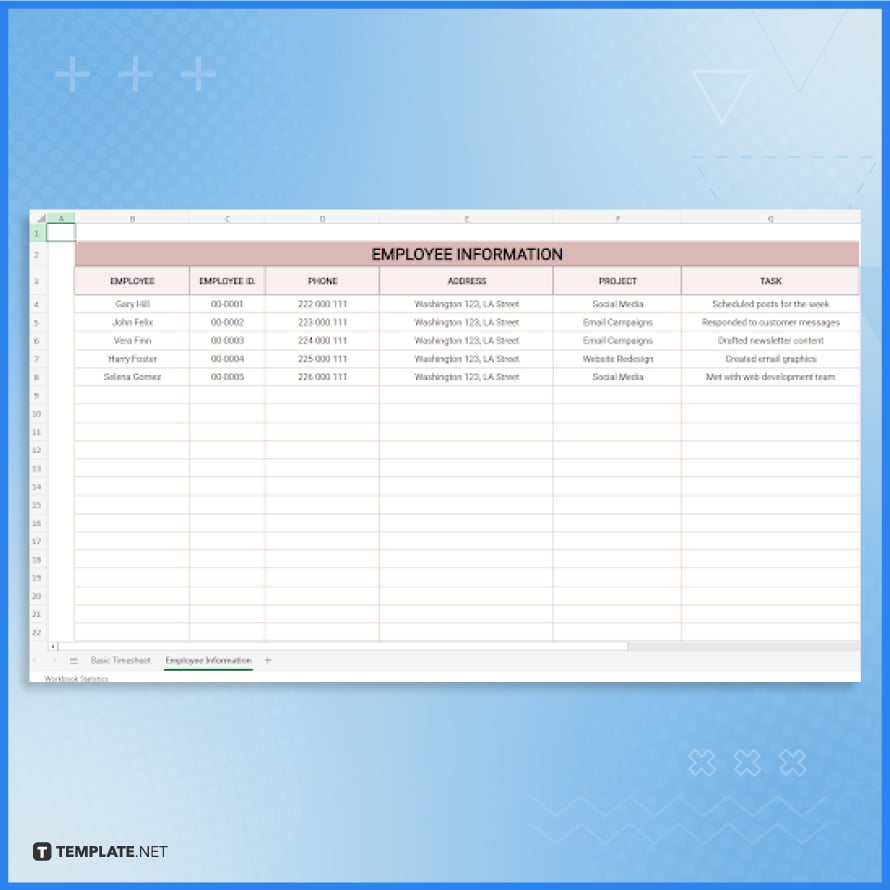
    Another essential component is the Employee Information table, located on a separate tab. This table is organized into columns for Employee Name, Employee ID, Phone, Address, Project, and Task. Simply input the relevant details into the appropriate cells using your keyboard.

  • Step 8: Print the Basic Timesheet Template
    step

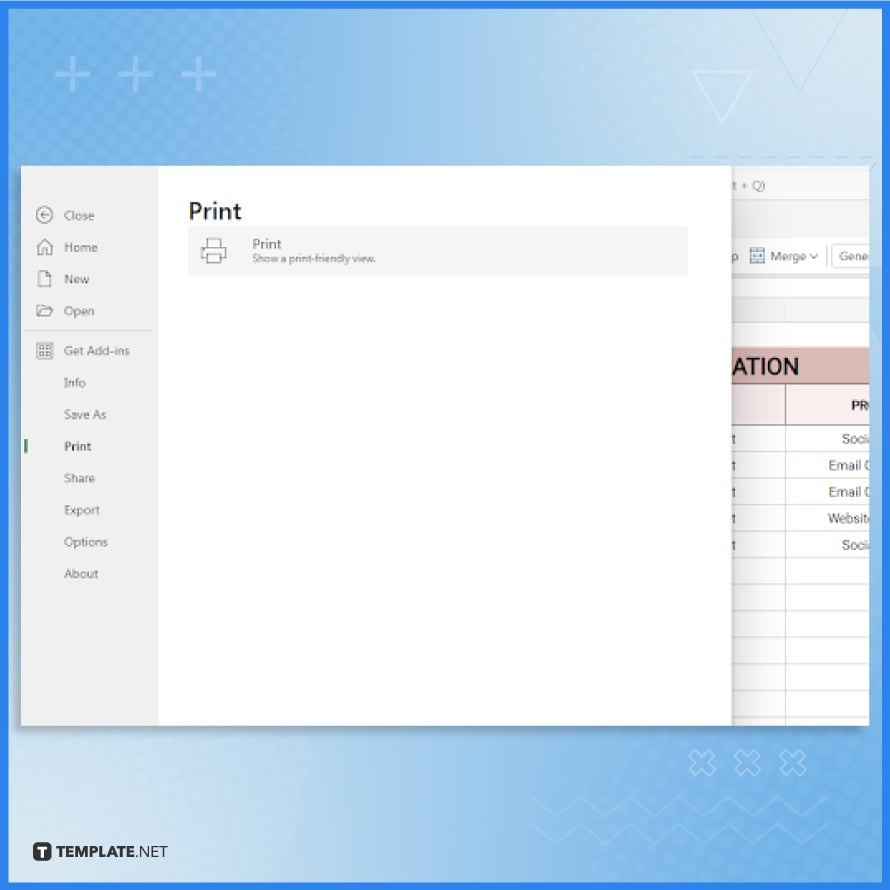
    To save your work, click the ‘File’ menu in MS Excel and select ‘Save’ or ‘Save As’, ensuring the timesheet is stored in your designated work folders. For physical records, you have the option to print copies. Ensure your printer is connected and select the ‘Print’ option for hassle-free documentation.

FAQs

How do I start creating a basic timesheet template in Excel?

Begin by opening a new Excel document and setting up columns for dates, hours worked, and employee details.

Can Excel automatically calculate total hours and overtime in a timesheet?

Yes, Excel can automatically calculate total hours and overtime using simple formulas in the timesheet.

Is it possible to customize the timesheet template for different employees?

Absolutely, you can customize the template for each employee by altering columns and formulas as needed.

How do I save and share the completed timesheet in Excel?

Save your timesheet by clicking ‘File’, then ‘Save As’, and share it via email or cloud storage platforms.

Can I print the Excel timesheet for physical records?

Yes, you can easily print the timesheet by selecting ‘Print’ from the File menu in Excel.

More in Excel

How to Freeze a Line in Microsoft ExcelHow to Create If Then in Microsoft Excel
How to Add Text in Microsoft ExcelHow to Return to Normal View in Microsoft Excel
How to Add Secondary X-Axis in Microsoft ExcelHow to Export Google Calendar to Microsoft Excel
How to Calculate R Squared in Microsoft ExcelHow to Select 2 Columns in Microsoft Excel
How to Go to the Next Line in Microsoft Excel CellHow to Insert a Blank Row in Microsoft Excel
How to Format a Microsoft Excel SpreadsheetHow to Do a Multiplication Formula in Microsoft Excel
How to Email an Excel DocumentHow to See Edit History in Microsoft Excel
How to Color Rows in Microsoft ExcelHow to Average Time in Microsoft Excel
How to Add a Header and Footer in Microsoft ExcelHow to Create a Monthly Calendar in Microsoft Excel
How to Lock an Excel Workbook from EditingHow to Custom Sort in Microsoft Excel
How to Do a Waterfall Chart in Microsoft ExcelHow to Remove Line Breaks in Microsoft Excel
How to Unlock Arrow Keys in Microsoft ExcelHow to Create a Monthly Budget in Microsoft Excel
How to Find the Probability in Microsoft ExcelHow to Get Solver in Microsoft Excel
How to Edit a Cell in Microsoft ExcelHow to Pin Columns in Microsoft Excel
How to Remove Scientific Notation in Microsoft ExcelHow to Turn Off Compatibility Mode in Microsoft Excel
How to Edit an Excel SpreadsheetHow to Change Formulas to Values in Microsoft Excel
How to Create a Mailing List in Microsoft ExcelHow to Write Formulas in Microsoft Excel
How to Link a PDF in Microsoft ExcelHow to Add a Comma in Microsoft Excel
How to Create a Project Timeline in Microsoft ExcelHow to Sum Filtered Cells in Microsoft Excel
How to Do a Sum in Microsoft ExcelHow to Combine Data in Two Columns in Microsoft Excel
How to Download a Microsoft Excel SpreadsheetHow to Create Sequential Numbers in Microsoft Excel
How to Edit Named Ranges in Microsoft ExcelHow to Rearrange Rows in Microsoft Excel
How to Make a Graph Using Microsoft ExcelHow to Add Weeks to a Date in Microsoft Excel
How to Create a Line Chart in Microsoft ExcelHow to Add a Regression Line in Microsoft Excel
How to Split Rows in Microsoft ExcelHow to Delete Multiple Tabs in Microsoft Excel
How to Create a Bullet Point in Microsoft ExcelHow to Separate Words in Microsoft Excel
How to Delete a Graph in Microsoft ExcelHow to Sort Cells in Microsoft Excel
How to Merge Duplicates in Microsoft ExcelHow to Calculate Interest in Microsoft Excel
How to Find the Percentage of Two Numbers in ExcelHow to Rename Legends in Microsoft Excel
How to Merge 3 Columns in Microsoft ExcelHow to Combine Two Tables in Microsoft Excel
How to Insert Images in an Excel CellHow to Find Hidden Columns in Microsoft Excel
How to Find Percentiles in Microsoft ExcelHow To Make an Excel Spreadsheet
How to Force Quit Microsoft Excel on WindowsHow to Freeze the First Row and Column in Microsoft Excel
How to Clear a Clipboard in Microsoft ExcelHow to Set the Row Height in Microsoft Excel
How to Delete a Formula in Microsoft ExcelHow To Restore a Previous Version of Excel
How To Find Duplicate Cells in Microsoft ExcelHow To Pivot Tables in Microsoft Excel
How to Do Subtotals in Microsoft ExcelHow to Insert an Object in Microsoft Excel
How to Copy Rows in Microsoft ExcelHow to Get a Sum in Microsoft Excel
How to Put Exponents in Microsoft ExcelHow to Split Information in a Microsoft Excel Cell
How to Duplicate a Tab in Microsoft ExcelHow to Calculate R2 in Microsoft Excel
How to Consolidate Duplicates in Microsoft ExcelHow to Create Collapsible Rows in Microsoft Excel
How to Calculate the Coefficient of Variation in Microsoft ExcelHow to Insert a Microsoft Excel File in Word
How to Save a Microsoft Excel Sheet as PDFHow to Create a Box and Whisker Plot in Microsoft Excel
How to Disable Scroll Lock in Microsoft ExcelHow to Insert a Symbol in Microsoft Excel
How to Remove Minus Sign in Microsoft ExcelHow to Insert an Email into Microsoft Excel
How to Round in Microsoft Excel FormulaHow to Exit Header and Footer in Microsoft Excel
How to Add the Add-Ins in Microsoft ExcelHow to Find Blank Cells in Microsoft Excel
How to Shift Rows Up in Microsoft ExcelHow to Select a Range of Cells in Microsoft Excel
How to Get Solver on Microsoft ExcelHow to Create a Calculated Field in Microsoft Excel
How to Make a Paragraph in Microsoft ExcelHow to Create Mail Merge from Microsoft Excel
bottom banner