Get Access to World’s largest Template Library & Tools

How To Separate Data in an Excel Cell


Microsoft Excel is an incredibly powerful tool for organizing and analyzing data, and mastering the ability to separate data within a cell is essential for maximizing its utility. Whether you’re dealing with names, addresses, or any other compound information, manage how to divide data into individual components, making it easier to work with and understand.
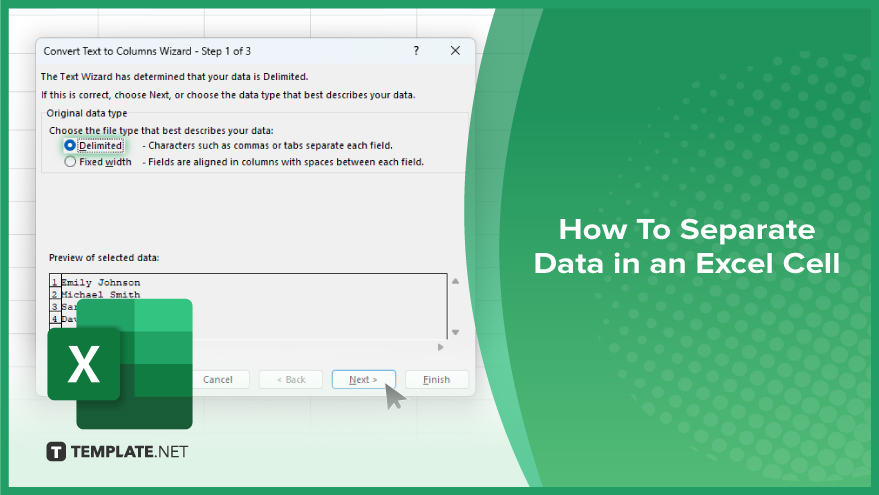
How To Separate Data in an Excel Cell


Efficiently separating data within a single Excel cell into multiple columns is a key skill for data organization, enhancing clarity and analysis capabilities. Follow these steps to master data separation, elevating your Excel proficiency.

  • Step 1. Select the Data Range

    Begin by highlighting the range of cells containing the data you wish to separate in a sheet. Ensure each cell within the range has the data formatted consistently for optimal results.

  • Step 2. Access the Text to Columns Wizard
    step 2 access the text to columns wizard

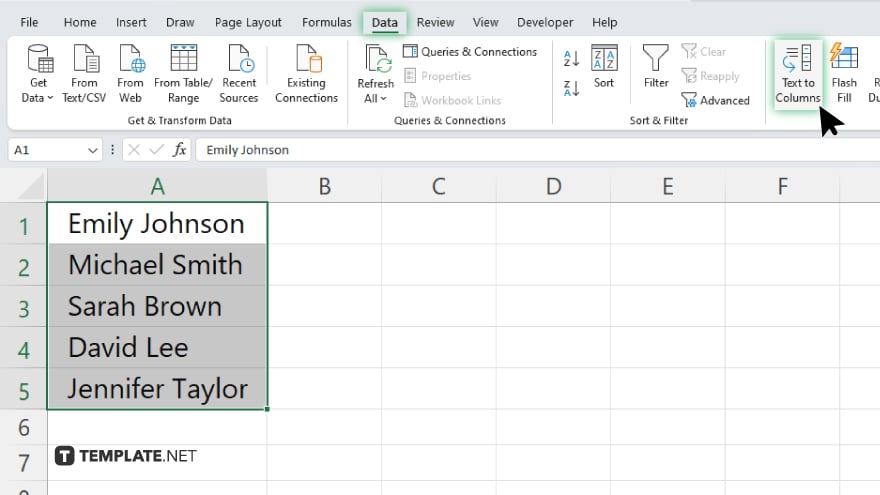
    With your data selected, navigate to the “Data” tab on the Excel ribbon and click “Text to Columns.” This tool is designed to facilitate the separation of data based on specific delimiters.

  • Step 3. Choose Your Data Type

    step 3 choose your data type

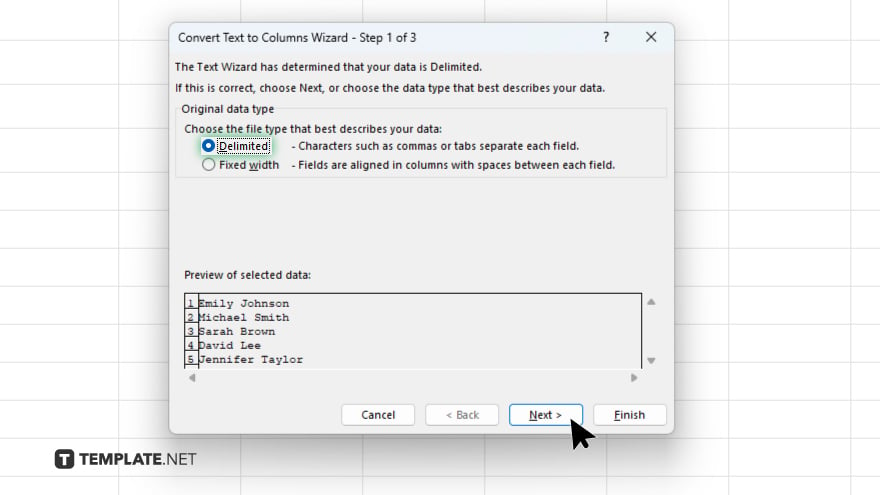
    In the Text to Columns wizard, you’ll be prompted to choose the type of data. Select “Delimited” if your data is separated by characters such as commas, spaces, or tabs. Choose “Fixed width” if the data is aligned in columns with spaces.

  • Step 4. Set Delimiters

    step 4 set delimiters

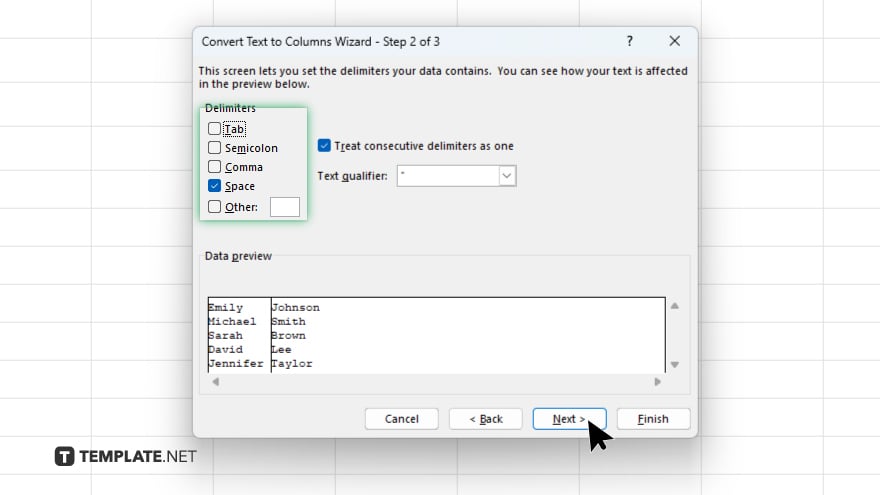
    For delimited data, specify the delimiter(s) that your data uses in the next step of the wizard. Excel will preview how your data will be separated based on the chosen delimiters. For a fixed width, manually set the column breaks in the preview window.

  • Step 5. Finalize the Data Destination

    step 5 finalize the data destination

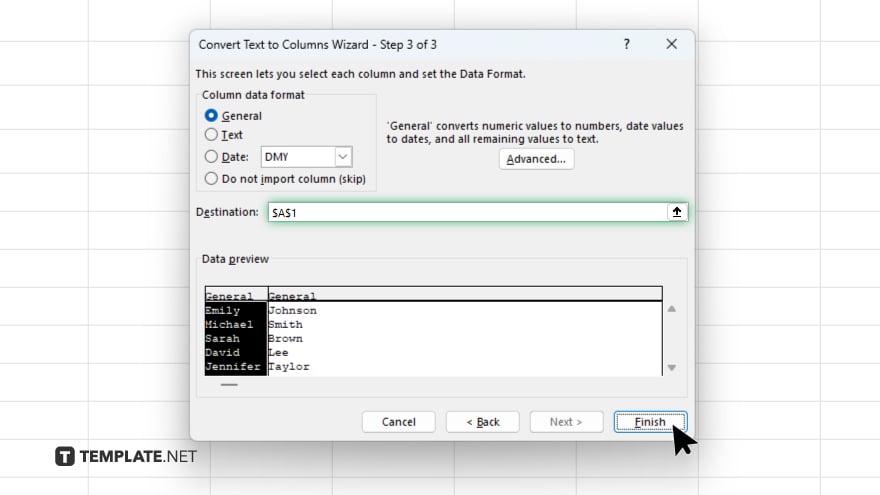
    Select the destination for the separated data, which can be the current column (replacing the original data) or a different location in your worksheet. Ensure you have enough empty columns to the right for the separated data to avoid overwriting existing data.

  • Step 6. Complete the Separation

    step 6 complete the separation

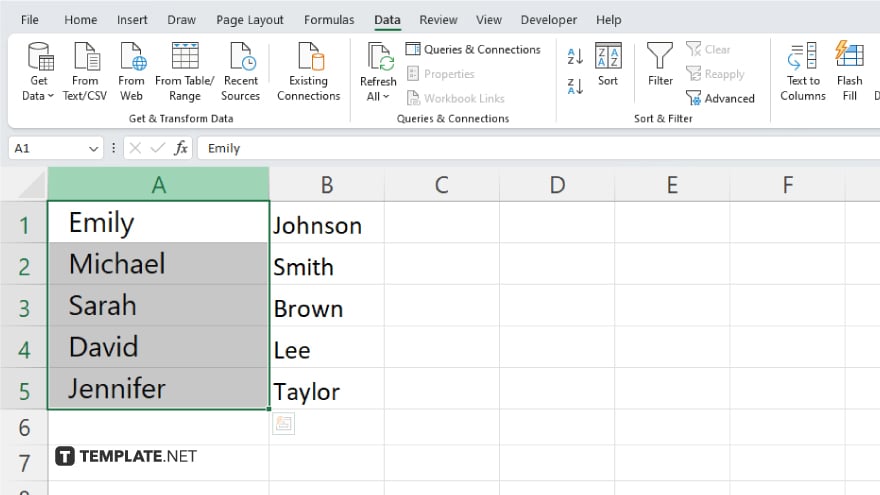
    After configuring your settings, click “Finish.” Excel will separate your selected data into individual columns based on your specified criteria.

You may also find valuable insights in the following articles offering tips for Microsoft Excel:

note iconNote

Unlock Your Productivity with Over 100,000 Microsoft Excel Templates! Exclusively Available at Template.net – Download Now and Transform Your Data Handling Experience!

FAQs

Can I separate data in an Excel cell into different rows instead of columns?

Excel primarily separates data into columns; to place data in rows, you’ll need to transpose the data after separating it into columns.

What if my data uses a delimiter not listed in the Text to Columns options?

You can specify custom delimiters in the Text to Columns wizard by selecting “Other” and entering your delimiter.

Will separating data into multiple columns overwrite existing data?

If there’s data in the columns where separated data will be placed, it will be overwritten unless you specify a new destination.

Can I undo the data separation if I make a mistake?

Yes, you can undo the separation immediately after performing it by using Excel’s Undo feature (Ctrl + Z).

How do I handle cells with different types of delimiters when separating data?

You may need to run the Text to Columns wizard multiple times, each with the appropriate delimiter set, to handle varying delimiters within the same dataset.

More in Excel

How to Freeze a Line in Microsoft ExcelHow to Create If Then in Microsoft Excel
How to Add Text in Microsoft ExcelHow to Return to Normal View in Microsoft Excel
How to Add Secondary X-Axis in Microsoft ExcelHow to Export Google Calendar to Microsoft Excel
How to Calculate R Squared in Microsoft ExcelHow to Select 2 Columns in Microsoft Excel
How to Go to the Next Line in Microsoft Excel CellHow to Insert a Blank Row in Microsoft Excel
How to Format a Microsoft Excel SpreadsheetHow to Do a Multiplication Formula in Microsoft Excel
How to Email an Excel DocumentHow to See Edit History in Microsoft Excel
How to Color Rows in Microsoft ExcelHow to Average Time in Microsoft Excel
How to Add a Header and Footer in Microsoft ExcelHow to Create a Monthly Calendar in Microsoft Excel
How to Lock an Excel Workbook from EditingHow to Custom Sort in Microsoft Excel
How to Do a Waterfall Chart in Microsoft ExcelHow to Remove Line Breaks in Microsoft Excel
How to Unlock Arrow Keys in Microsoft ExcelHow to Create a Monthly Budget in Microsoft Excel
How to Find the Probability in Microsoft ExcelHow to Get Solver in Microsoft Excel
How to Edit a Cell in Microsoft ExcelHow to Pin Columns in Microsoft Excel
How to Remove Scientific Notation in Microsoft ExcelHow to Turn Off Compatibility Mode in Microsoft Excel
How to Edit an Excel SpreadsheetHow to Change Formulas to Values in Microsoft Excel
How to Create a Mailing List in Microsoft ExcelHow to Write Formulas in Microsoft Excel
How to Link a PDF in Microsoft ExcelHow to Add a Comma in Microsoft Excel
How to Create a Project Timeline in Microsoft ExcelHow to Sum Filtered Cells in Microsoft Excel
How to Do a Sum in Microsoft ExcelHow to Combine Data in Two Columns in Microsoft Excel
How to Download a Microsoft Excel SpreadsheetHow to Create Sequential Numbers in Microsoft Excel
How to Edit Named Ranges in Microsoft ExcelHow to Rearrange Rows in Microsoft Excel
How to Make a Graph Using Microsoft ExcelHow to Add Weeks to a Date in Microsoft Excel
How to Create a Line Chart in Microsoft ExcelHow to Add a Regression Line in Microsoft Excel
How to Split Rows in Microsoft ExcelHow to Delete Multiple Tabs in Microsoft Excel
How to Create a Bullet Point in Microsoft ExcelHow to Separate Words in Microsoft Excel
How to Delete a Graph in Microsoft ExcelHow to Sort Cells in Microsoft Excel
How to Merge Duplicates in Microsoft ExcelHow to Calculate Interest in Microsoft Excel
How to Find the Percentage of Two Numbers in ExcelHow to Rename Legends in Microsoft Excel
How to Merge 3 Columns in Microsoft ExcelHow to Combine Two Tables in Microsoft Excel
How to Insert Images in an Excel CellHow to Find Hidden Columns in Microsoft Excel
How to Find Percentiles in Microsoft ExcelHow To Make an Excel Spreadsheet
How to Force Quit Microsoft Excel on WindowsHow to Freeze the First Row and Column in Microsoft Excel
How to Clear a Clipboard in Microsoft ExcelHow to Set the Row Height in Microsoft Excel
How to Delete a Formula in Microsoft ExcelHow To Restore a Previous Version of Excel
How To Find Duplicate Cells in Microsoft ExcelHow To Pivot Tables in Microsoft Excel
How to Do Subtotals in Microsoft ExcelHow to Insert an Object in Microsoft Excel
How to Copy Rows in Microsoft ExcelHow to Get a Sum in Microsoft Excel
How to Put Exponents in Microsoft ExcelHow to Split Information in a Microsoft Excel Cell
How to Duplicate a Tab in Microsoft ExcelHow to Calculate R2 in Microsoft Excel
How to Consolidate Duplicates in Microsoft ExcelHow to Create Collapsible Rows in Microsoft Excel
How to Calculate the Coefficient of Variation in Microsoft ExcelHow to Insert a Microsoft Excel File in Word
How to Save a Microsoft Excel Sheet as PDFHow to Create a Box and Whisker Plot in Microsoft Excel
How to Disable Scroll Lock in Microsoft ExcelHow to Insert a Symbol in Microsoft Excel
How to Remove Minus Sign in Microsoft ExcelHow to Insert an Email into Microsoft Excel
How to Round in Microsoft Excel FormulaHow to Exit Header and Footer in Microsoft Excel
How to Add the Add-Ins in Microsoft ExcelHow to Find Blank Cells in Microsoft Excel
How to Shift Rows Up in Microsoft ExcelHow to Select a Range of Cells in Microsoft Excel
How to Get Solver on Microsoft ExcelHow to Create a Calculated Field in Microsoft Excel
How to Make a Paragraph in Microsoft ExcelHow to Create Mail Merge from Microsoft Excel
bottom banner