How to Connect Access with Microsoft SharePoint
Microsoft SharePoint is one of the products within the Microsoft product suite where you can access more applications integrated into…
Aug 16, 2022


Apr 22, 2023
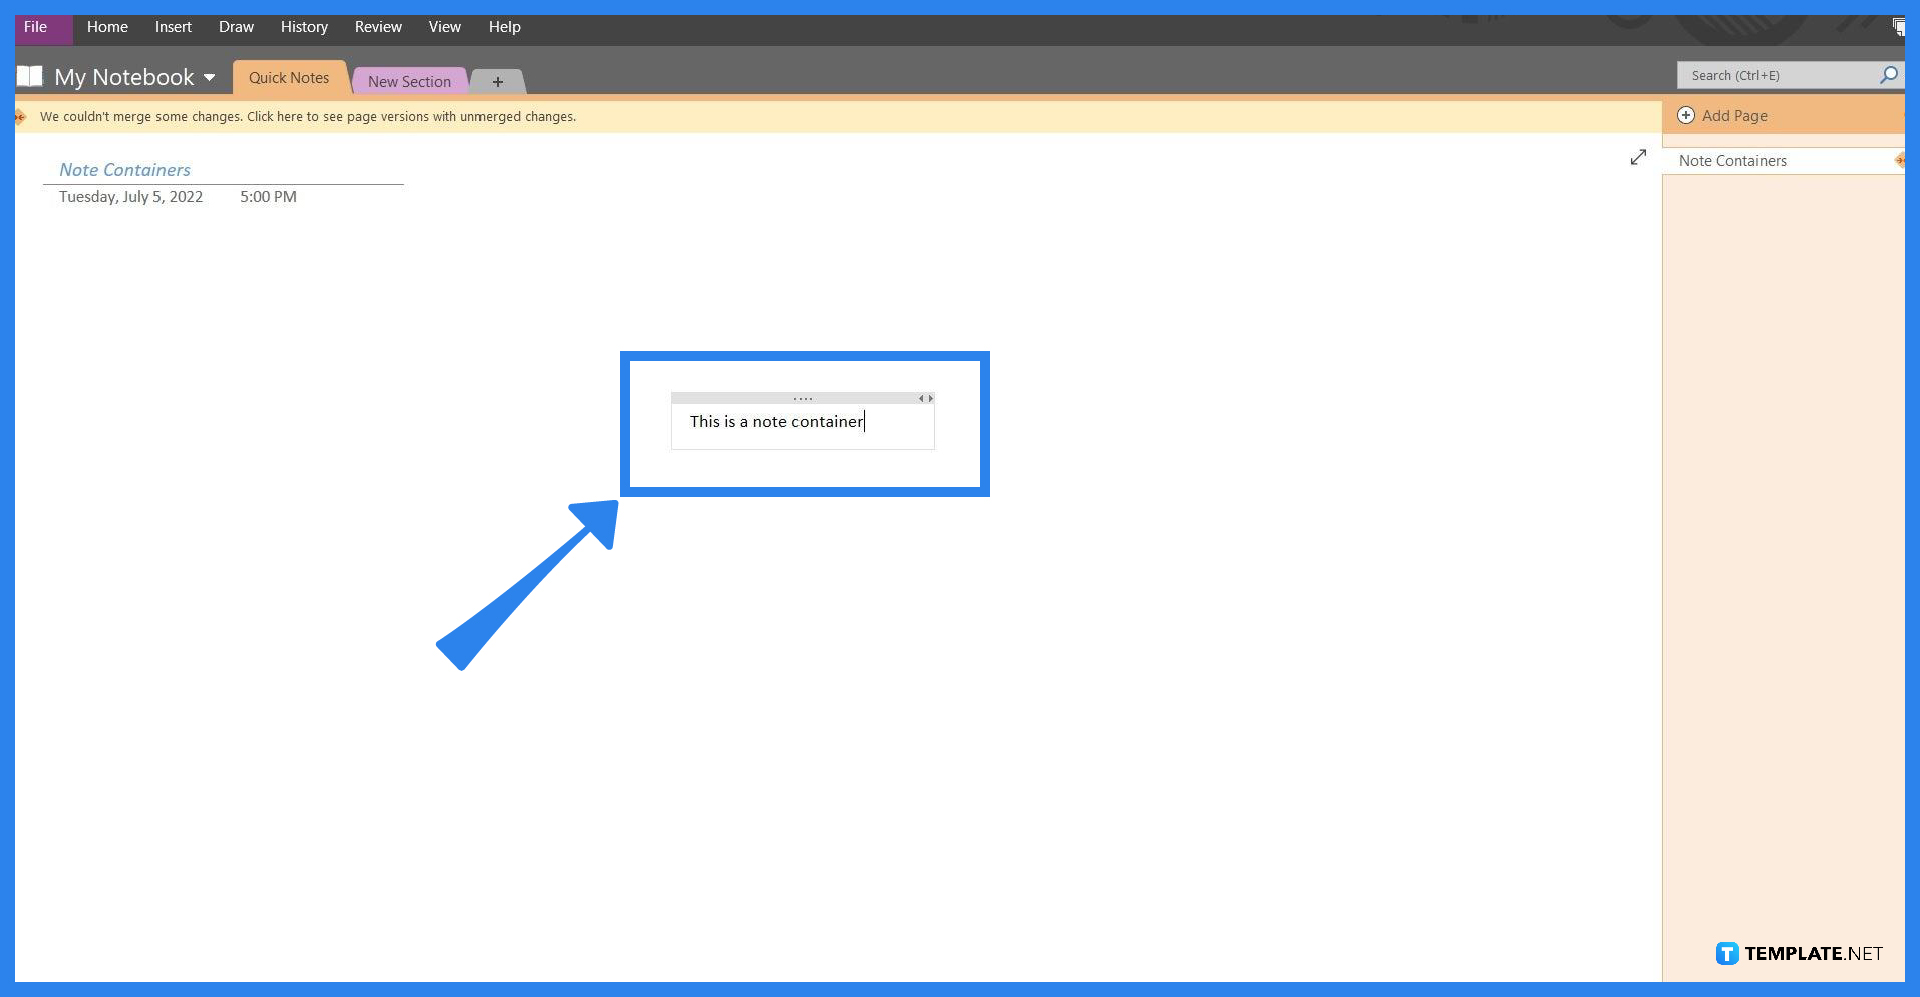
Microsoft OneNote allows the user to freely modify the way their notebooks or notes look. Note containers are utilized in OneNote as a way to jot down different notes without them clipping to a specific spot, this is done to allow the user to freely customize their notes.

Note containers have all the text written in one spot, allowing the user to move them to any spot in the note. However, this is often unintuitive and messy, which may usually result in scattered groups of texts on the note. Luckily, the note container function can easily be disabled in OneNote.
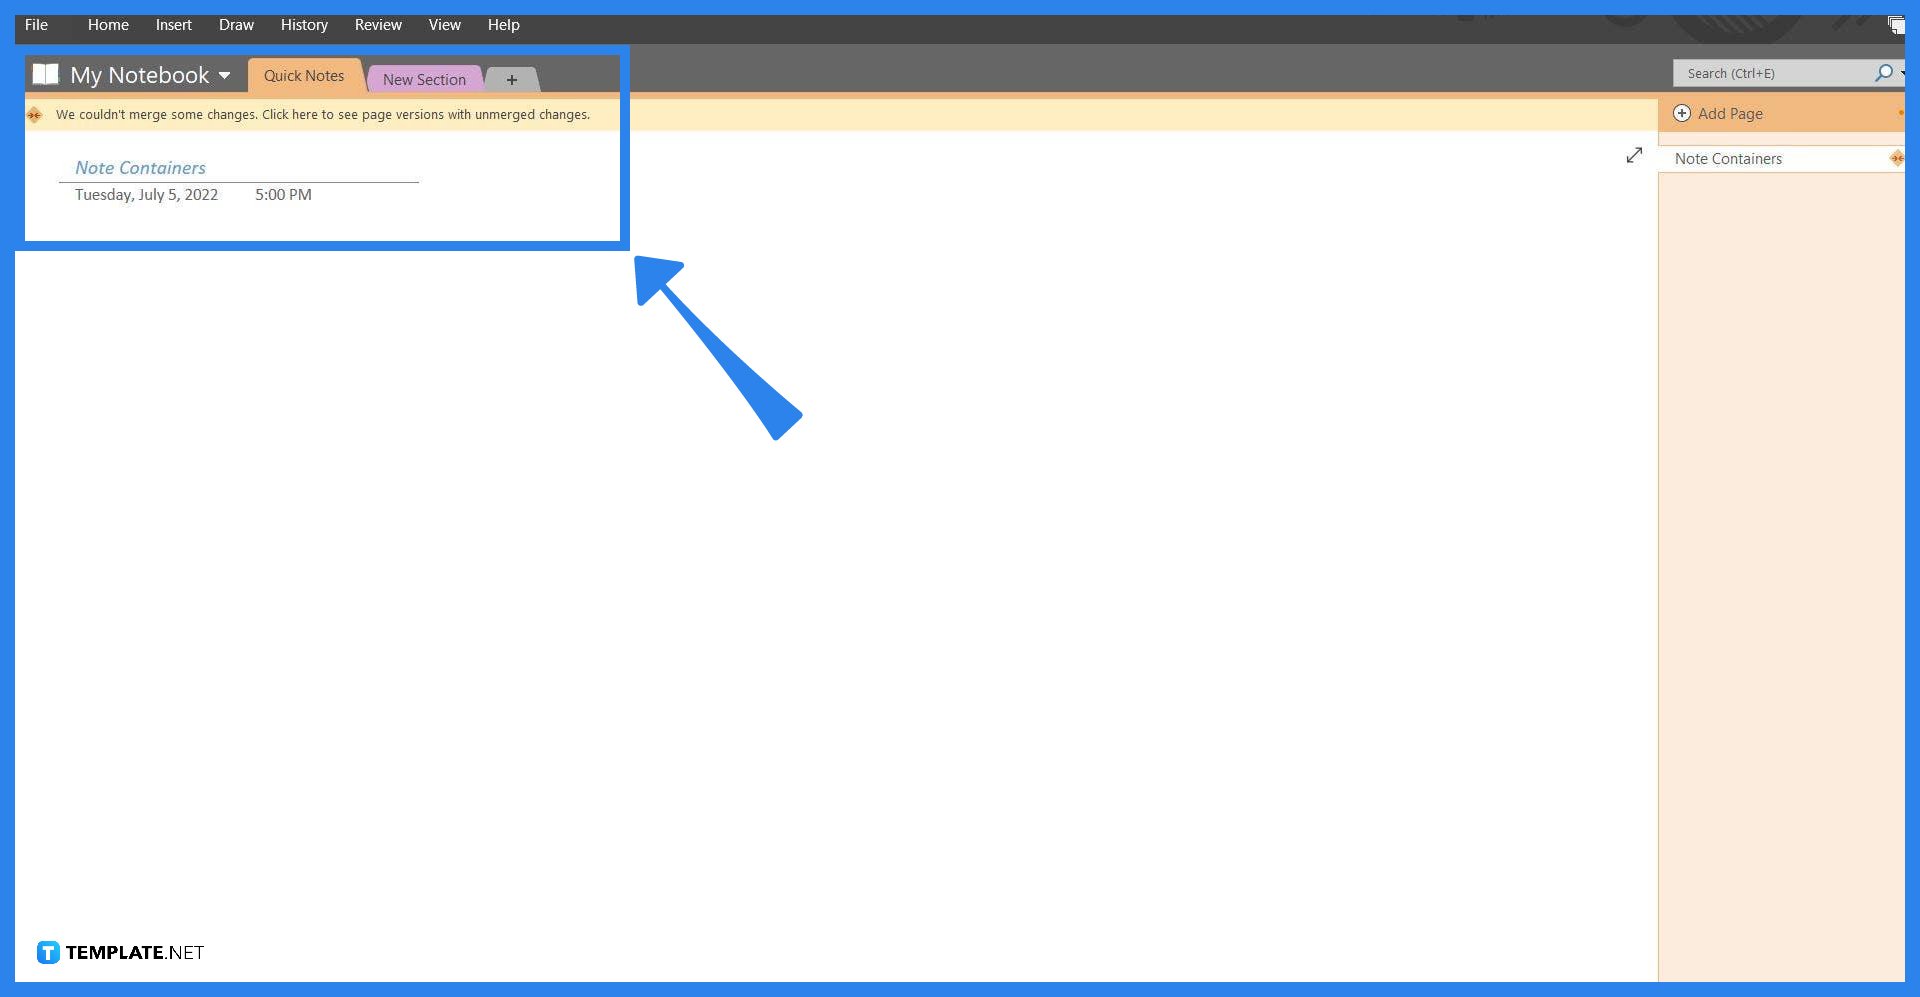
The user can start this process by opening Microsoft OneNote on their desktop. Afterward, the user must select a note by clicking the notebook and selecting any of the notes available.
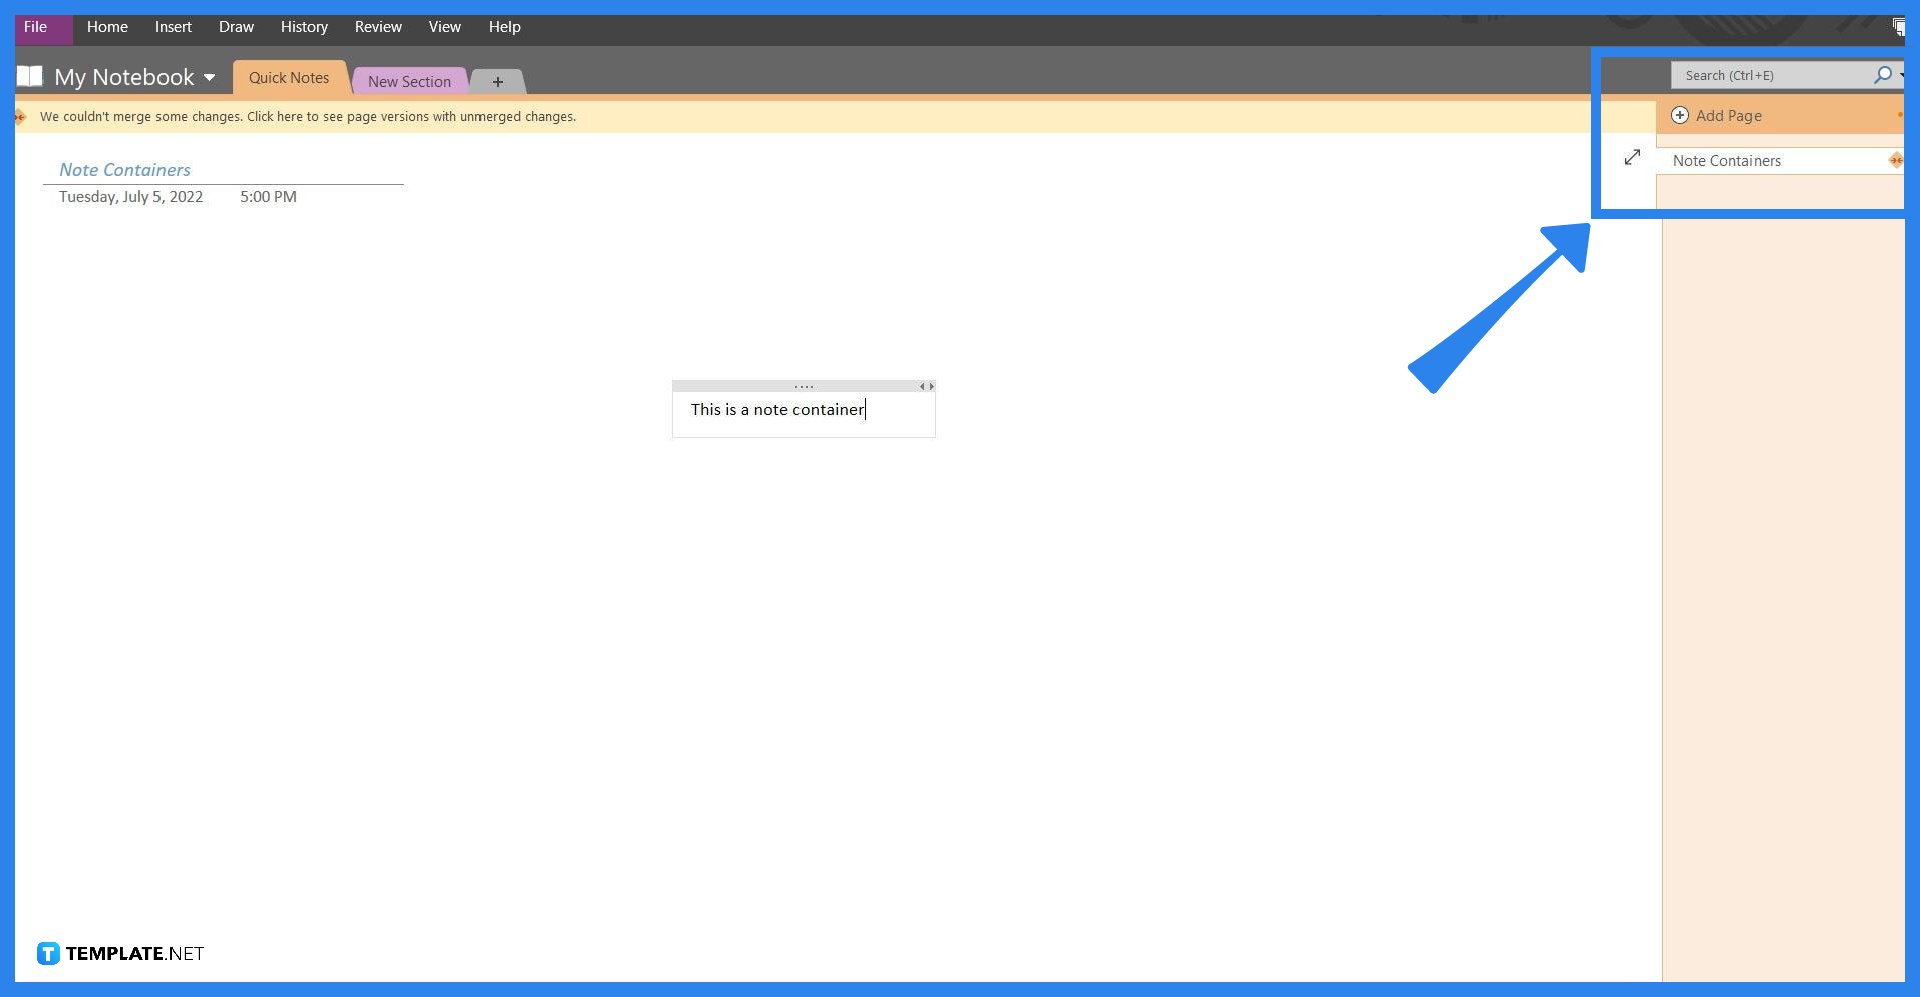
The option for Note Containers is enabled by default in Microsoft OneNote. But as a precaution, it is best to check if this option is enabled. The user will have to click on any spot within the note, and type Uses on their keyboard to create any combination of words and letters. If a box with text appears, the note container option is enabled.
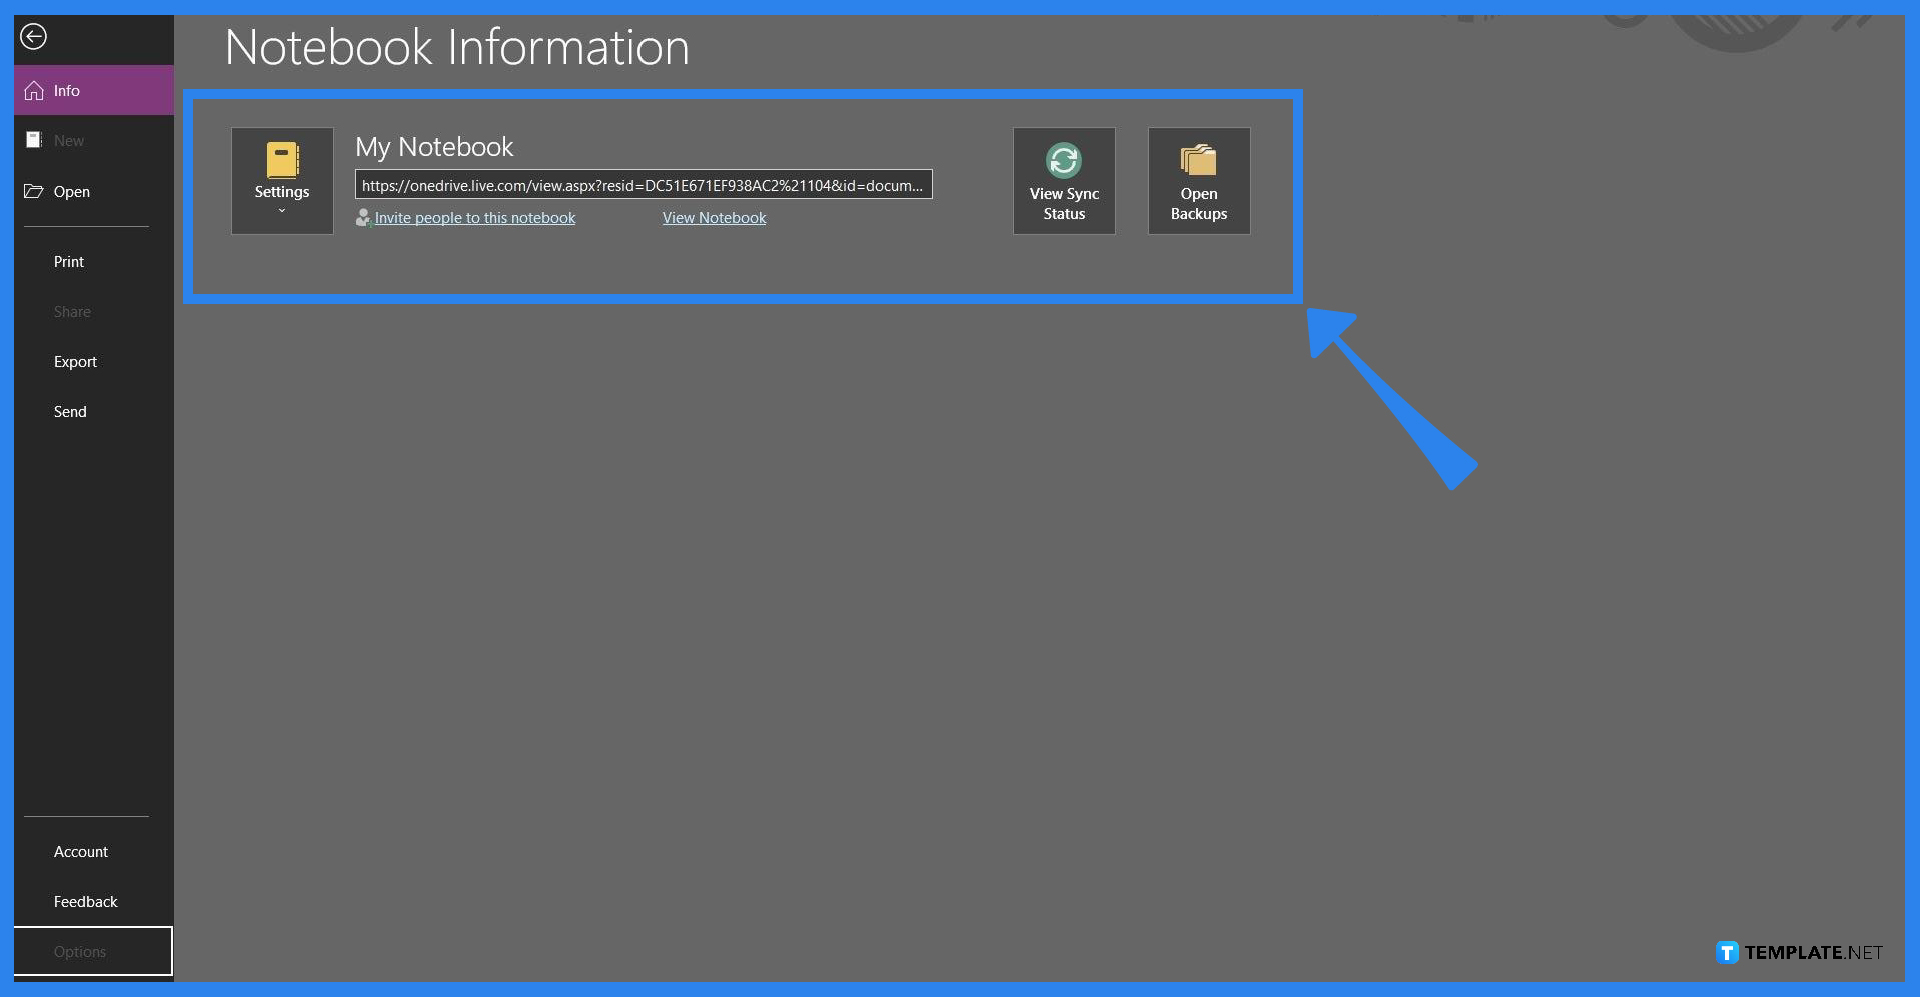
The accessibility options of Microsoft OneNote can be accessed by heading to the Options tab inside the File view. The user can open the File view by clicking the “File” button, which is located in the upper right corner of the window.
The file view holds all the options that could be used to edit, export, send, and save the file. To enable or disable any of the accessibility options available, the user must open the Options view by clicking the “Options” button located in the lower-left corner of the window.

After the user has clicked the Options view, they must navigate to the Display backstage view by pressing the “Display” button on the left pane of the window. Upon clicking the “Display” button the user should scroll down until they find the Note Container option, and uncheck the check box for “Show note containers on pages” to disable this function.
The user can remove a text container from their note, by clicking the note container and either pressing the “Backspace” or “Delete” key on their keyboard, or right-clicking the container and pressing the “cut” button on the dropdown.
If the user opts to enable the option to have note containers, then they will go to Display Back View and check the “Show note containers on pages” option.
The user can hide sections by right-clicking the section and pressing the “Hide section” button on the dropdown.
The user can turn this function off by opening the Draw toolbar view on the top corner of the window, clicking the arrow pointing downwards on the drawing section, and unticking the “Snap to Grid” option by clicking the button.
The user can change how OneNote looks by opening the Display back view, which is located on the Options view and can be accessed by clicking the “Options” button while in the File view.

Microsoft SharePoint is one of the products within the Microsoft product suite where you can access more applications integrated into…
Finding a product key for the Microsoft Visio software only takes a few clicks and doesn’t require a diagrammed process.…
With Microsoft Visio, collaborating and editing drawings online is entirely possible. In addition to that, templates and various selections of…
Microsoft Publisher is an easy-to-use publishing software application that users in this DIY age can optimize to produce digital content…
Access Microsoft Visio on your PC or mobile device to graphically arrange complicated concepts. Begin your Visio projects with hundreds…
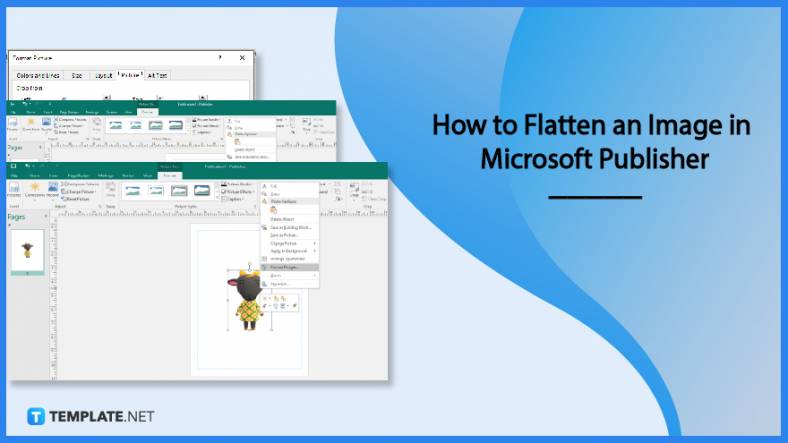
Flattening an image means reducing the file size of the image, which will make saving and printing much easier. So,…
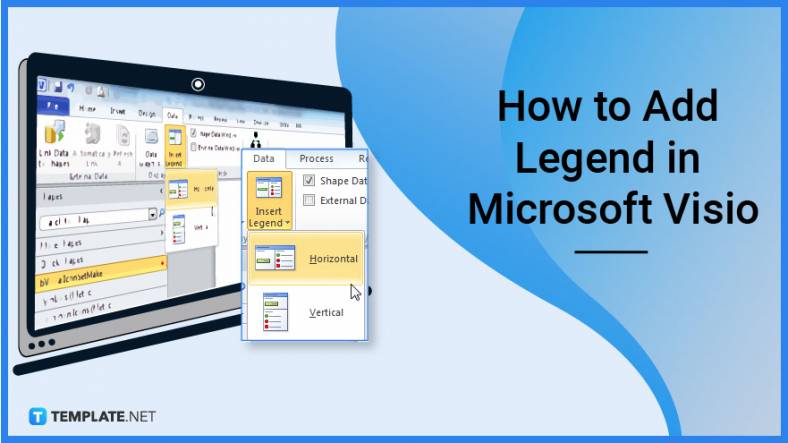
Microsoft Visio lets you create professional diagrams and flowcharts for various purposes and occasions. It also enables you to collaborate…
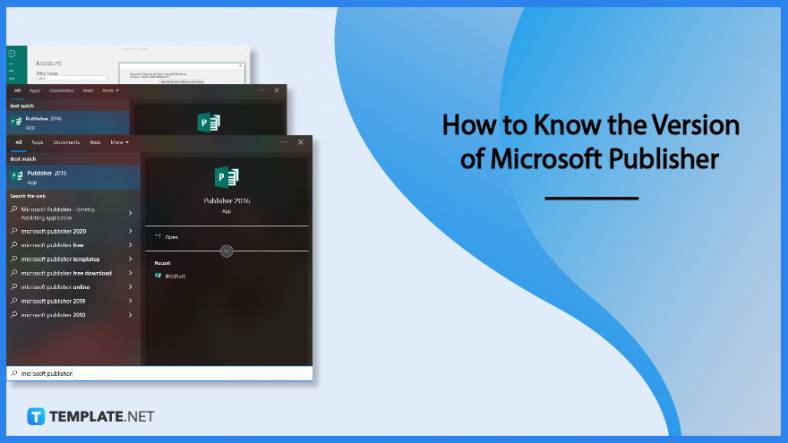
Knowing the version of Microsoft Publisher installed on your computer is also helpful when downloading templates and add-ins because some…
Microsoft Visio is an excellent tool and application for creating visual representations of flows and processes using creative and beautiful…